help! My Differential to PPF Bolts Are Stuck
 08-02-2011, 01:41 PM
#1
MFz Lurker
Thread Starter

Join Date: Jul 2011
Location: Madison WI
Posts: 38
Im replacing all of my bushings with energy suspension bushings. and of course i cant get the diff bushings out with an air hammer in the car so i have to remove every around and near the diff.
my question is has anyone removed their diff before? i cant get the second(front) bolt out. The bolt is out of the 2 sleeves it screws into but is still stuck in. ive been soaking it with pb blasted but wont budge!
thanks.
[IMG]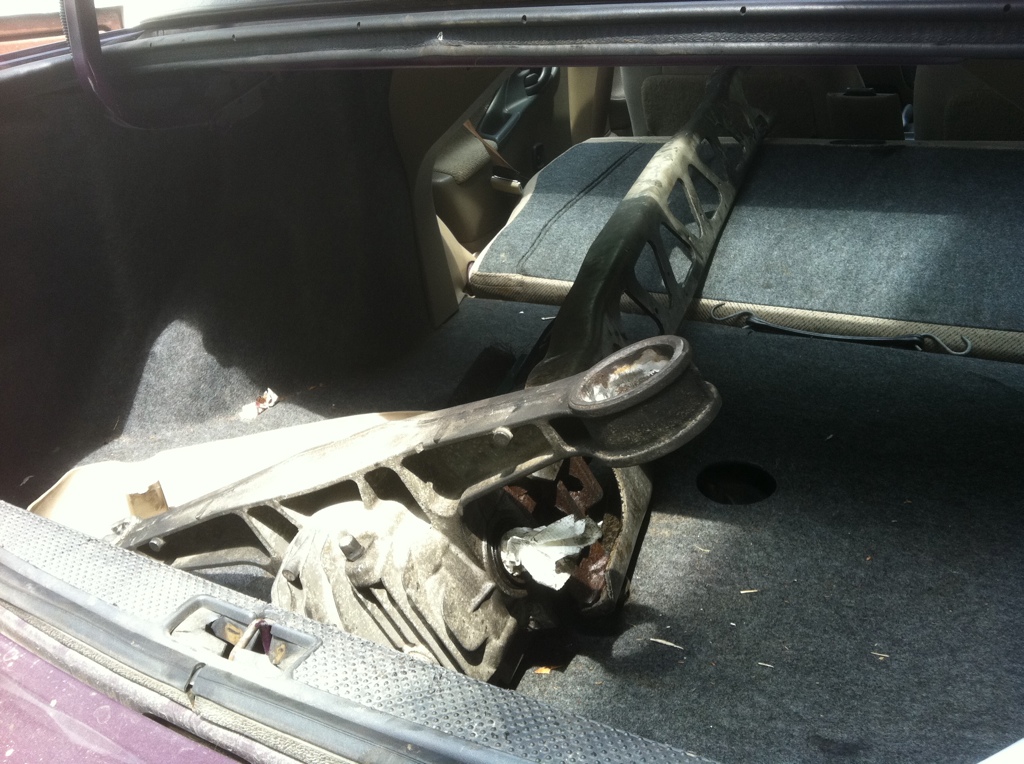 [/IMG]
my question is has anyone removed their diff before? i cant get the second(front) bolt out. The bolt is out of the 2 sleeves it screws into but is still stuck in. ive been soaking it with pb blasted but wont budge!
thanks.
[IMG]
[/IMG]
 08-02-2011, 02:43 PM
#2
MFz Lurker

Join Date: Aug 2011
Location: Ceresco, NE
Posts: 39
I'm confused but I think you are talking about the two bolts that hold the PPF to the diff. If in fact you have the bolts out but can't get the PPF off of the sleeve, you have to pry it off with a large pry bar. The sleeves will stay stuck in the diff. You pry the PPF over the top of the sleeve. It's tough to do the first time but after you understand the procedure it isn't bad. Also, I have never done it without the diff mounted in the car so I don't know how well you will be able to pry with it loose.
Now if you are talking about the bolts themselves, I'm at a loss. They are just two long bolts.
Please add a bit more detail so that we can help.
Now if you are talking about the bolts themselves, I'm at a loss. They are just two long bolts.
Please add a bit more detail so that we can help.
Last edited by Stein; 08-02-2011 at 02:45 PM.
08-02-2011, 03:55 PM
#3
MFz Lurker
Thread Starter
Join Date: Jul 2011
Location: Madison WI
Posts: 38
first bolt came out fine. second bolt is just spinning i place. even tho its still very tight. it cant be stripped. both the sleeves are off. the bolt is out about an inch an a half. so the top sleeve is just floating and the bottom one is fully off.
so lost
so lost
08-02-2011, 04:06 PM
#4
MFz Lurker

Join Date: Aug 2011
Location: Boston
Posts: 20
There's a capture nut that you must grab with vice-grips.
Assuming you already have the but out, use the pry bar with some leverage (like, the handle of a hammer) to pry the bolt out.
Basically, yank the silly thing down (or out, seeing as you have the entire PPF & the pumpkin is in the trunk of your car.
Assuming you already have the but out, use the pry bar with some leverage (like, the handle of a hammer) to pry the bolt out.
Basically, yank the silly thing down (or out, seeing as you have the entire PPF & the pumpkin is in the trunk of your car.

 08-05-2011, 09:52 AM
#7
BAMFr

Join Date: Jul 2011
Location: NC
Posts: 1,787
you don't need to take the diff out to get the bushings out. if you get the harbor freight 3-jaw puller kit (3", 4", 6" - use the 3") and any sleeve that is the same size as the diff bushing (so you want the metal sleeve to be on the metal part of the diff bushing) you can push them out with relative ease! saves time if you have the right tools, I was able to get it using these parts:
http://www.harborfreight.com/3-piece...set-40966.html
One of the sleeves in this kit will work perfectly (others have used it):
http://www.harborfreight.com/3-in-1-...kit-38335.html
I ended up using a hockey puck like piece and just pushing it into the diff mount with ease. took 5 minutes to get the bushings out, and took 2 hours to get the f'in ppf off.
 08-10-2011, 11:54 AM
#9
Moderator
Join Date: Jul 2011
Location: Tampa, FL; Lake Jackson (Atlanta), GA
Posts: 1,902
Please make thread titles as descriptive as possible to aid those who may search for "help!" later. It will make things better for all the little ones that will follow in your footsteps.
To be helpful I adjusted it for you.
To be helpful I adjusted it for you.
08-10-2011, 12:21 PM
#10
Moderator
Join Date: Jul 2011
Location: Tampa, FL; Lake Jackson (Atlanta), GA
Posts: 1,902
Have you thought about the Faeflora method of differential removal? It involves one of these:
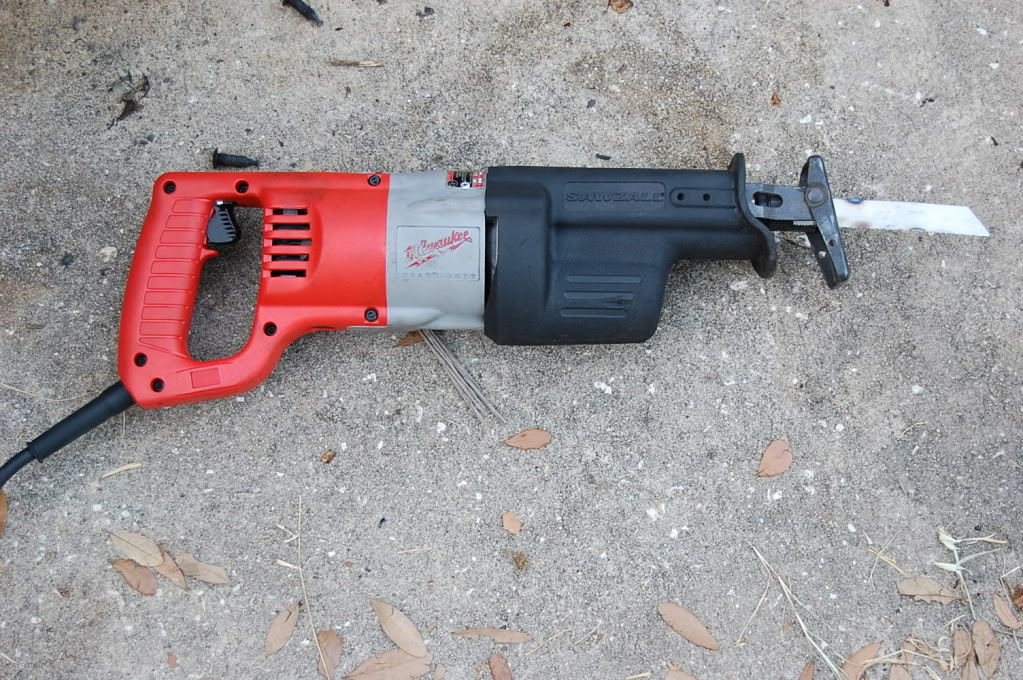
It makes the disassembly process significantly faster.
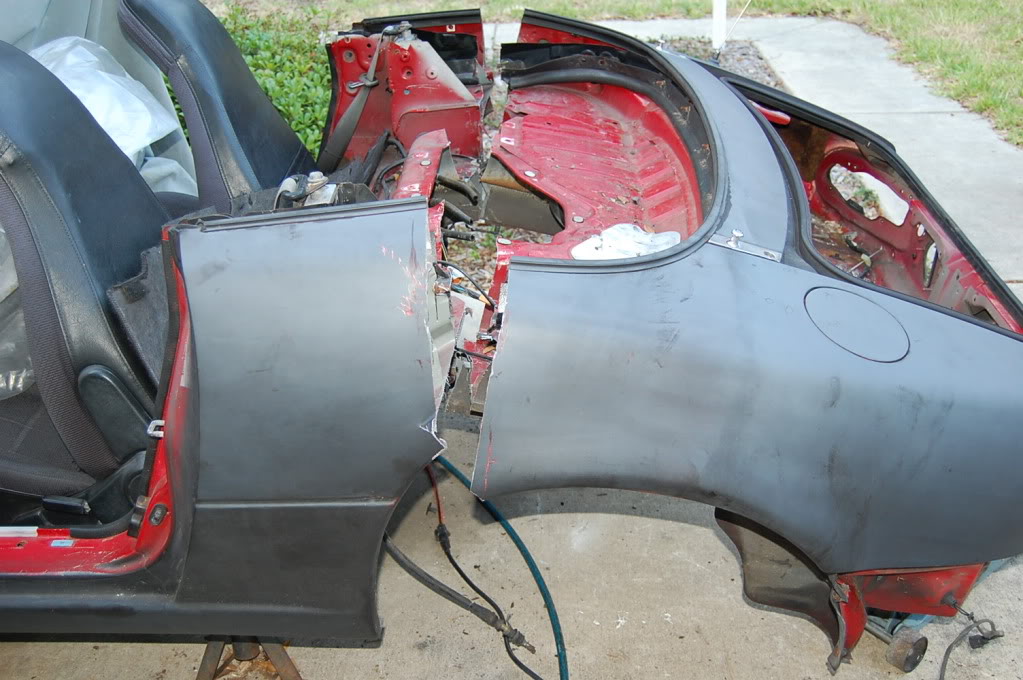
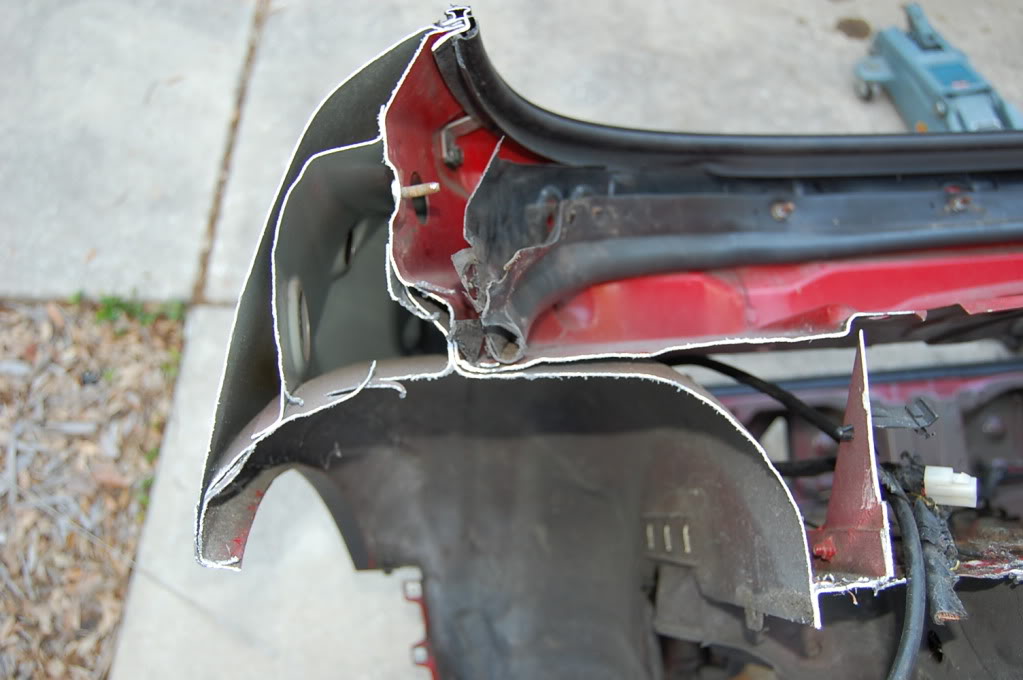
All of the rear subframe mounting points become easily accessible as well.
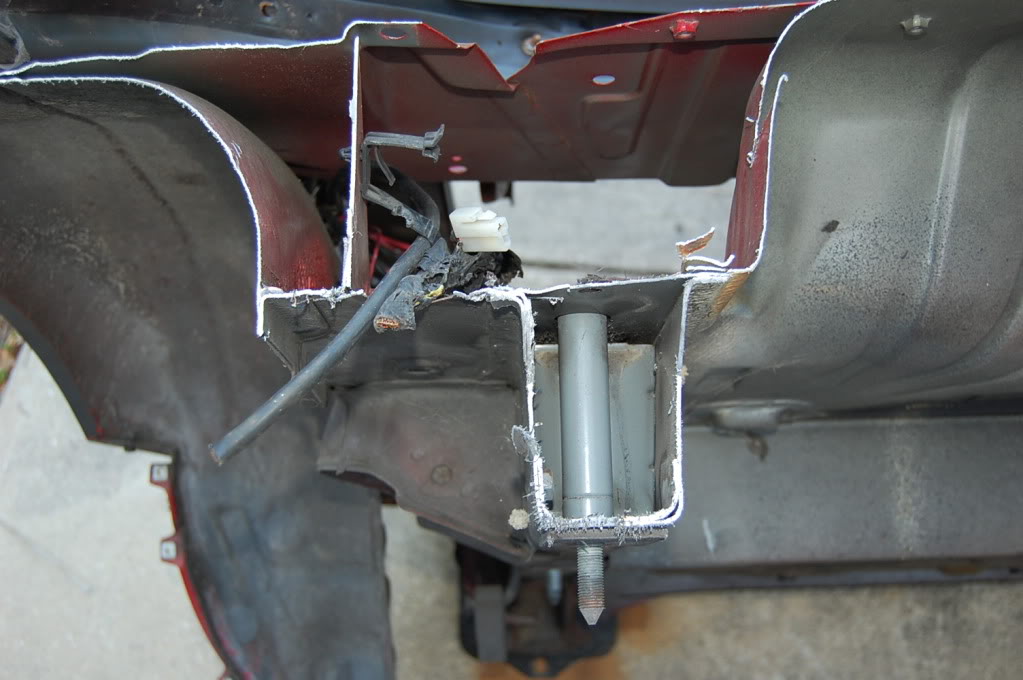

When finished it should look something like this:

I haven't finished the reassembly yet, so stay tuned for updates.
It makes the disassembly process significantly faster.
All of the rear subframe mounting points become easily accessible as well.
When finished it should look something like this:
I haven't finished the reassembly yet, so stay tuned for updates.