Maintenance NB Taillight Changeout Procedure
 11-03-2013, 02:11 PM
#1
MFz Regular

Thread Starter

Join Date: Oct 2013
Location: North Stonington, Connecticut
Posts: 107
Taillight Bulb Changing
Note that this procedure is intended for an NB (or MSM) Miata.
Per the User’s Manual, this is a relatively simple job. Unfortunately, the Manual leaves out several steps which make the job more, uhmmm, interesting, shall we say.
Safety: This is a relatively safe job, the car doesn’t have to be lifted, you don’t need to work under it, but there are a few things you should do.
First: Make sure the car is in gear, and the parking brake is on. It’s probably not necessary to chock the wheels, but if you feel more comfortable doing so, its certainly worth the time.
Second: You will be working in the trunk, near the cars battery. Dropping a metal tool onto the battery terminals is not a safe thing to do, actually it’s probably right up there with checking the gas level with a match. Disconnect the battery, or put a sandwich (plastic) bag over the battery in a manner that won’t fall off (or both).
Tools: You won’t need a lot of tools to do this job. All that’s required are:
o Fingernails
o Two flat blade screwdrivers
o A 10mm wrench
o A flashlight
o A Philips screwdriver+
o A rubber hammer or equivalent
o A towel
Optionally, a rubber glove such as is used in your medical physical would be helpful.
Supplies: The Manual calls for:
o Taillight: 7443
o Stoplight: 7443
o Backup Light: 7440
o Directional Signal: 7440A
All of these should be available at a Mazda Dealer (likely expensive), a local parts store (likely less expensive) or other sources. It is not recommended that you BORROW one from a nearby MSM. I needed to only replace the taillight in my car, but the other lights are virtually identical to replace.
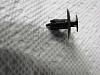
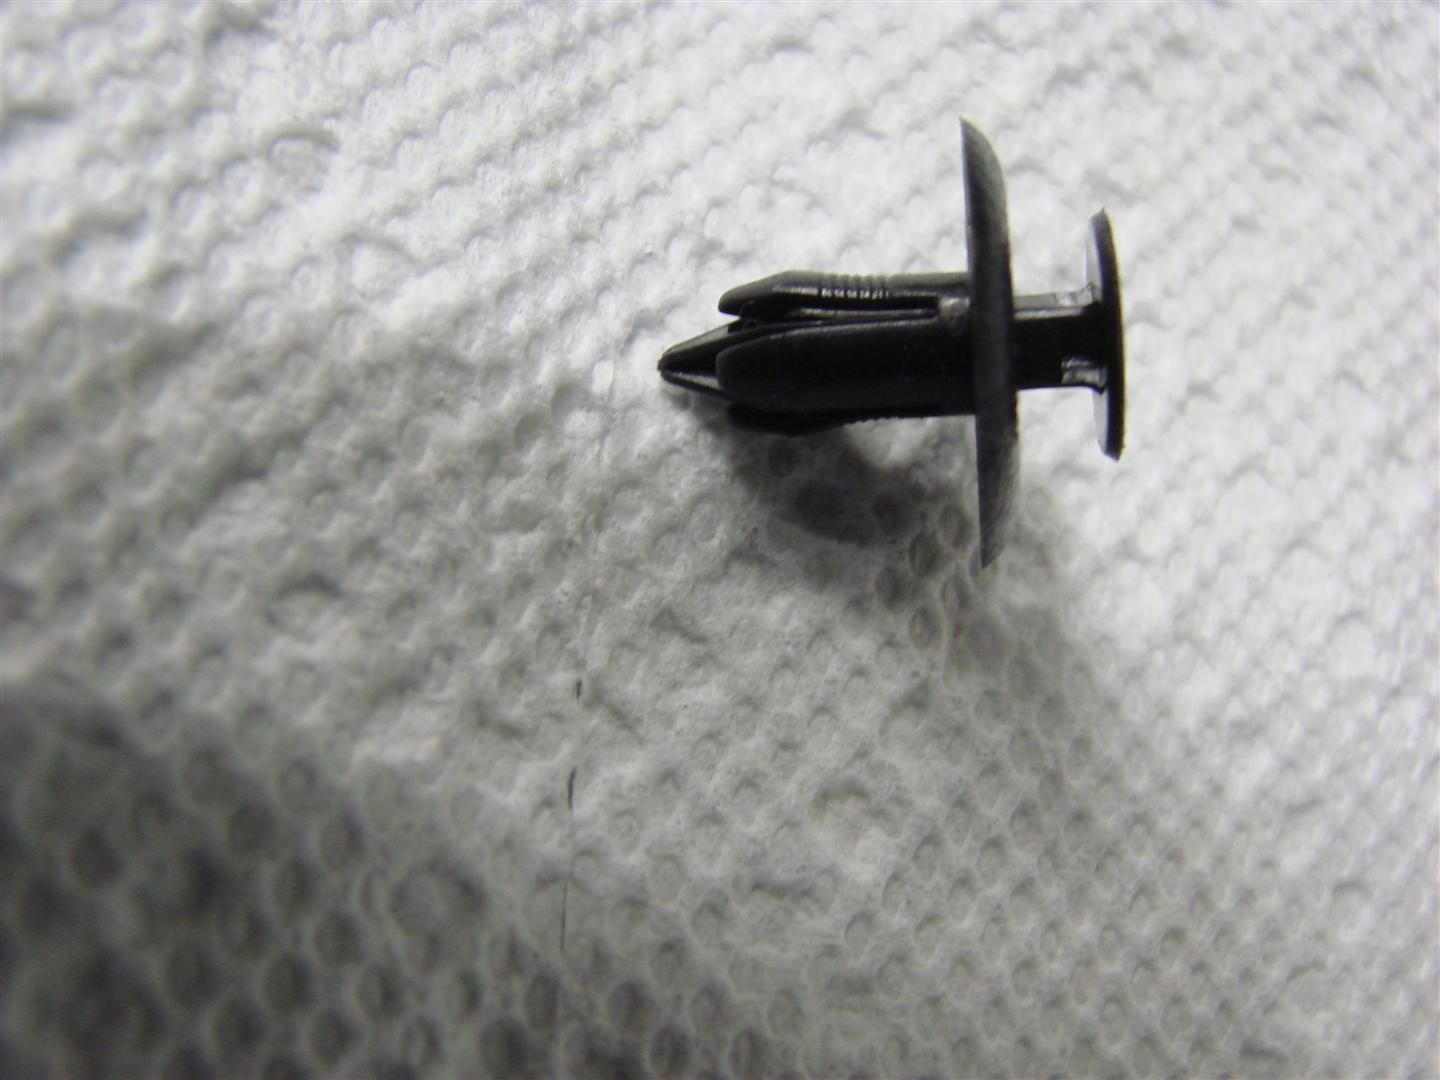
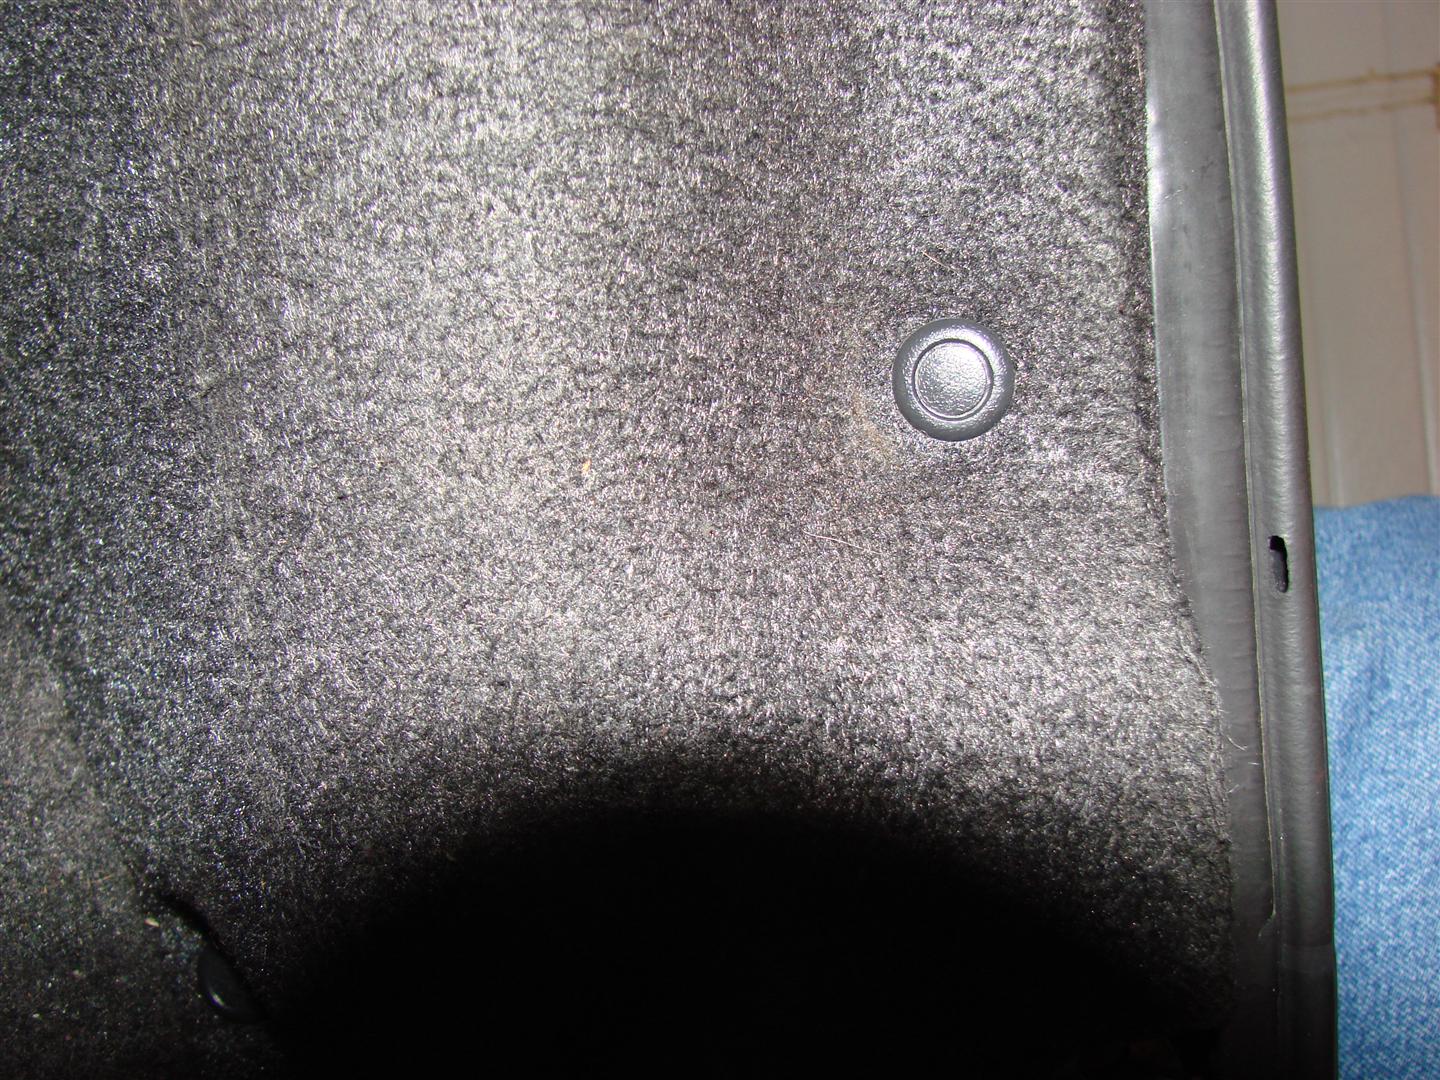
Step 1: Remove the rear carpet from the trunk. First remove the seven plastic fasteners from the carpet. This involves using your fingernails to pry open the inner circle of the fastener. See photo below.
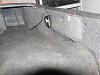
Once the inner circle pops open, the fastener can easily be pulled out from the carpet. Store the fasteners in a safe place, we will be reusing them. A Tupperware container is good for storage. Unlike the plastic fasteners used under the splash shield and in the wheel wells, these were easy to remove without damaging them. See photos below.
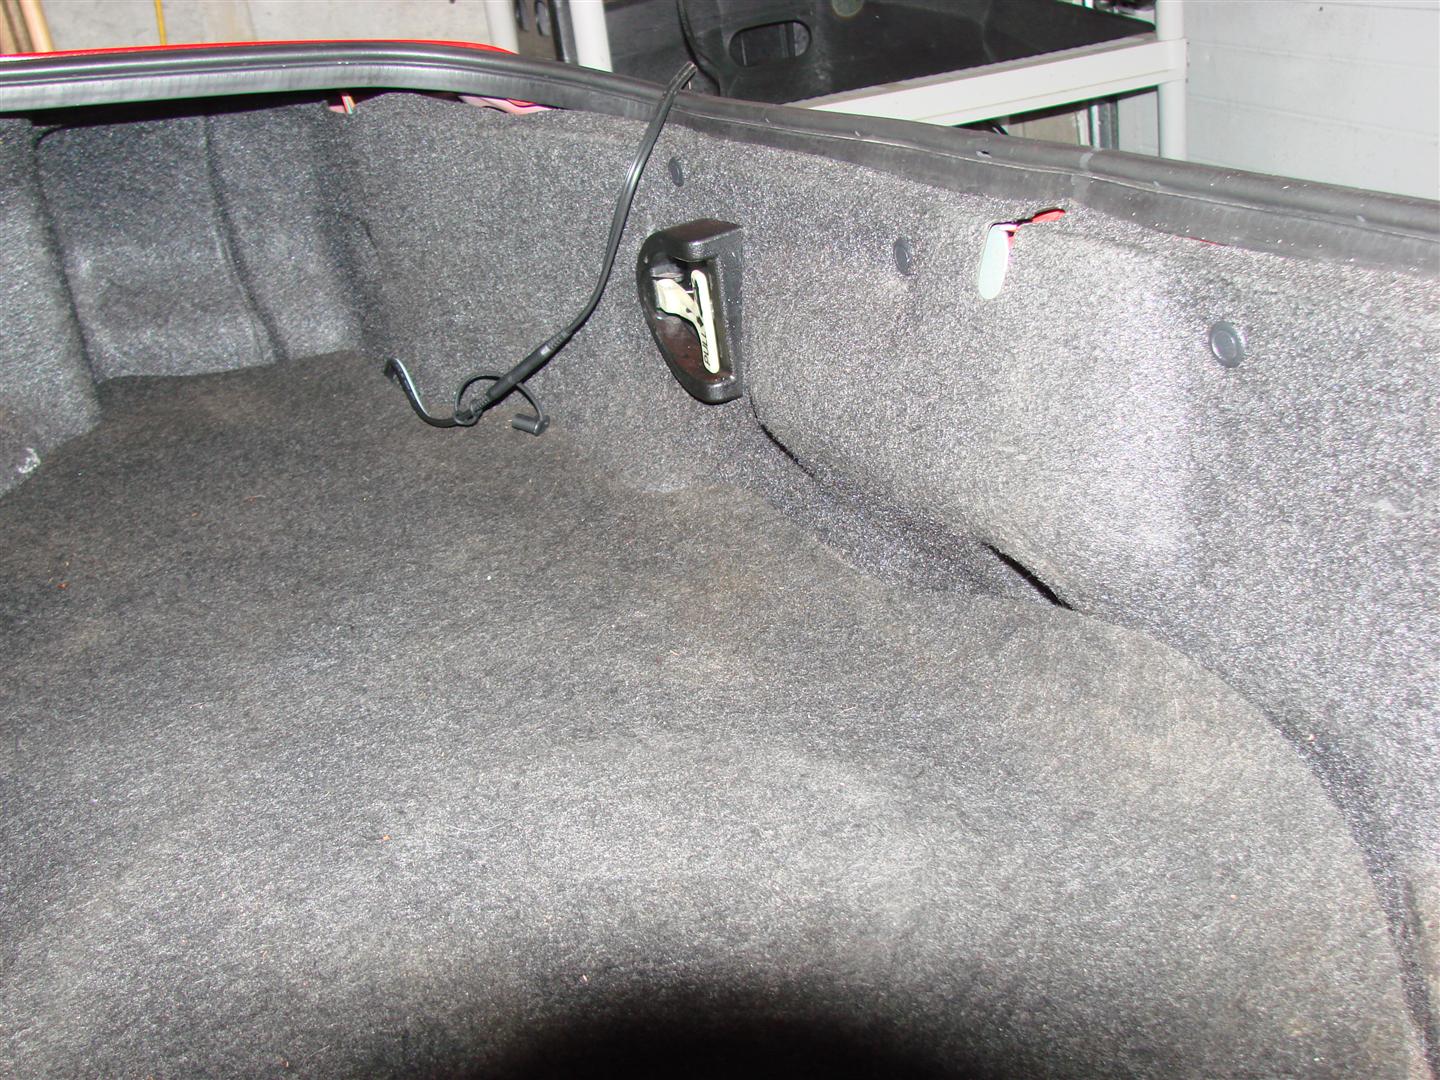
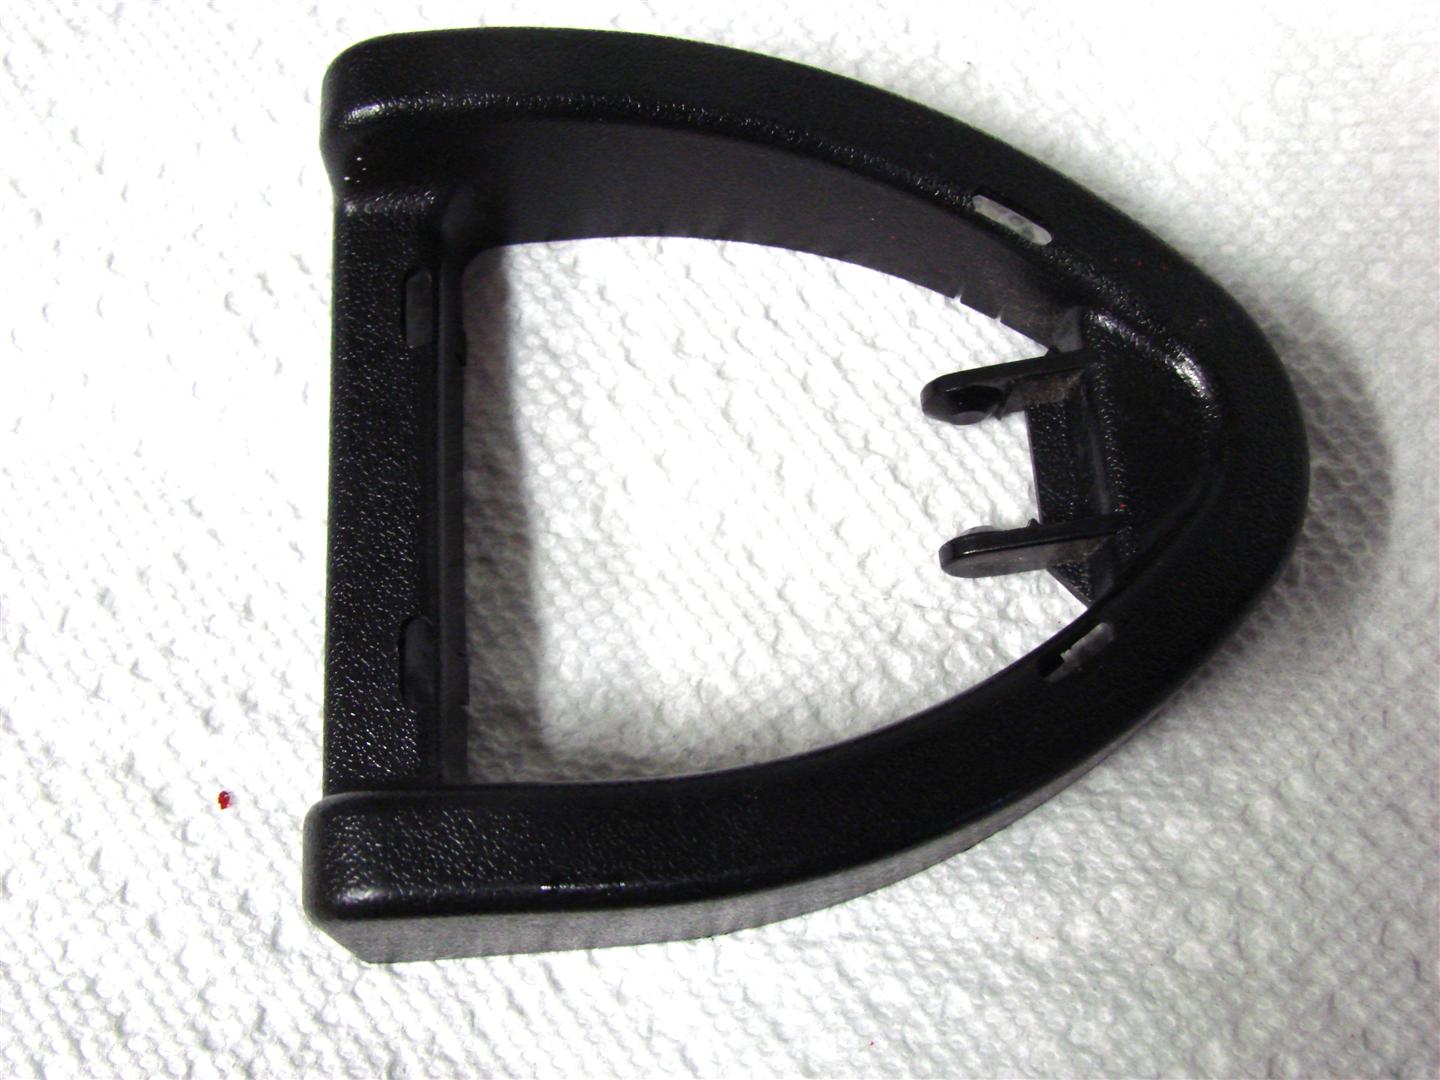
Once removed, the only remaining obstacle is the emergency trunk release (with the glow in the dark handle). I did not verify that the handle glows in the dark. The white handle clips onto a black plastic part that is actually two pieces, a “pretty” trim piece, and a base that does all the work. See Photo below of the exterior of the trim piece.

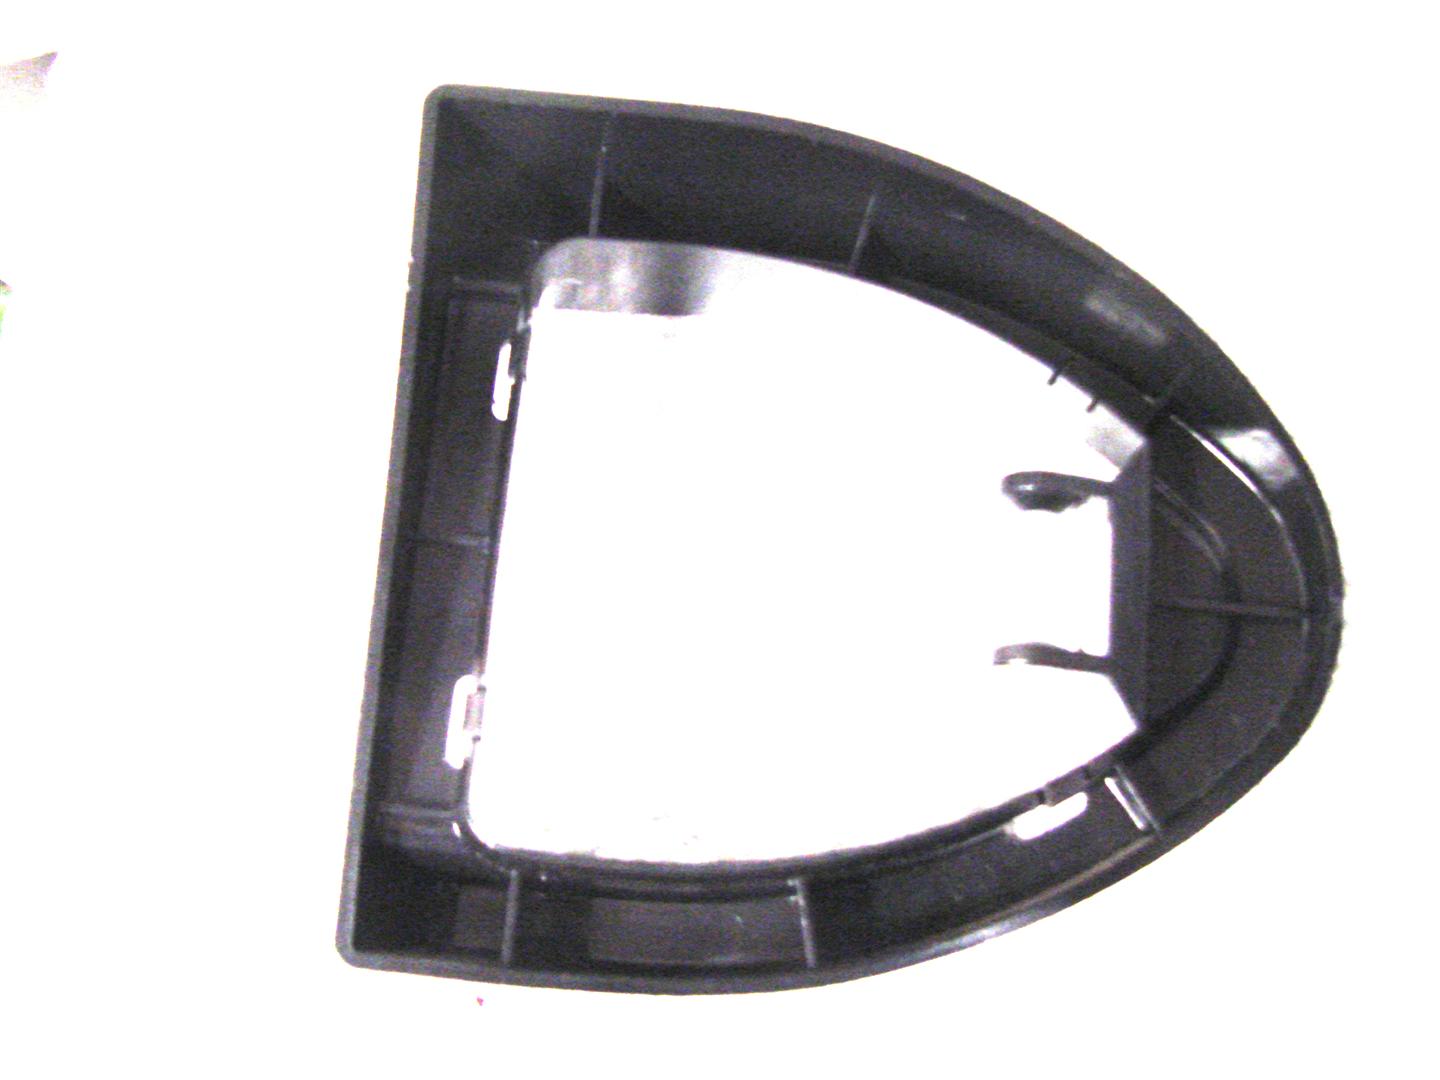
See photo below of the interior of the trim piece, note that it simply snaps on and off.
Remove the handle from the clip.
There are several slots in the textured black plastic trim piece. If you insert a small flat blade screwdriver in the slot and press inward (towards the cable attached to the handle), the trim piece will release from the base part.
Once the trim piece is off, again, carefully store it, we will be reusing it.
Remove the molded rear carpet from the trunk. Again, store carefully, but I doubt it’ll fit into the Tupperware.
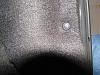
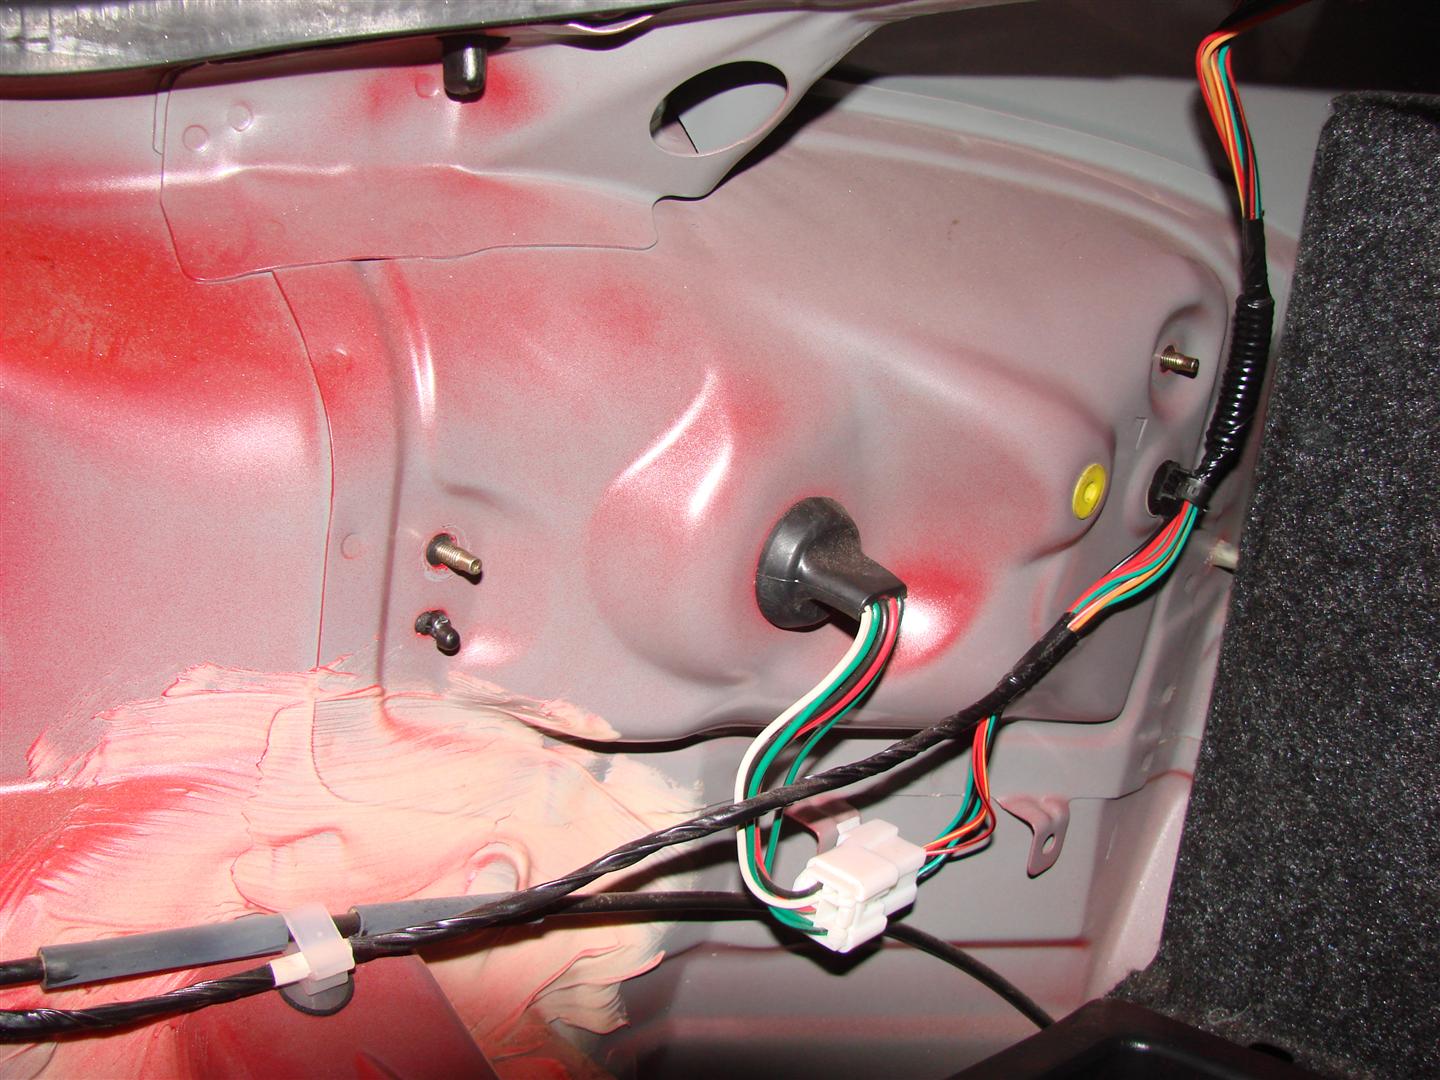
Step 2: Take a look at the back of the taillight area (inside the trunk), you’ll see two brass colored nuts, a small black part that looks like a grease fitting (but isn’t) a black rubber grommet, with several wires going into the taillight module, a black plastic wire standoff and a white translucent nylon post (near the outer end of the taillight.

Remove the two brass colored nuts, using the 10 mm wrench.
Note: Others have told me since, that removal of the black rubber grommet is NOT necessary. I've included it, simply because my impression was that it was necessary.
Then use two of the flat blade screwdrivers to pry the black rubber grommet from the metal back wall of the car. The grommet is fairly wide on the opposite side of the metal back wall, thus you’ll have to reach in further than you might think to successfully remove the grommet. Really dig in with the screwdriver. Once it’s out, take a look at the top of the trunk lid near the inner end of the taillight module. You’ll see a black plastic Phillips screw that needs to be removed with a large Phillips screwdriver. Again, oh, you’ve guessed, store the screw in the Tupperware container. The taillight module is now loose and can be removed.
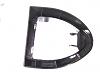
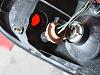
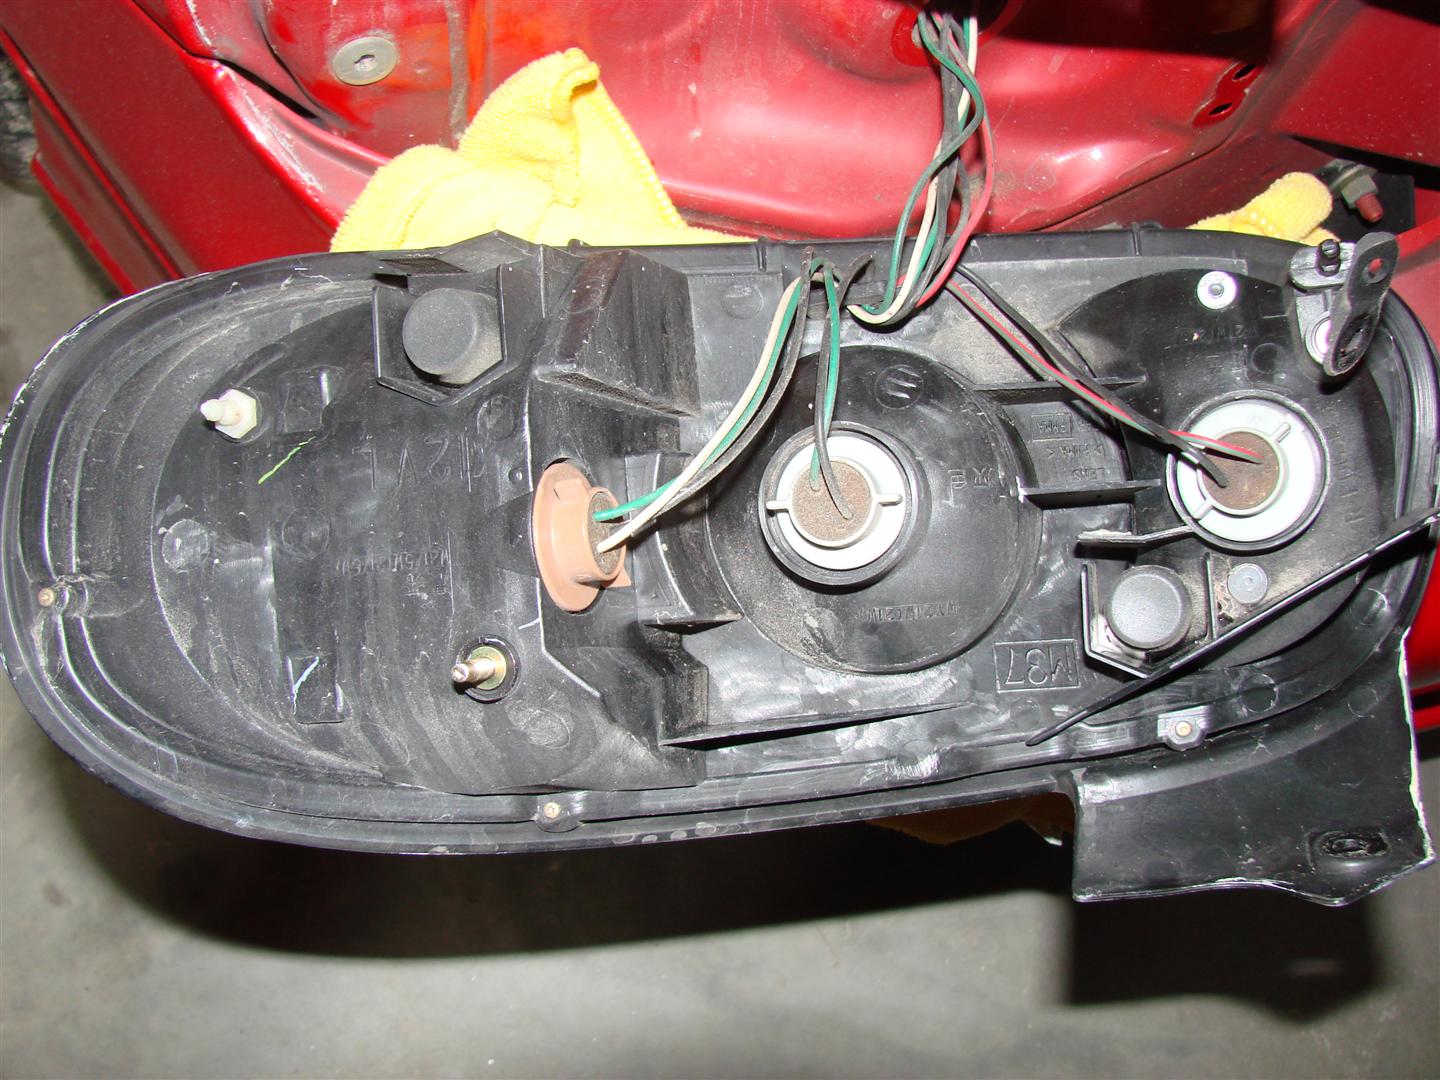
Step 3: Gently tap the end of the brass colored bolts (using the rubber hammer) and the black post. Do not hit the wire standoff or the white translucent nylon part. Both are delicate, and neither will aid you in removing the taillight module. Hold your free hand outside the trunk, up against the taillight to catch it when it comes free. Once it’s in your hand, place one of the towels (clean) between the taillight and the body panel. Both are rather well finished parts, which would be expensive to repair or replace if scratched. See photo of the back side of the taillight module below.

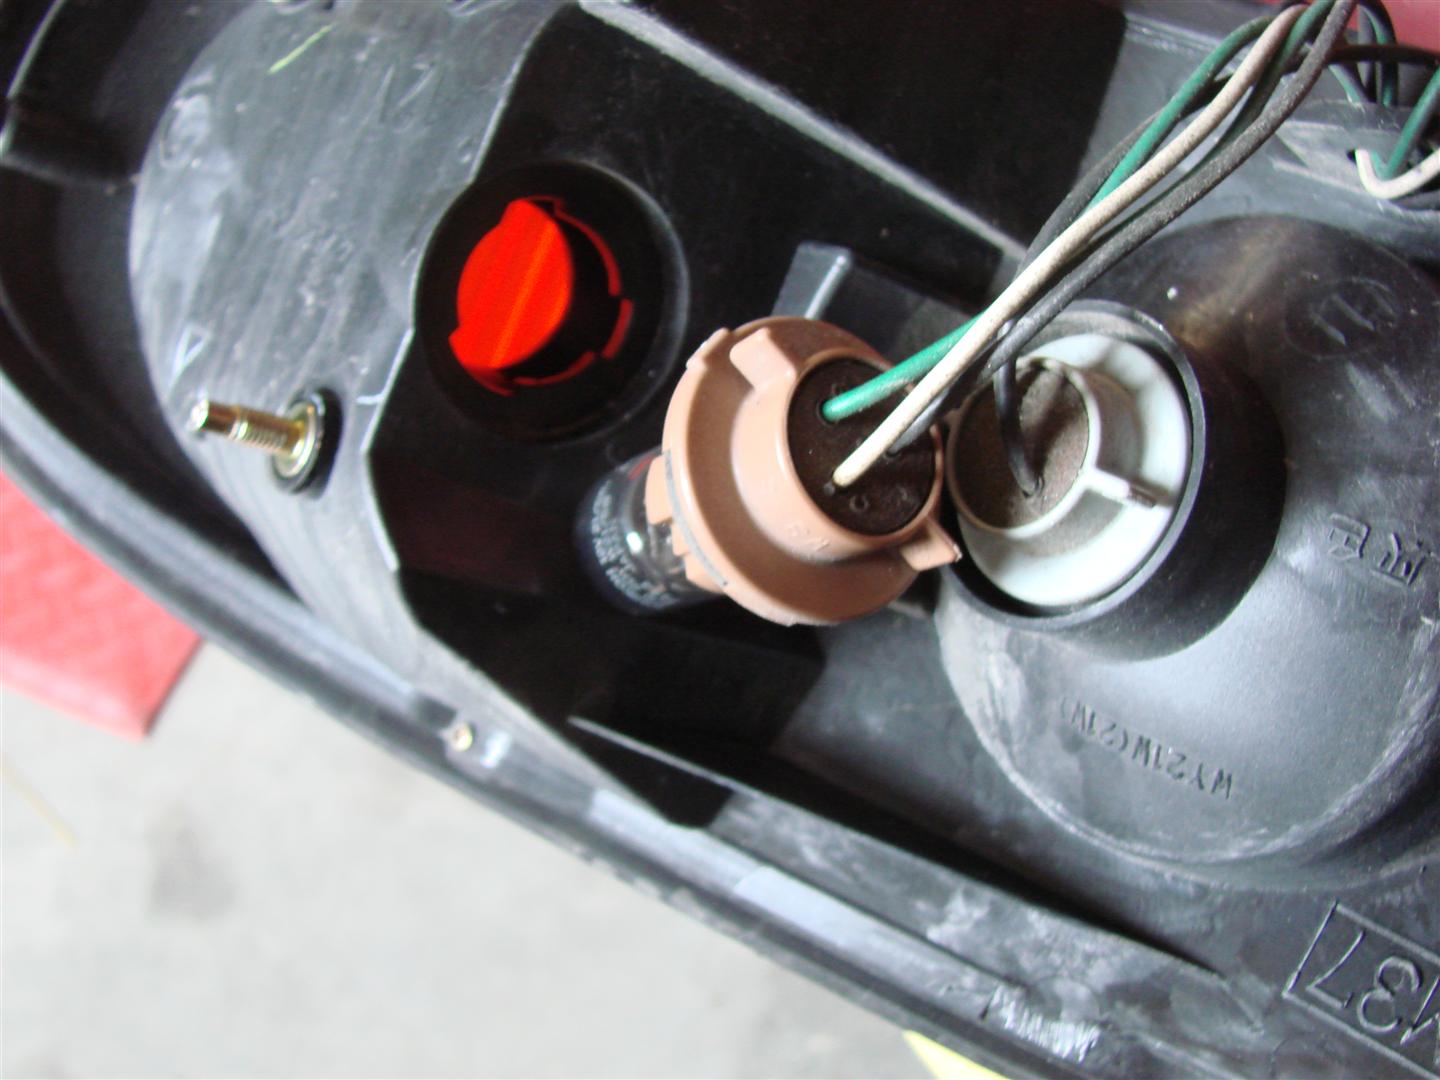
Now, you can see the various taillight connectors. To replace the outer most taillight, grasp the finger tabs on the outermost connector, and twist it counterclockwise approximately one eighth turn. It will come free, and you can pull it out of the taillight module. To remove the light bulb, grasp the connector in one hand, while pulling the bulb straight out from the connector. I suggest that you dispose of the burnt out bulb immediately to avoid any chance of reinstalling it. Please don’t ask why I think this is a pertinent suggestion. See photo below.
Step 4: Install the new bulb by pushing it into the plastic connector and then inserting the connector back into the taillight module and turning it clockwise. Check for frayed wires, missing bolts, etc in the area. You may find the rattle you’ve been hearing.
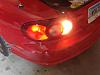
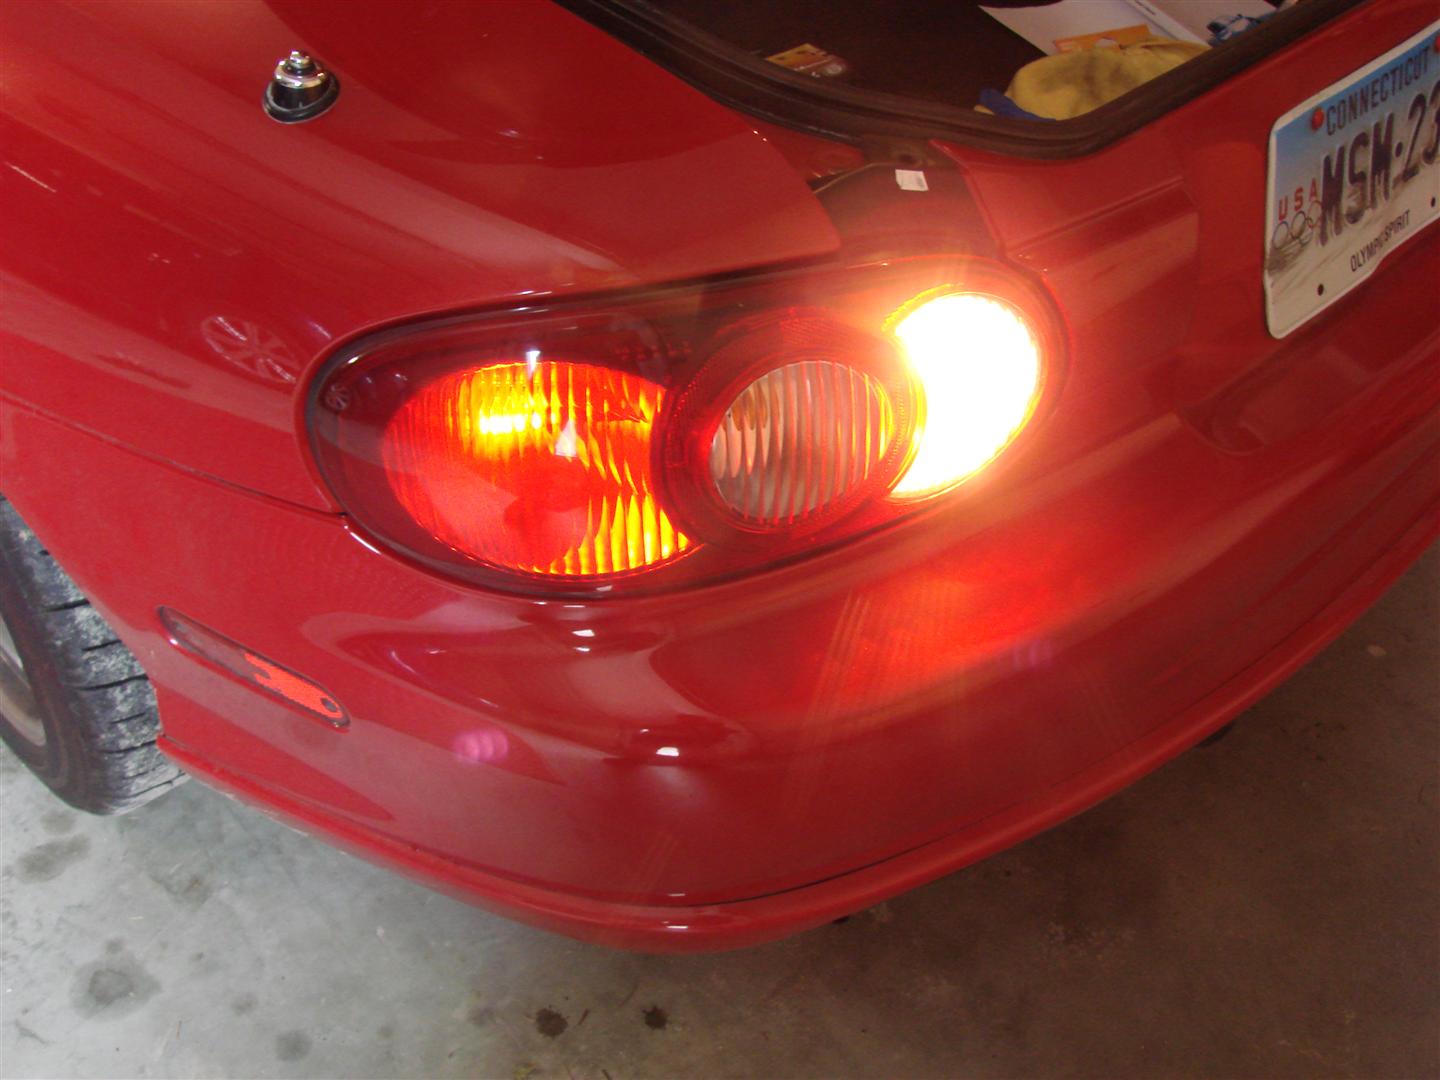
Testing: Replace the taillight module back into the trunk wall loosely, without fasteners. Pick up your loose metal tools (at least move them away from the battery). Get into the drivers seat, insert and turn the key on (reconnect the battery if necessary), and verify that the new bulb works. See photo below.
Buttoning up: To finish simply reverse the previous steps.
Optional: Clean the areas behind the taillight module. Mine had accumulated a fair amount of dirt and wax.
The fiberboard panel that holds the jack handle has always been difficult for me to define how the jack handle mounts onto the board. I took the opportunity to trace out the jack handle location with a marker, so that it'll be quicker in the future.
Note that this procedure is intended for an NB (or MSM) Miata.
Per the User’s Manual, this is a relatively simple job. Unfortunately, the Manual leaves out several steps which make the job more, uhmmm, interesting, shall we say.
Safety: This is a relatively safe job, the car doesn’t have to be lifted, you don’t need to work under it, but there are a few things you should do.
First: Make sure the car is in gear, and the parking brake is on. It’s probably not necessary to chock the wheels, but if you feel more comfortable doing so, its certainly worth the time.
Second: You will be working in the trunk, near the cars battery. Dropping a metal tool onto the battery terminals is not a safe thing to do, actually it’s probably right up there with checking the gas level with a match. Disconnect the battery, or put a sandwich (plastic) bag over the battery in a manner that won’t fall off (or both).
Tools: You won’t need a lot of tools to do this job. All that’s required are:
o Fingernails
o Two flat blade screwdrivers
o A 10mm wrench
o A flashlight
o A Philips screwdriver+
o A rubber hammer or equivalent
o A towel
Optionally, a rubber glove such as is used in your medical physical would be helpful.
Supplies: The Manual calls for:
o Taillight: 7443
o Stoplight: 7443
o Backup Light: 7440
o Directional Signal: 7440A
All of these should be available at a Mazda Dealer (likely expensive), a local parts store (likely less expensive) or other sources. It is not recommended that you BORROW one from a nearby MSM. I needed to only replace the taillight in my car, but the other lights are virtually identical to replace.
Step 1: Remove the rear carpet from the trunk. First remove the seven plastic fasteners from the carpet. This involves using your fingernails to pry open the inner circle of the fastener. See photo below.
Once the inner circle pops open, the fastener can easily be pulled out from the carpet. Store the fasteners in a safe place, we will be reusing them. A Tupperware container is good for storage. Unlike the plastic fasteners used under the splash shield and in the wheel wells, these were easy to remove without damaging them. See photos below.
Once removed, the only remaining obstacle is the emergency trunk release (with the glow in the dark handle). I did not verify that the handle glows in the dark. The white handle clips onto a black plastic part that is actually two pieces, a “pretty” trim piece, and a base that does all the work. See Photo below of the exterior of the trim piece.
See photo below of the interior of the trim piece, note that it simply snaps on and off.
Remove the handle from the clip.
There are several slots in the textured black plastic trim piece. If you insert a small flat blade screwdriver in the slot and press inward (towards the cable attached to the handle), the trim piece will release from the base part.
Once the trim piece is off, again, carefully store it, we will be reusing it.
Remove the molded rear carpet from the trunk. Again, store carefully, but I doubt it’ll fit into the Tupperware.
Step 2: Take a look at the back of the taillight area (inside the trunk), you’ll see two brass colored nuts, a small black part that looks like a grease fitting (but isn’t) a black rubber grommet, with several wires going into the taillight module, a black plastic wire standoff and a white translucent nylon post (near the outer end of the taillight.
Remove the two brass colored nuts, using the 10 mm wrench.
Note: Others have told me since, that removal of the black rubber grommet is NOT necessary. I've included it, simply because my impression was that it was necessary.
Then use two of the flat blade screwdrivers to pry the black rubber grommet from the metal back wall of the car. The grommet is fairly wide on the opposite side of the metal back wall, thus you’ll have to reach in further than you might think to successfully remove the grommet. Really dig in with the screwdriver. Once it’s out, take a look at the top of the trunk lid near the inner end of the taillight module. You’ll see a black plastic Phillips screw that needs to be removed with a large Phillips screwdriver. Again, oh, you’ve guessed, store the screw in the Tupperware container. The taillight module is now loose and can be removed.
Step 3: Gently tap the end of the brass colored bolts (using the rubber hammer) and the black post. Do not hit the wire standoff or the white translucent nylon part. Both are delicate, and neither will aid you in removing the taillight module. Hold your free hand outside the trunk, up against the taillight to catch it when it comes free. Once it’s in your hand, place one of the towels (clean) between the taillight and the body panel. Both are rather well finished parts, which would be expensive to repair or replace if scratched. See photo of the back side of the taillight module below.
Now, you can see the various taillight connectors. To replace the outer most taillight, grasp the finger tabs on the outermost connector, and twist it counterclockwise approximately one eighth turn. It will come free, and you can pull it out of the taillight module. To remove the light bulb, grasp the connector in one hand, while pulling the bulb straight out from the connector. I suggest that you dispose of the burnt out bulb immediately to avoid any chance of reinstalling it. Please don’t ask why I think this is a pertinent suggestion. See photo below.
Step 4: Install the new bulb by pushing it into the plastic connector and then inserting the connector back into the taillight module and turning it clockwise. Check for frayed wires, missing bolts, etc in the area. You may find the rattle you’ve been hearing.
Testing: Replace the taillight module back into the trunk wall loosely, without fasteners. Pick up your loose metal tools (at least move them away from the battery). Get into the drivers seat, insert and turn the key on (reconnect the battery if necessary), and verify that the new bulb works. See photo below.
Buttoning up: To finish simply reverse the previous steps.
Optional: Clean the areas behind the taillight module. Mine had accumulated a fair amount of dirt and wax.
The fiberboard panel that holds the jack handle has always been difficult for me to define how the jack handle mounts onto the board. I took the opportunity to trace out the jack handle location with a marker, so that it'll be quicker in the future.
Last edited by CharlesE; 11-03-2013 at 02:13 PM. Reason: Add Tag


Thread
Thread Starter
Forum
Replies
Last Post

