Maintenance Spark Plug Install Instructions
 10-26-2013, 03:00 PM
#1
MFz Regular

Thread Starter

Join Date: Oct 2013
Location: North Stonington, Connecticut
Posts: 107
Spark Plug Install
This was originally written for MSM's. It should be virtually identical for any NA/NB Miata, however.
This job is very easy on the MSM. All of the work is on top of the car….you don’t need jack stands, ramps or a lift! Far easier than any other normal maintenance task you’ll do on the MSM.
You do need some tools, and some materials, however.
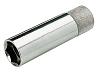
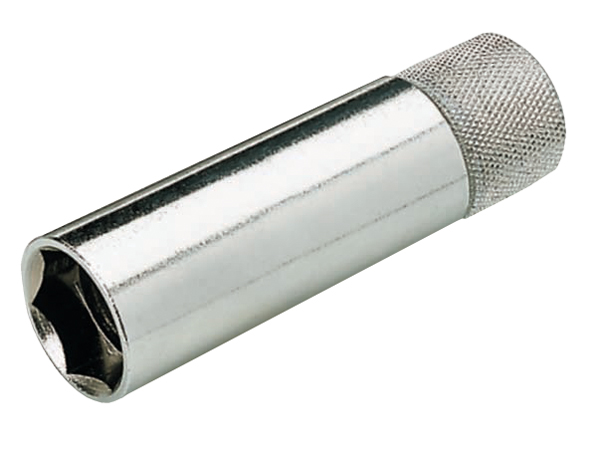
First obtain a good spark plug socket. The socket should be a deep socket, with a rubber liner (which grips the plug on installation and removal), and 16 mm in size. If you don’t have a 16 mm socket, a 5/8” socket will also work, and fit slightly tighter.
You’ll also need at least a six inch extension to reach into the spark plug well – the plugs aren’t on top of the red valve cover!
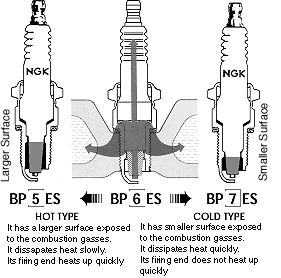
You will need the appropriate spark plugs. The Workshop Manual specifies a heat range of 5…A modded MSM probably requires a slightly colder range. The Workshop Manual recommends using Denso SK16PR-F8 Iridium plugs. There are conversion charts online which allow you to switch manufacturers / heat ranges, etc. Google is your friend.
I used NGK ZFR 6FIX -11 plugs. The IX signifies an Iridium plug. The NGK ZFR 6F-11 plug is a similar copper plug, somewhat less expensive, but requiring more frequent replacement. The “6” in the designation is the heat range for the plug. A “6” is colder than a “5”.
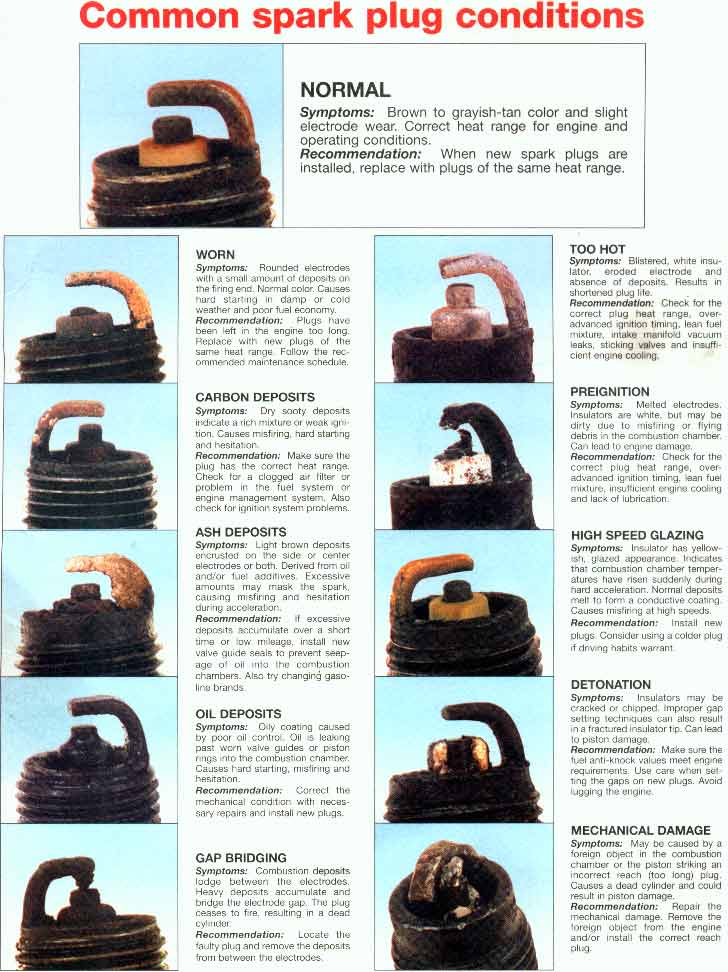
You can diagnose the engine’s condition after pulling the plugs, by inspecting the electrodes / ceramic portions of the spark plug. Most of these conditions are highly unusual.

A small package of antiseize will help you the next time you do the job.
A torque wrench that can be accurately read in the 5 to 30 foot pounds range will also be helpful. Obviously, you can multiply those values by 12, if you prefer inch pounds.
To clean the spark plug sockets, a shop vac is useful.
Optional…..If you’re concerned about putting it back together when you’ve finished, take a bunch of photos before starting….and maybe along the way.
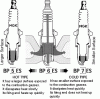
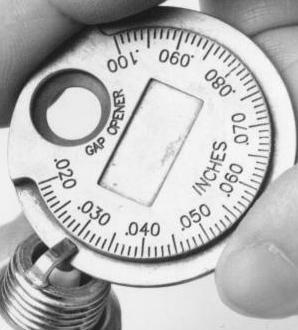
The spark plugs come from the factory gapped at 0.040 inches (which the Workshop Manual recommends for non turbo NB’s). Our car (MSM) seems to prefer 0.028 to 0.031”, per the Workshop Manual. When you purchase the plugs, buy or get a gapping tool…only a few dollars – or a store giveaway!
There are several styles of gapping tool, this type is excellent for measuring the gap quickly, but shouldn’t be used for gapping our plugs. When you adjust the gap, do not apply ANY force to the center electrode (the little pointy thing that sticks up from the white ceramic). They are delicate, and will break easily, requiring another trip to the FLAPS.

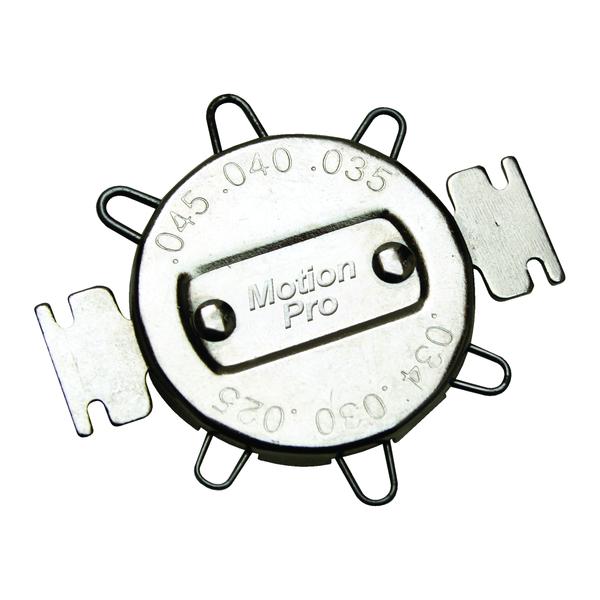
It’s better to use a tool with a notch, as shown below, to adjust the gap. These allow you to grab the outer electrode and bend it slightly…SLIGHTLY to adjust the gap. Very little force is required to make a change in the gap…almost no force. Gap all four plugs to the same opening.

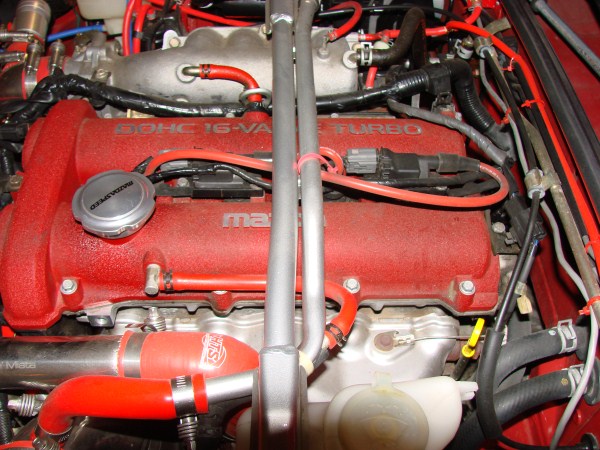
Now that that’s out of the way, open the hood. In the middle of the engine bay….right dead center….is a bright red valve cover with two cylindrical humps running from near the back of the radiator to the firewall at the rear of the engine bay. My car has an FM intake, your engine may look slightly different, but the valve cover should be nearly identical.

Along the centerline of the valve cover is a bunch of wires, - usually black (mine are red magnecors – aftermarket) and some grey connectors. Some of the smaller wires are wrapped in black electrical tape – Those we won’t be touching. The thicker, usually black wires that descend vertically into the black rubber connectors, in the valley running from the front of the engine to the rear, in the middle of the valve cover are the spark plug wires.
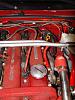
While it might be slightly easier to temporarily remove the shock tower brace (the twin stainless steel tubes running over the engine, it isn’t necessary.
The cylinders are numbered (traditionally) starting at the chrome “Mazdaspeed: oil fill cap with “1” and going to cylinder “4” near the firewall. I suggest starting with number 1, and working your way back to 4 individually. Number 1 is the easiest to reach, and inspect. Also, by completing each plug individually, you have less chance of miswiring anything.
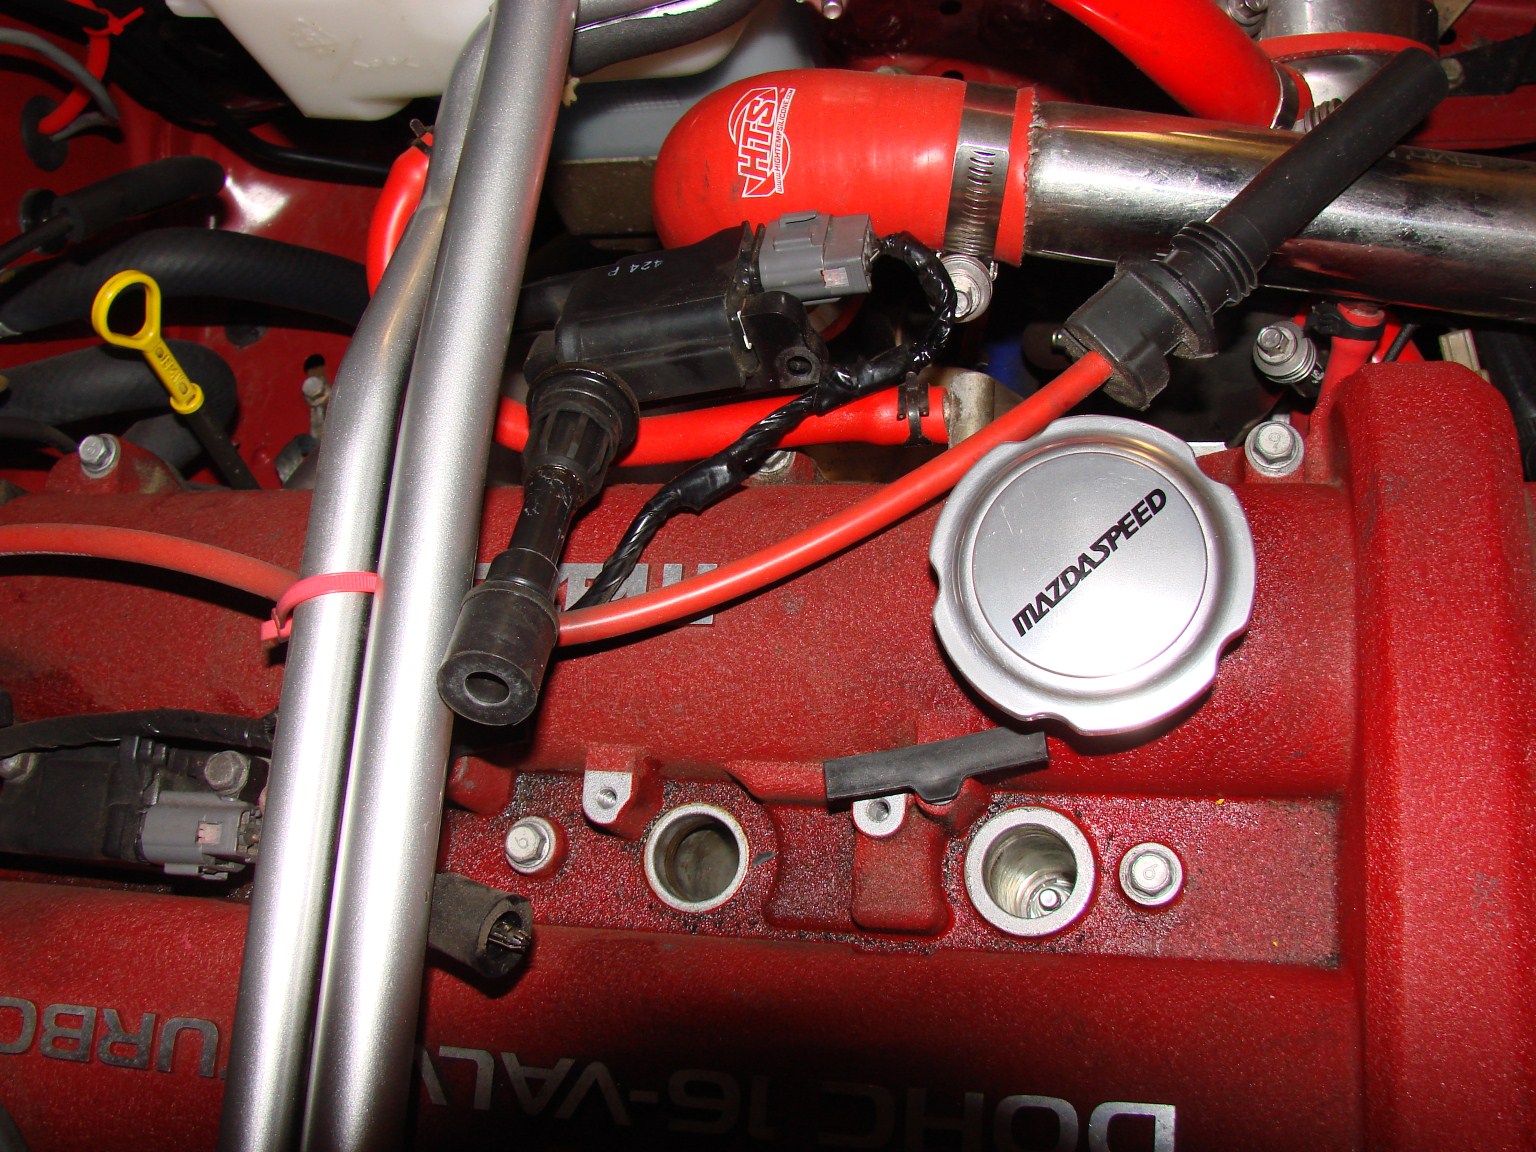
If you’ve ever dealt with any electronic wires with sophisticated connectors you’ve been told to grab the connector and pull it out of it’s socket. The spark plug connectors are DIFFERENT. Grab the wire itself for number “1” and yank straight up!! You’ll hear slurping noise and the long black connector will be in your hand. No, you haven’t broken it, it just feels like you did. Set it down on the engine and look into the spark plug well – the shiny hole below. The number 1 plug should now look like the photo below. You’ll see the top of the spark plug. Now is a good time to remove any loose debris inside the spark plug well using the shop vac.
With the spark plug socket on the extension, gently drop the socket / extension into the well, and slowly turn it, pushing down, until it lines up with spark plug and seats itself onto the spark plug. While it is difficult to do with the deep wells on our engine, ensure that the socket / extension is square with the plug, not at an angle, to ensure you don’t break the plug. Attach the socket wrench, and firmly turn the wrench counter clockwise (lefty loosey) until the spark plug threads release from the cylinder head. Pull the socket, with the spark plug out of the well and set it aside. Again, look into the spark plug well and vacuum out any debris.

Once the socket is cleaned, you can install your newly gapped spark plugs, by carefully inserting them into the rubber lined spark plug socket / extension, then screwing them by hand (no socket wrench) into the socket. Before installing the spark plug, put a small dab (highly technical term) of antiseize onto the spark plug threads, then smear it around the threads evenly using a paper towel, your finger, or your wife’s good kitchen towels.
The new plug should start threading easily (clockwise), with little force required. This is a two fingers operation. Be careful not to cross thread the plug. Once the plug is finger tight, use the torque wrench to tighten it to 11 to 16 ft pounds, per the Workshop Manual. The spark plug is now installed.
To reinstall the electrical connector, simply grasp it near the top, and push it down into the well, until it seats. It makes a slight popping noise as it seals. It should now look like the other connectors, which you haven’t disturbed yet…have you? You likely won’t feel the connector making its electrical connection, but it always seems to fire nicely once all four plugs are installed.
Before you can remove the number 2 plug, you’ll have to unbolt the coil which covers the spark plug. The spark plug connector is located directly below, and connected to the coil. The coil is held on by two 10 mm bolts, which are easily removed with a socket. The Workshop Manual calls for 70 to 90 inch pounds of torque to install the bolts. That isn’t a lot of torque, I recommend using your torque wrench. To remove the number 2 plug, connector grasp the coil, as close to the bottom as possible, and again, pull straight up…slurping sound again

You should now be holding a connector similar to that shown below, next to the shock tower brace.
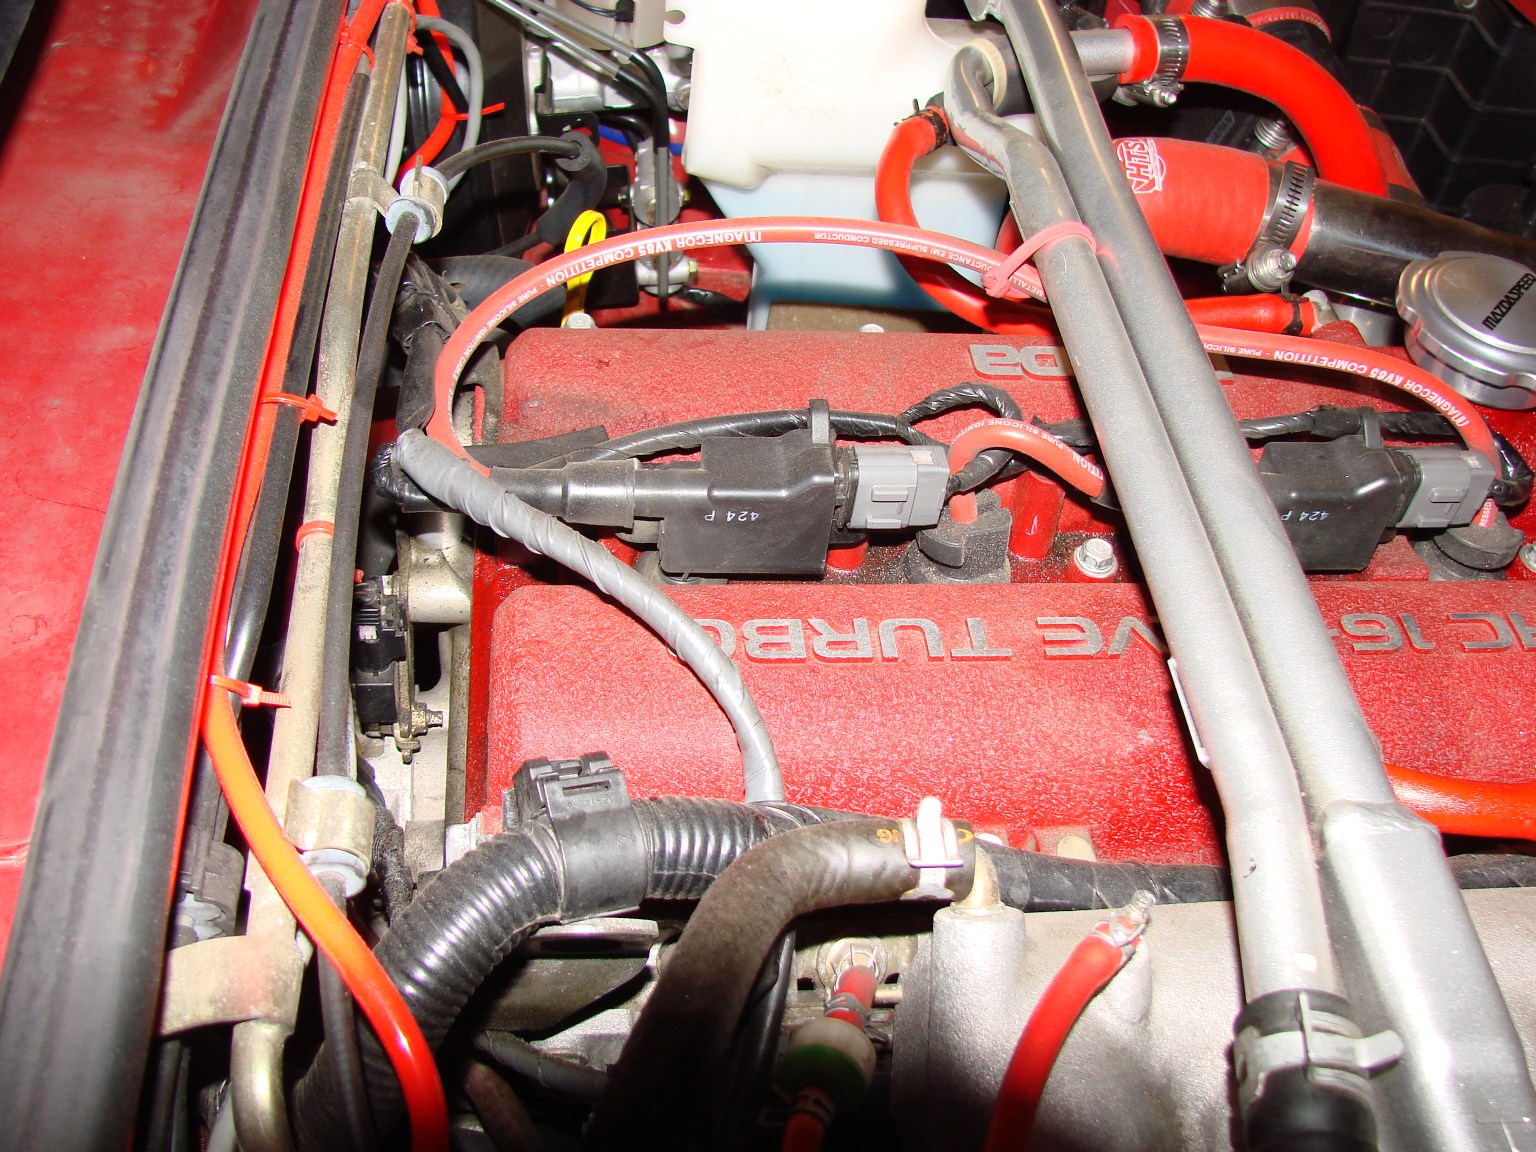
The photo below shows the number 3 and 4 cylinder locations, near the rear firewall. Removal of these spark plugs is the same as cylinders 1 and 2.

Replacement is the same as cylinders 1 and 2.
Once you’ve finished numbers 3 and4, take a minute to pick up all of your tools, and put them away. That ensures that a socket / screwdriver / drop light, etc. won’t fall into the fan on startup, or that you won’t drive over your tools on your test drive.
Fire it up, and you should be good to go for a test drive…..After you lower the hood.
This was originally written for MSM's. It should be virtually identical for any NA/NB Miata, however.
This job is very easy on the MSM. All of the work is on top of the car….you don’t need jack stands, ramps or a lift! Far easier than any other normal maintenance task you’ll do on the MSM.
You do need some tools, and some materials, however.
First obtain a good spark plug socket. The socket should be a deep socket, with a rubber liner (which grips the plug on installation and removal), and 16 mm in size. If you don’t have a 16 mm socket, a 5/8” socket will also work, and fit slightly tighter.
You’ll also need at least a six inch extension to reach into the spark plug well – the plugs aren’t on top of the red valve cover!
You will need the appropriate spark plugs. The Workshop Manual specifies a heat range of 5…A modded MSM probably requires a slightly colder range. The Workshop Manual recommends using Denso SK16PR-F8 Iridium plugs. There are conversion charts online which allow you to switch manufacturers / heat ranges, etc. Google is your friend.
I used NGK ZFR 6FIX -11 plugs. The IX signifies an Iridium plug. The NGK ZFR 6F-11 plug is a similar copper plug, somewhat less expensive, but requiring more frequent replacement. The “6” in the designation is the heat range for the plug. A “6” is colder than a “5”.
You can diagnose the engine’s condition after pulling the plugs, by inspecting the electrodes / ceramic portions of the spark plug. Most of these conditions are highly unusual.
A small package of antiseize will help you the next time you do the job.
A torque wrench that can be accurately read in the 5 to 30 foot pounds range will also be helpful. Obviously, you can multiply those values by 12, if you prefer inch pounds.
To clean the spark plug sockets, a shop vac is useful.
Optional…..If you’re concerned about putting it back together when you’ve finished, take a bunch of photos before starting….and maybe along the way.
The spark plugs come from the factory gapped at 0.040 inches (which the Workshop Manual recommends for non turbo NB’s). Our car (MSM) seems to prefer 0.028 to 0.031”, per the Workshop Manual. When you purchase the plugs, buy or get a gapping tool…only a few dollars – or a store giveaway!
There are several styles of gapping tool, this type is excellent for measuring the gap quickly, but shouldn’t be used for gapping our plugs. When you adjust the gap, do not apply ANY force to the center electrode (the little pointy thing that sticks up from the white ceramic). They are delicate, and will break easily, requiring another trip to the FLAPS.
It’s better to use a tool with a notch, as shown below, to adjust the gap. These allow you to grab the outer electrode and bend it slightly…SLIGHTLY to adjust the gap. Very little force is required to make a change in the gap…almost no force. Gap all four plugs to the same opening.
Now that that’s out of the way, open the hood. In the middle of the engine bay….right dead center….is a bright red valve cover with two cylindrical humps running from near the back of the radiator to the firewall at the rear of the engine bay. My car has an FM intake, your engine may look slightly different, but the valve cover should be nearly identical.
Along the centerline of the valve cover is a bunch of wires, - usually black (mine are red magnecors – aftermarket) and some grey connectors. Some of the smaller wires are wrapped in black electrical tape – Those we won’t be touching. The thicker, usually black wires that descend vertically into the black rubber connectors, in the valley running from the front of the engine to the rear, in the middle of the valve cover are the spark plug wires.

While it might be slightly easier to temporarily remove the shock tower brace (the twin stainless steel tubes running over the engine, it isn’t necessary.
The cylinders are numbered (traditionally) starting at the chrome “Mazdaspeed: oil fill cap with “1” and going to cylinder “4” near the firewall. I suggest starting with number 1, and working your way back to 4 individually. Number 1 is the easiest to reach, and inspect. Also, by completing each plug individually, you have less chance of miswiring anything.
If you’ve ever dealt with any electronic wires with sophisticated connectors you’ve been told to grab the connector and pull it out of it’s socket. The spark plug connectors are DIFFERENT. Grab the wire itself for number “1” and yank straight up!! You’ll hear slurping noise and the long black connector will be in your hand. No, you haven’t broken it, it just feels like you did. Set it down on the engine and look into the spark plug well – the shiny hole below. The number 1 plug should now look like the photo below. You’ll see the top of the spark plug. Now is a good time to remove any loose debris inside the spark plug well using the shop vac.
With the spark plug socket on the extension, gently drop the socket / extension into the well, and slowly turn it, pushing down, until it lines up with spark plug and seats itself onto the spark plug. While it is difficult to do with the deep wells on our engine, ensure that the socket / extension is square with the plug, not at an angle, to ensure you don’t break the plug. Attach the socket wrench, and firmly turn the wrench counter clockwise (lefty loosey) until the spark plug threads release from the cylinder head. Pull the socket, with the spark plug out of the well and set it aside. Again, look into the spark plug well and vacuum out any debris.
Once the socket is cleaned, you can install your newly gapped spark plugs, by carefully inserting them into the rubber lined spark plug socket / extension, then screwing them by hand (no socket wrench) into the socket. Before installing the spark plug, put a small dab (highly technical term) of antiseize onto the spark plug threads, then smear it around the threads evenly using a paper towel, your finger, or your wife’s good kitchen towels.
The new plug should start threading easily (clockwise), with little force required. This is a two fingers operation. Be careful not to cross thread the plug. Once the plug is finger tight, use the torque wrench to tighten it to 11 to 16 ft pounds, per the Workshop Manual. The spark plug is now installed.
To reinstall the electrical connector, simply grasp it near the top, and push it down into the well, until it seats. It makes a slight popping noise as it seals. It should now look like the other connectors, which you haven’t disturbed yet…have you? You likely won’t feel the connector making its electrical connection, but it always seems to fire nicely once all four plugs are installed.
Before you can remove the number 2 plug, you’ll have to unbolt the coil which covers the spark plug. The spark plug connector is located directly below, and connected to the coil. The coil is held on by two 10 mm bolts, which are easily removed with a socket. The Workshop Manual calls for 70 to 90 inch pounds of torque to install the bolts. That isn’t a lot of torque, I recommend using your torque wrench. To remove the number 2 plug, connector grasp the coil, as close to the bottom as possible, and again, pull straight up…slurping sound again
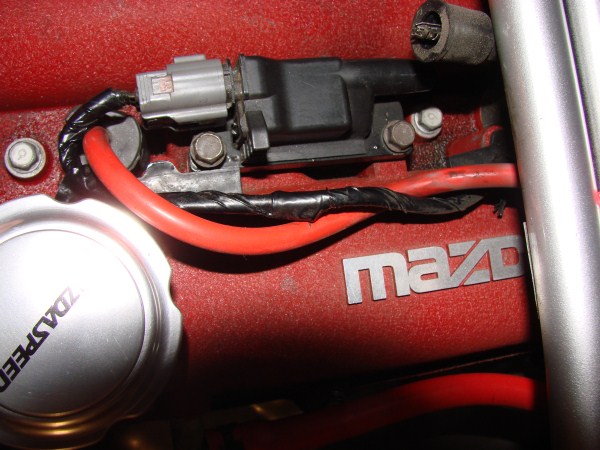
You should now be holding a connector similar to that shown below, next to the shock tower brace.
The photo below shows the number 3 and 4 cylinder locations, near the rear firewall. Removal of these spark plugs is the same as cylinders 1 and 2.
Replacement is the same as cylinders 1 and 2.
Once you’ve finished numbers 3 and4, take a minute to pick up all of your tools, and put them away. That ensures that a socket / screwdriver / drop light, etc. won’t fall into the fan on startup, or that you won’t drive over your tools on your test drive.
Fire it up, and you should be good to go for a test drive…..After you lower the hood.


Thread
Thread Starter
Forum
Replies
Last Post
Engine Management Megasquirt DIYPNP "How-To" - Step-By-Step Instructions
MF-Brain
How To...
41
12-25-2014 05:42 PM
Engine Management Help! radiator drain plug on engine block?
doanuts
How To...
4
03-11-2013 02:20 PM