Interior How-To: LED Gauge Cluster


 12-08-2011, 08:34 PM
#34
BAMFr

Join Date: Jul 2011
Location: NC
Posts: 1,787
***Moved***
Tools needed:
Screw driver
LEDS to put in
A pair of ******
*Do not be afraid to pull on the cluster hood with some force.
Step 1: Get LEDs. Many places sell them, even on ebay. I used superbrightleds and am a return customer (3 times so far, 4 will be next week).
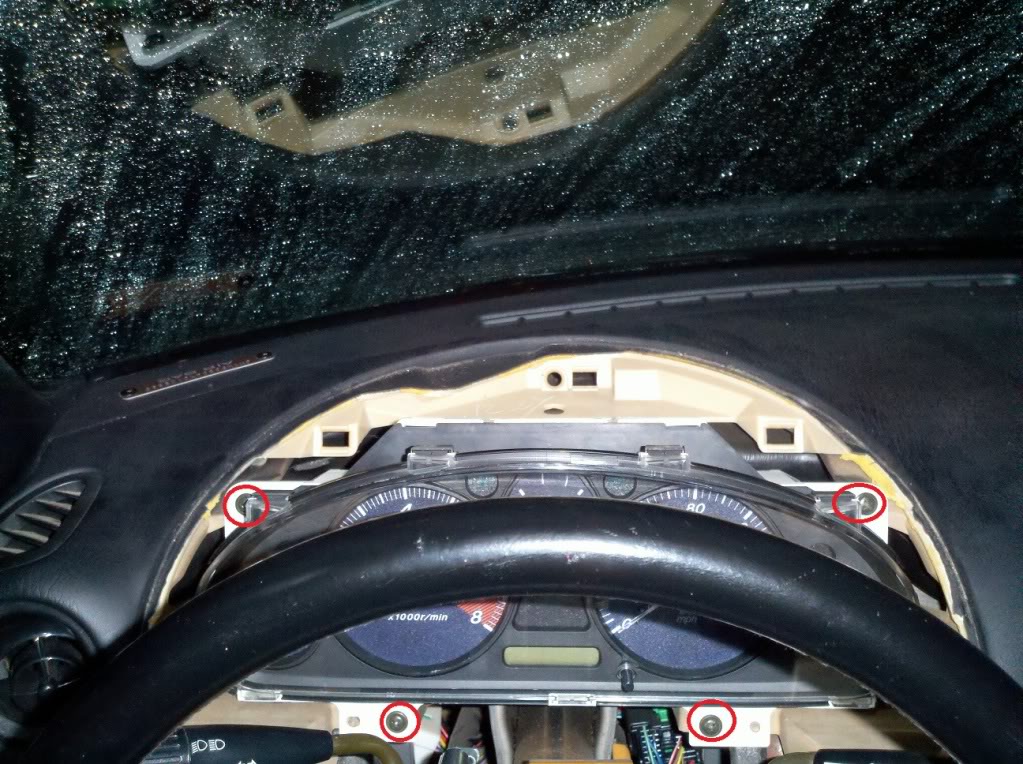
Step 2: Remove screws on bottom on steering wheel/column. Note the key location for reference.
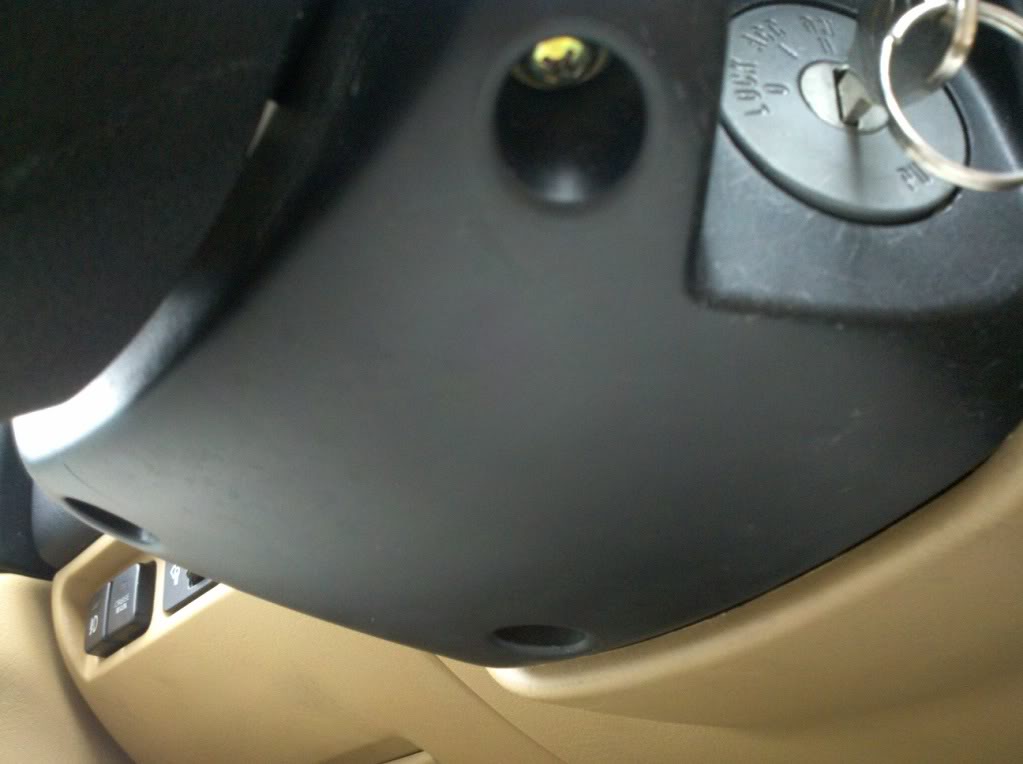
Step 3: I don't have a picture for this (sorry I assumed it would be obvious). You need to remove the two covers, they stick to each other with some teeth, easy really.
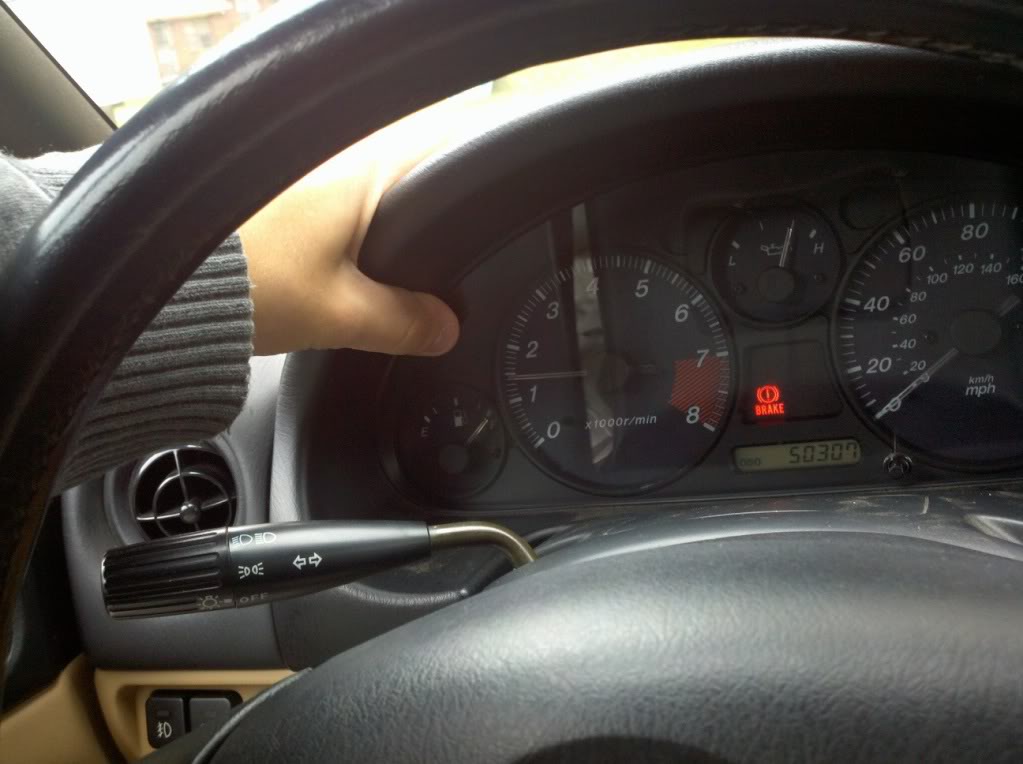
Step 4: PULL on the gauge cluster hood, in this fashion:
Step 5: Remove screws holding gauge cluster in AFTER this step, the only thing holding the cluster in is the connectors on the back (3 in total)
HINTS!:
Gauge hood: Don't be afraid to pull on both "sides" of the hood (opposite side of where my hand is on step 4).
Cluster Connectors: you might have an easier time pulling the connectors off if you get out of the car/drop the top/do both.
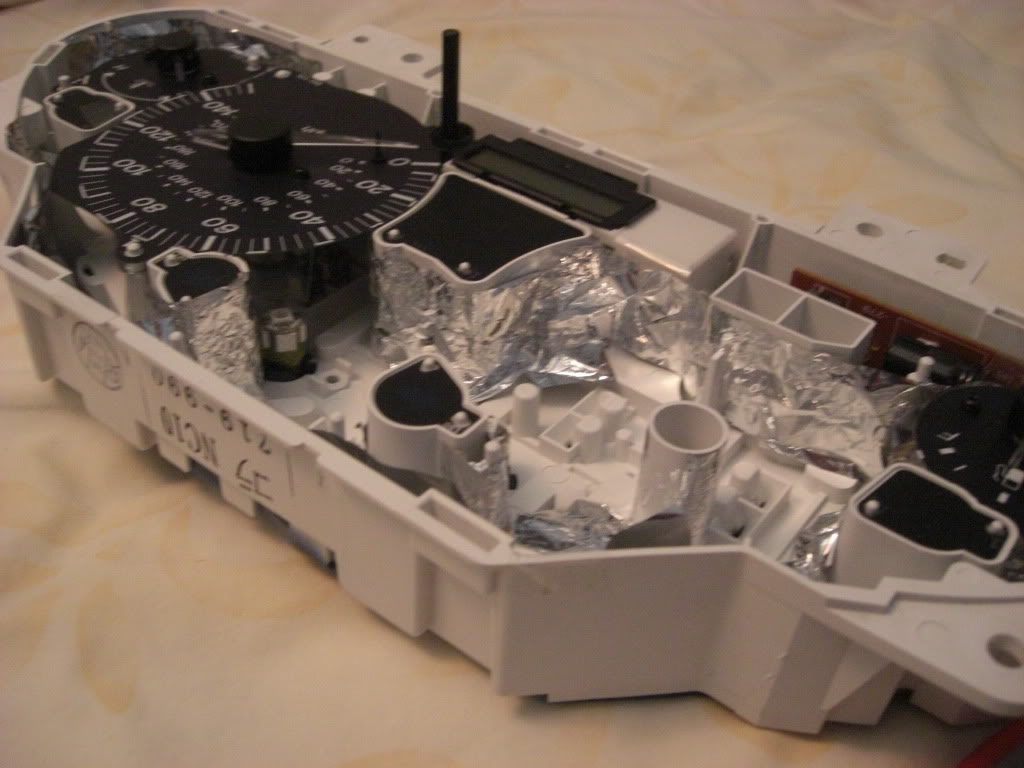
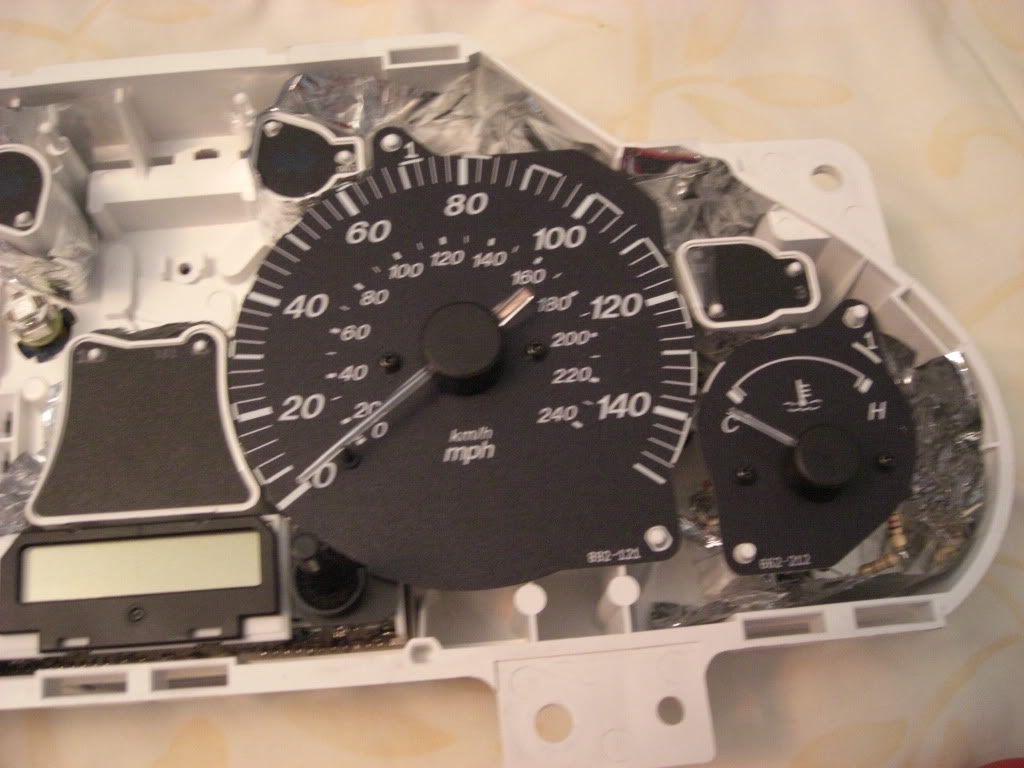
So now you have overcome your fears and finished all the hard parts. time for gratification, you got this plastic funky thing with a blue sheet on the back and somehow it lights ---- up. Here is the code:
Tools needed:
Screw driver
LEDS to put in
A pair of ******
*Do not be afraid to pull on the cluster hood with some force.
Step 1: Get LEDs. Many places sell them, even on ebay. I used superbrightleds and am a return customer (3 times so far, 4 will be next week).
Step 2: Remove screws on bottom on steering wheel/column. Note the key location for reference.
Step 3: I don't have a picture for this (sorry I assumed it would be obvious). You need to remove the two covers, they stick to each other with some teeth, easy really.
Step 4: PULL on the gauge cluster hood, in this fashion:
Step 5: Remove screws holding gauge cluster in AFTER this step, the only thing holding the cluster in is the connectors on the back (3 in total)
HINTS!:
Gauge hood: Don't be afraid to pull on both "sides" of the hood (opposite side of where my hand is on step 4).
Cluster Connectors: you might have an easier time pulling the connectors off if you get out of the car/drop the top/do both.
So now you have overcome your fears and finished all the hard parts. time for gratification, you got this plastic funky thing with a blue sheet on the back and somehow it lights ---- up. Here is the code:
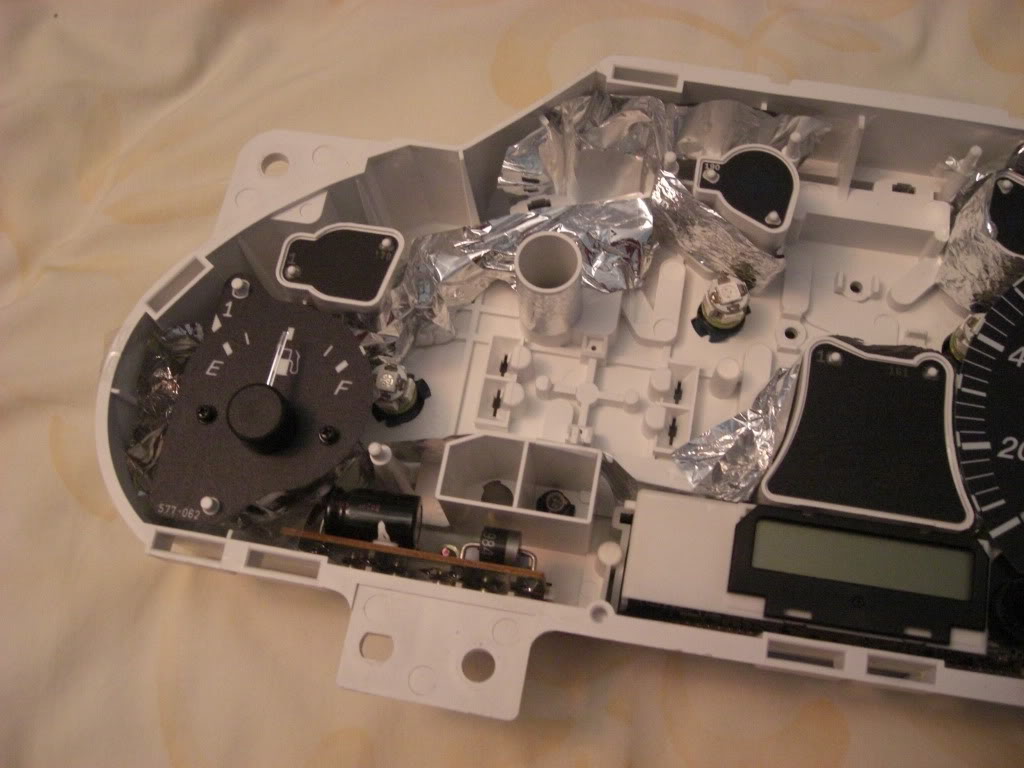

 , Once I get my other car, I will take the dash apart and take pictures of the mylar, leds, and maybe do a write-up on how to actually degrease the OPG.
 12-09-2011, 05:56 PM
#40
BAMFr
Join Date: Jul 2011
Location: NC
Posts: 1,787
You can use any color LED. Since LEDs are single wavelength, the filter doesn't really effect them. (I currently run blue turn signals out of the green filters, other than being excessively bright...well they are excessively bright and its 1 HP LED, so yea, no complaints).
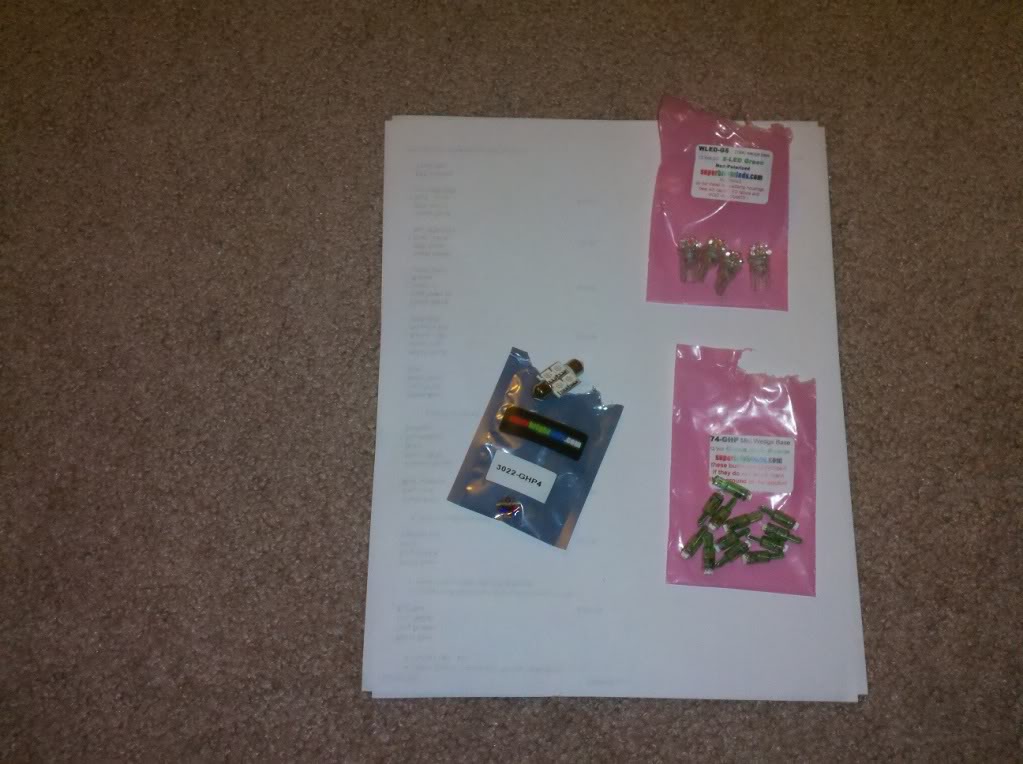
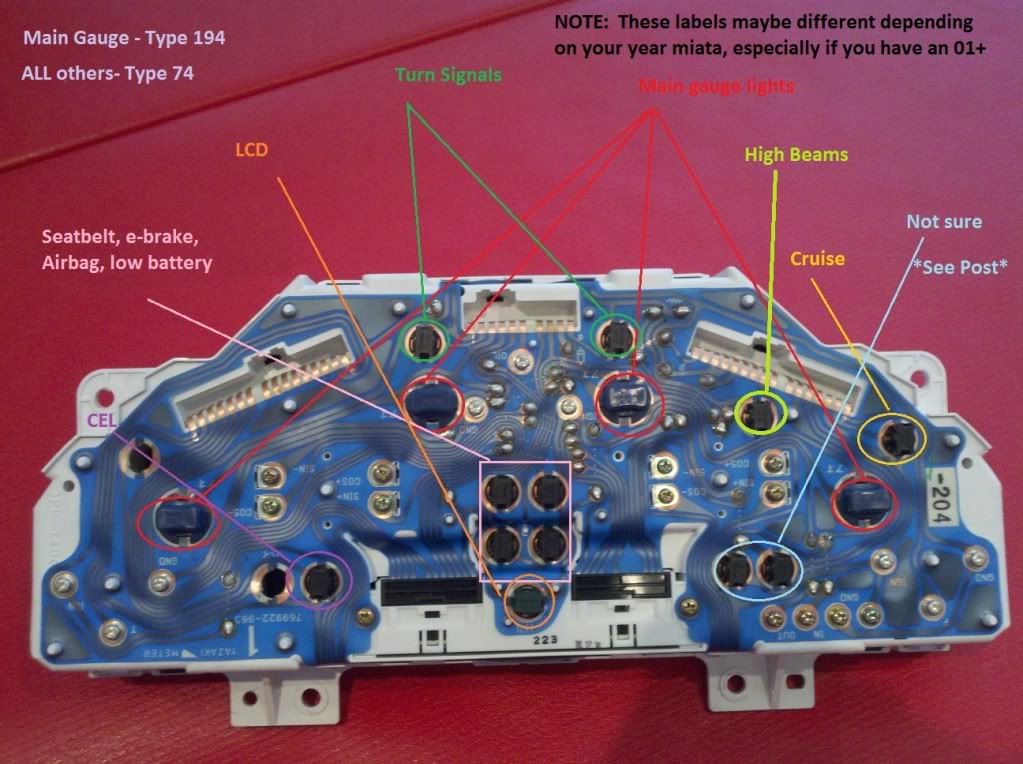
The LEDs types are posted in the pics (Type 194 for the main gauge lights, type 74 for each individual indicator like check engine, e-brake, turn signals, cruise etc).
I don't have a 90-93 cluster to test this on, but I am about 95% sure its same size LEDs, but I can't guarantee that the indicator lights will be in the same location.
As for LED suggestions, I would NOT buy HP (High power) LEDs for them, they are ------- blinding and excessive in those cases. If you reallllly want a HP LED for them, use the weakest one you can find.
I use superbrightleds for my stuff. I would say I am about 80% satisfied with their LEDs. I have gotten some festoon ones where the metal piece broke off on the end, ------ pain. I have also gotten two external brake light LEDs that kept breaking my fuses for no ------- reason. Piece of *****. Lastly, They use some really ---- bag grounding in some of the LED circuitry, I don't know why but one of my LEDs is always on. Its really dim, but its obvious that its on at night. junk me please.
An alternative to use is autoillumination. They have other color choices like purple? and ----.
I haven't tried autoillumination LEDs, but a good friend has and he loved them. I used a x5 HP for the gauge cluster:
http://www.superbrightleds.com/cgi-b...FWLED-xHP5.htm
and I used a single HP for the indicator lights (NOT suggested)
here is what I SUGGEST you use:
http://www.superbrightleds.com/cgi-b...cs%2F74-x.html
(If you want to see the one I used, move up to the 74-xHP)
Last edited by Track; 12-09-2011 at 05:59 PM.