Instrument Cluster Removal
 12-03-2014, 08:59 PM
#1
MFz Regular

Thread Starter

Join Date: Oct 2013
Location: North Stonington, Connecticut
Posts: 107
NB Miata Instrument Cluster Removal:
Tools needed:
Screw driver (a few different sizes may be useful)
A small socket set (1/4” size set should be adequate)
Sandwich bags
Several towels to wrap delicate or scratchable parts in
Sharpie marker
Difficulty: 4 out of 10 (10 being the most difficult)
Step 1: Clean everything you’ll be removing. You don’t want to have any loose dirt scratch visible parts. Wrap and label everything you remove. Screws should go in sandwich bags – LABELED!!
Step 2: Turn off the engine, and disconnect the battery. You will be playing with expensive delicate electrical components. Don’t save a minute by not disconnecting the battery. Also, chock the wheels and ensure the parking brake is on. It is embarrassing to run yourself over. There are better ways to impress the emergency room nurse.
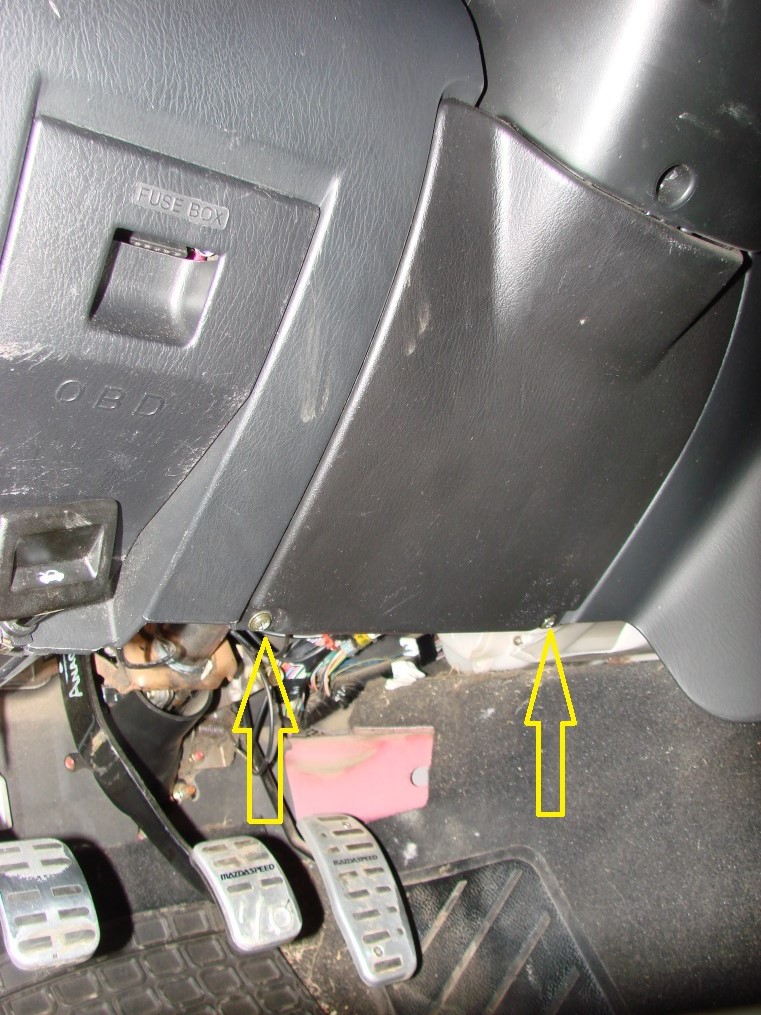
Step 3: O.K. the good stuff now. Remove the plate that’s under the steering column. There are two screws located at the lower edge of the plate. The upper end is supported by the bottom part of the steering column cover. Once the screws are removed, simply pull the plate towards the foot pedals and it will slide off.
It may be possible to skip this step, but this plate has heavy steel reinforcing on the back side, I prefer to not have it supported by two relatively small screws.
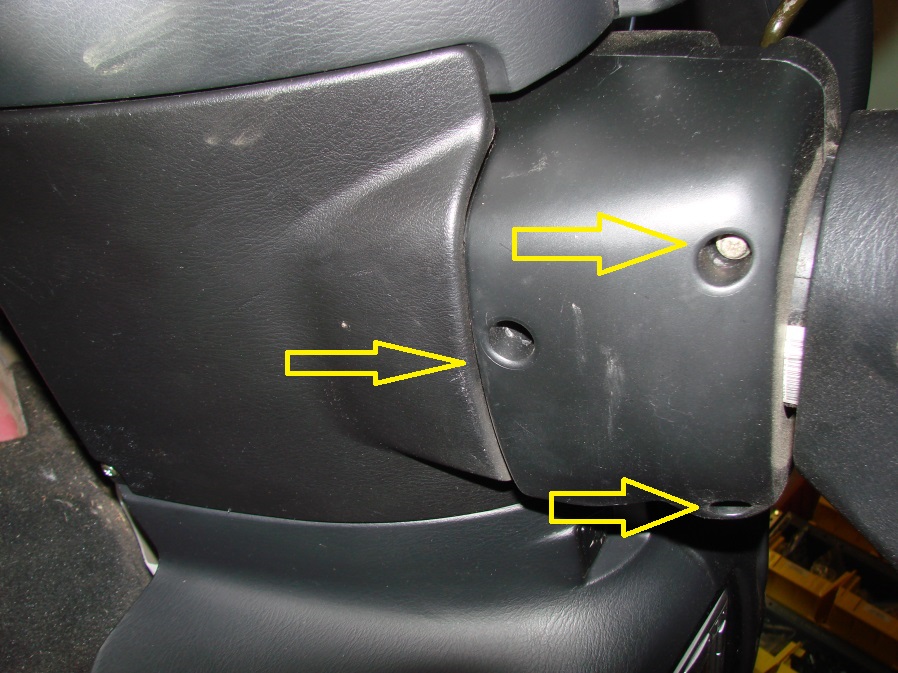
Step 4: The steering wheel column cover must be removed to provide clearance for the instrument cluster hood. There are three screws that can be seen from the bottom of the two part column cover. Remove those three screws on the bottom of the steering wheel/column cover.
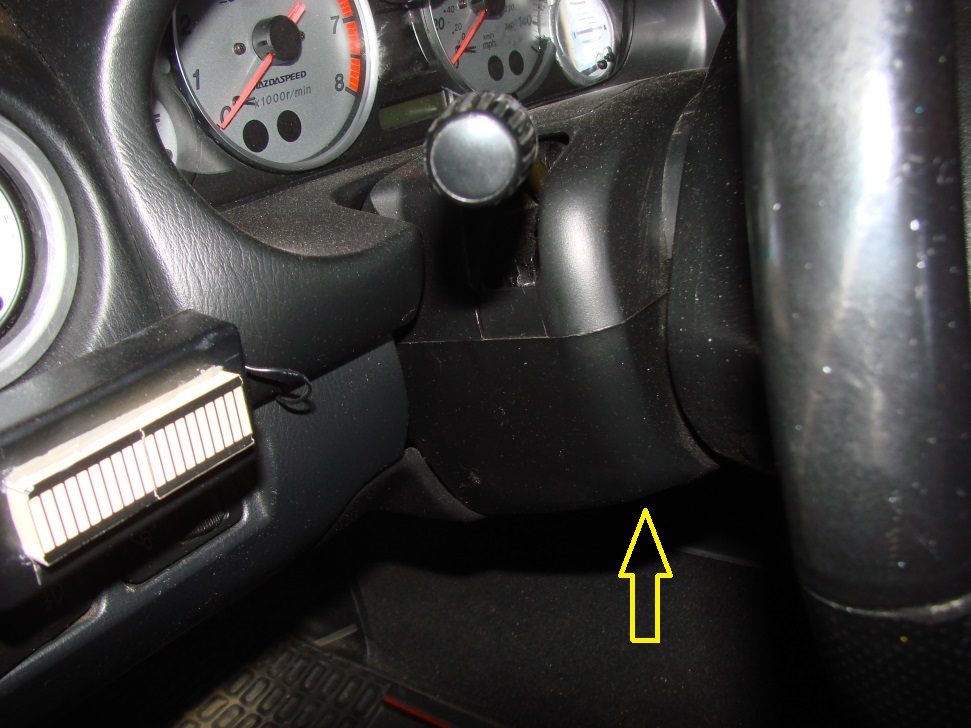
Once the three screws are removed, you can separate and remove the top and bottom pieces. Some wiggling and gentle prying will be necessary, since there are clips that hold the two parts together.
Step 5: PULL on the gauge cluster hood, in this fashion:
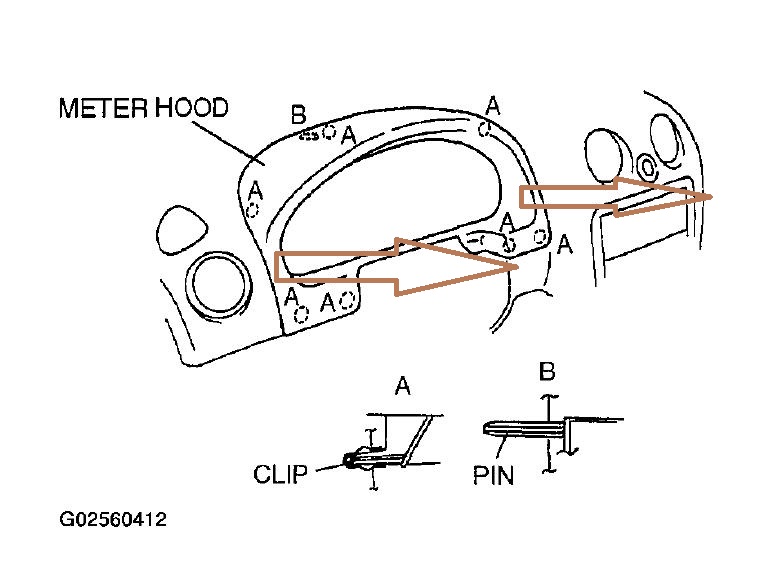
You may find it easier to grab the gap between the gauge cluster hood and the dashboard however, you need to pull the hood towards you (towards the steering wheel). There are 7 clips in all, so some force is required. When they release, you will be certain that you broke something! Fortunately, that is normal and not an indication of damage. I have tugged the lower clips off first, then tugged the upper clips off successfully. This is somewhat less stressful to me, if not to the meter hood.

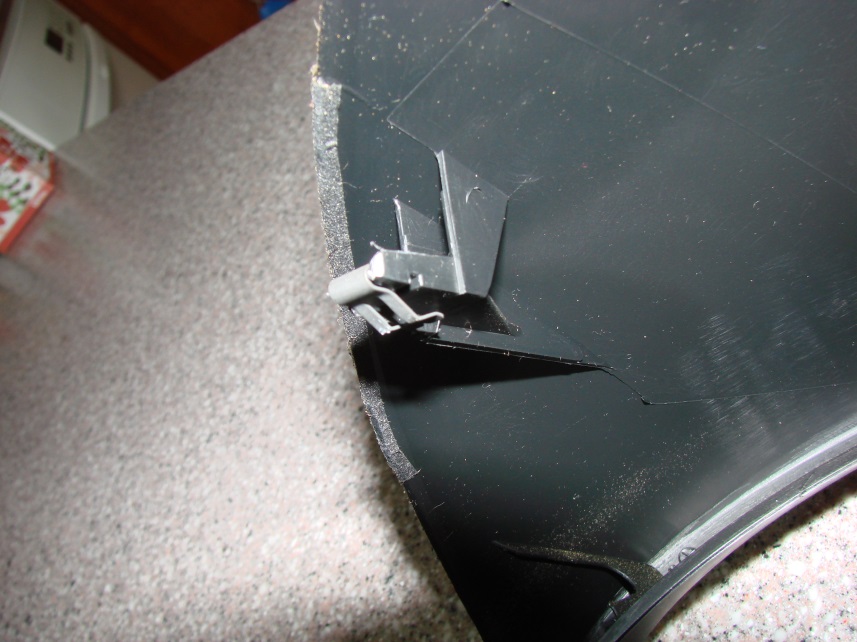
It will then be easy to remove the cluster hood. An inspection of the back side will show the clip locations as seen above.
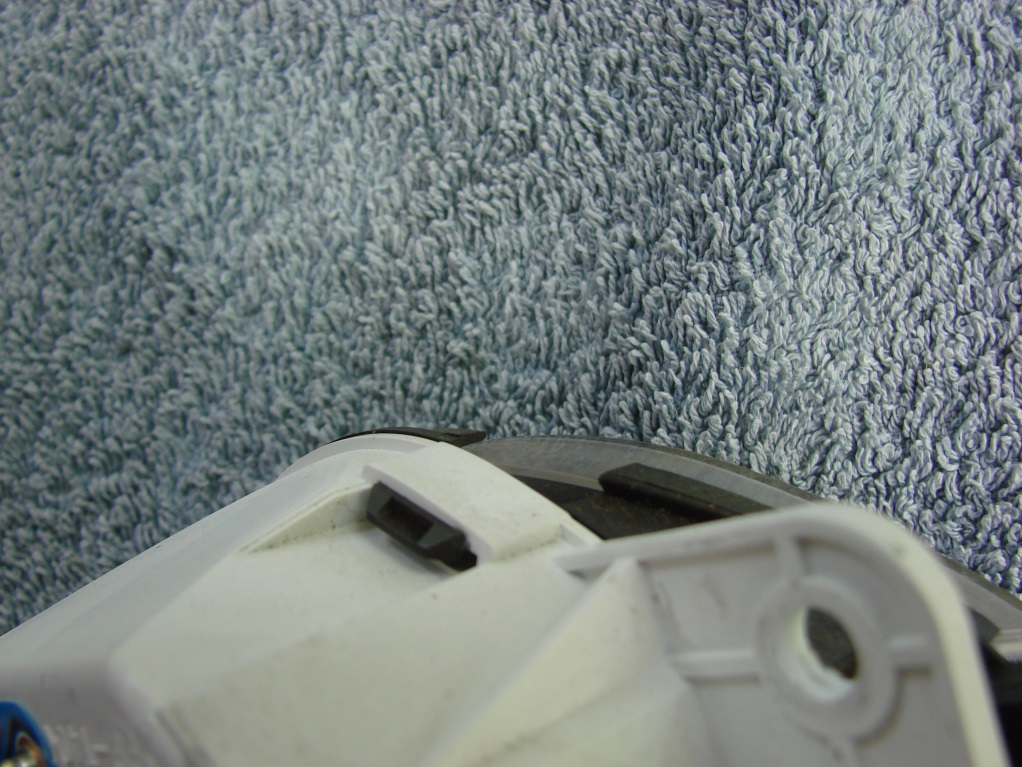
A detailed look at one of the clips will show it as seen below.
The only mechanical connections of the instrument cluster hood to the dashboard remaining are four screws, one at the top right, one at the bottom right and similar screws on the left. The bottom tab also has a hole in it for a locating pin, so that you can easily reinstall it in the proper location.
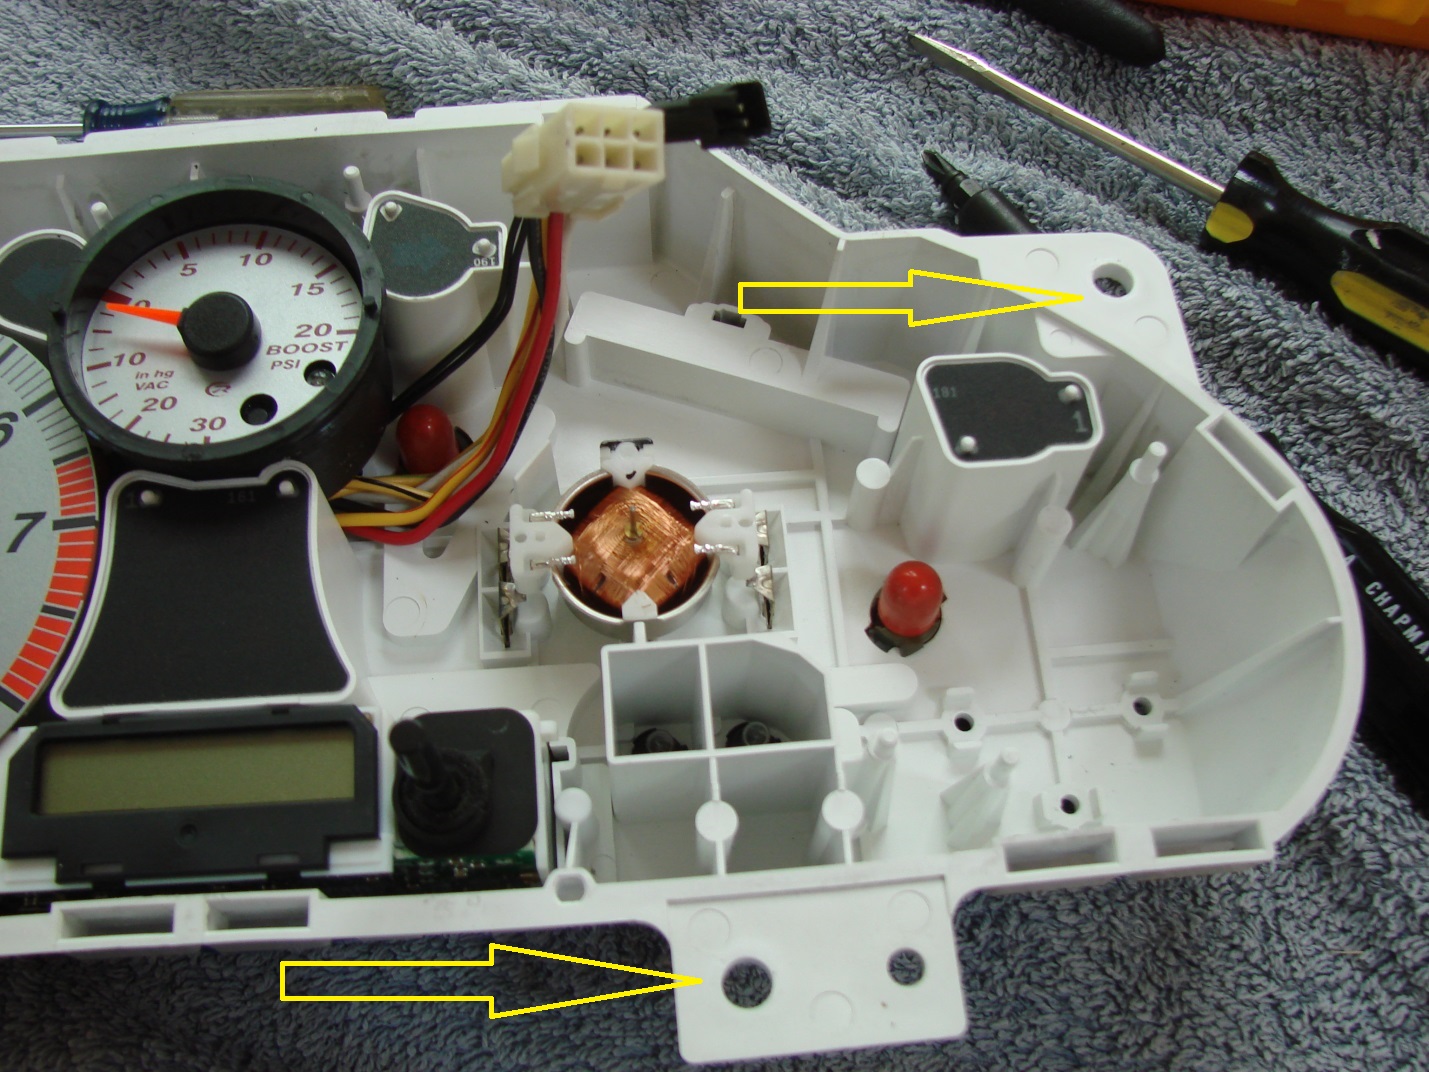
This picture show the cluster partially disassembled, so that you can see the two screw holes in one photo. Simply removing the instrument cluster does NOT require this level of disassembly.
At this point, the only remaining obstacle to removing the instrument cluster as a unit, are the three white electrical connectors at the top of the instrument cluster. These are the ones with the ribbon cables going to them.

Note that the three connectors are of different shapes, and cannot be inserted into the wrong socket – at least not without massive amounts of force!!
Step 6: Remove screws holding gauge cluster in AFTER this step, the only thing holding the cluster in are the electrical connectors on the back (3 in total)
While these connectors are fairly easy to reach, one of the advantages of a Miata is its convertible top. If the top is lowered, the connectors are easier to play with.
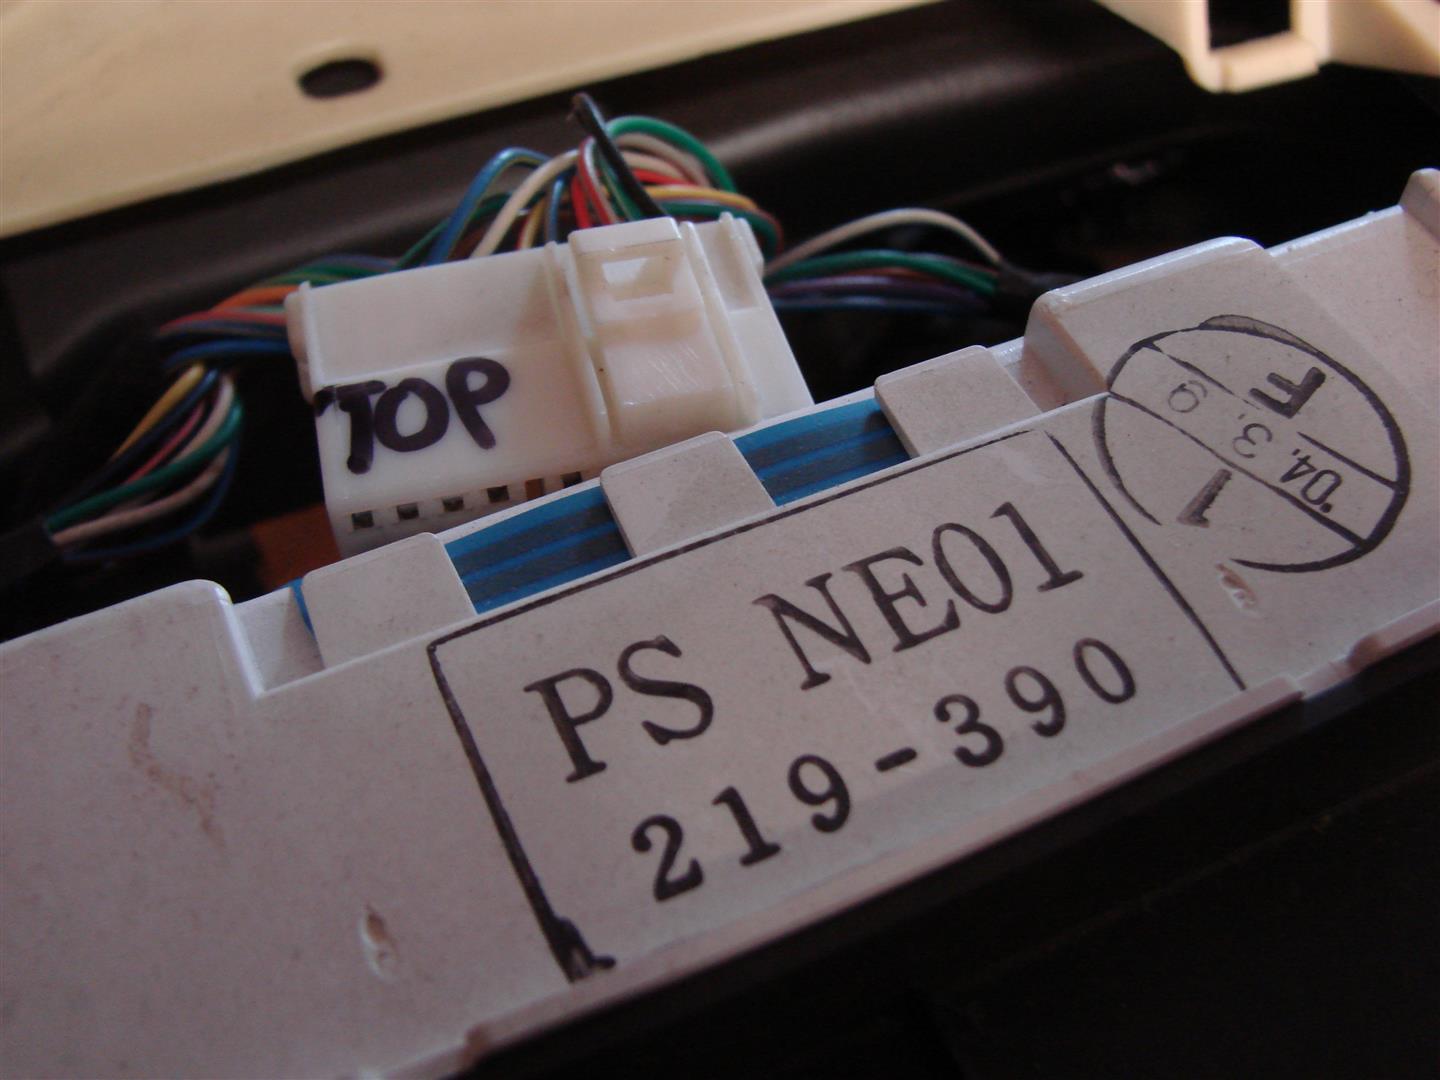
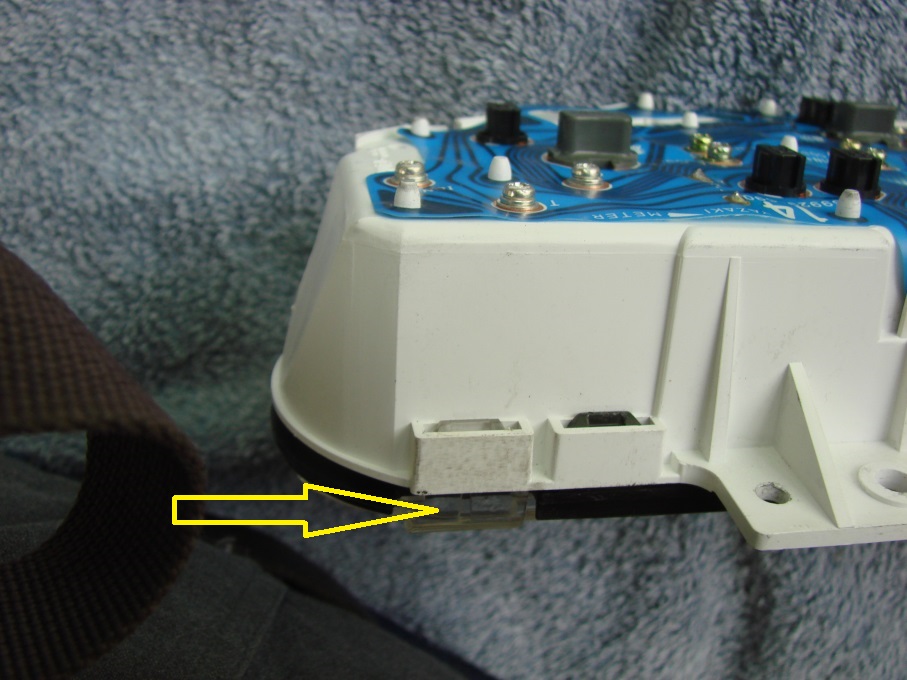
The tab in the connector needs to be pressed down to disconnect the connector from the instrument cluster hood. Once the tab is properly pressed, the connector can be wiggled out. Note that these connectors are designed to maintain contact during rough driving over many years. They are not loose in the connectors! If you need to, a small – very small screwdriver can be used GENTLY to “wedge the connectors out. Note that such use is not standard or recommended practice, but it may help start the connectors moving, again, GENTLY.
I labeled my connectors, although that is not necessary – they cannot easily be inserted into the wrong socket.
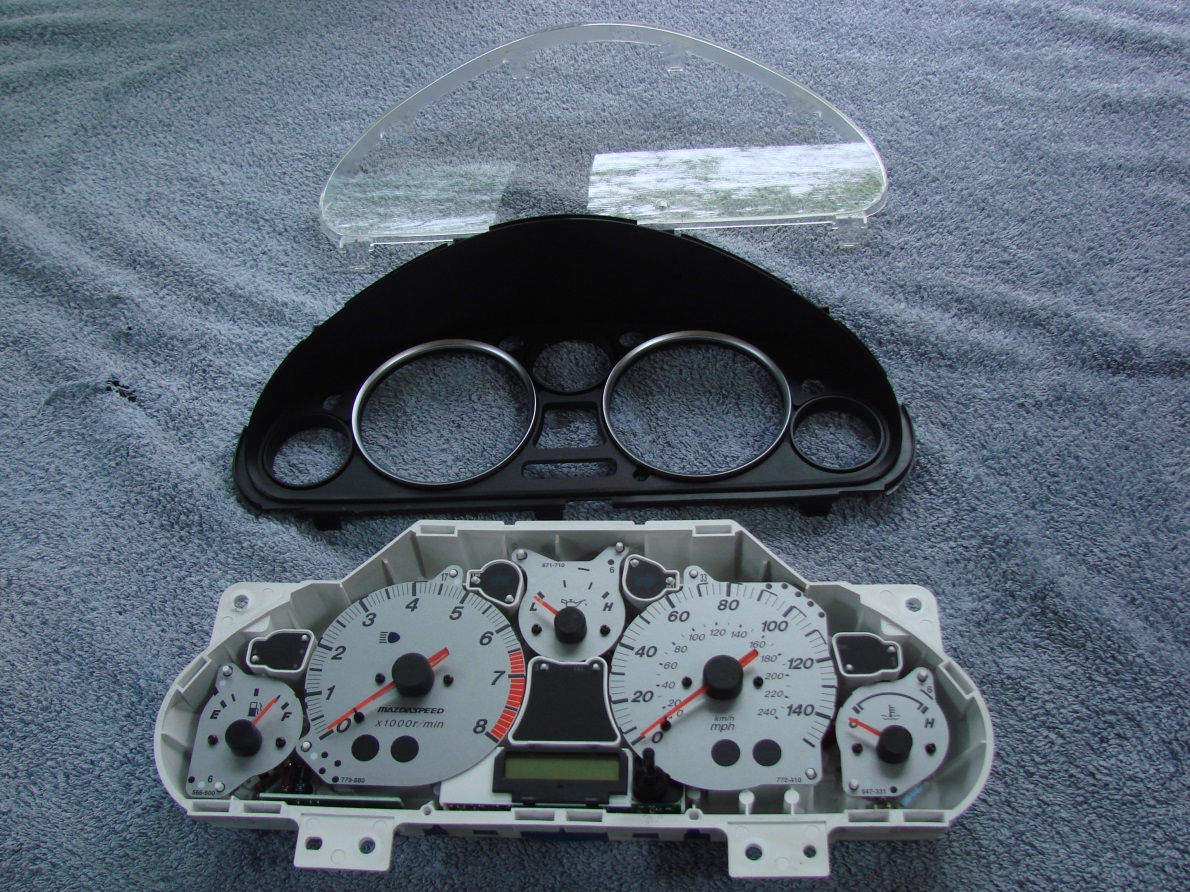
Finally, once you have all three connectors separated, remove the cluster from the car and place it on clean soft surface ( a towel works well – just don’t tell your wife how you’re using her good towels). You want to ensure that the printed circuits on the back of the cluster are not damaged.
All that remains to get to the instrument faces is to remove the clear plastic bezel, which protects all of the instrument faces. It is held on by several clear plastic tongues that clip into the white instrument cluster. Separat these one at a time, gently and the bezel will pop off.You might want to place a popsicle stick or something similar in the gap between the two parts to ensure that the clips do not magically refasten as you go around the cluster.
Tools needed:
Screw driver (a few different sizes may be useful)
A small socket set (1/4” size set should be adequate)
Sandwich bags
Several towels to wrap delicate or scratchable parts in
Sharpie marker
Difficulty: 4 out of 10 (10 being the most difficult)
Step 1: Clean everything you’ll be removing. You don’t want to have any loose dirt scratch visible parts. Wrap and label everything you remove. Screws should go in sandwich bags – LABELED!!
Step 2: Turn off the engine, and disconnect the battery. You will be playing with expensive delicate electrical components. Don’t save a minute by not disconnecting the battery. Also, chock the wheels and ensure the parking brake is on. It is embarrassing to run yourself over. There are better ways to impress the emergency room nurse.
Step 3: O.K. the good stuff now. Remove the plate that’s under the steering column. There are two screws located at the lower edge of the plate. The upper end is supported by the bottom part of the steering column cover. Once the screws are removed, simply pull the plate towards the foot pedals and it will slide off.
It may be possible to skip this step, but this plate has heavy steel reinforcing on the back side, I prefer to not have it supported by two relatively small screws.
A detailed look at one of the clips will show it as seen below.
At this point, the only remaining obstacle to removing the instrument cluster as a unit, are the three white electrical connectors at the top of the instrument cluster. These are the ones with the ribbon cables going to them.
Finally, once you have all three connectors separated, remove the cluster from the car and place it on clean soft surface ( a towel works well – just don’t tell your wife how you’re using her good towels). You want to ensure that the printed circuits on the back of the cluster are not damaged.
All that remains to get to the instrument faces is to remove the clear plastic bezel, which protects all of the instrument faces. It is held on by several clear plastic tongues that clip into the white instrument cluster. Separat these one at a time, gently and the bezel will pop off.You might want to place a popsicle stick or something similar in the gap between the two parts to ensure that the clips do not magically refasten as you go around the cluster.
Now you can do whatever work you wish within the instrument cluster.


Thread
Thread Starter
Forum
Replies
Last Post
jerchristo
NC (2006+)
1
08-12-2015 01:38 PM