
Modernbeat's '92 Special Edition build thread


Thread Starter
MFz Lurker
Joined: Jul 2011
Posts: 34
From: Dallas, TX
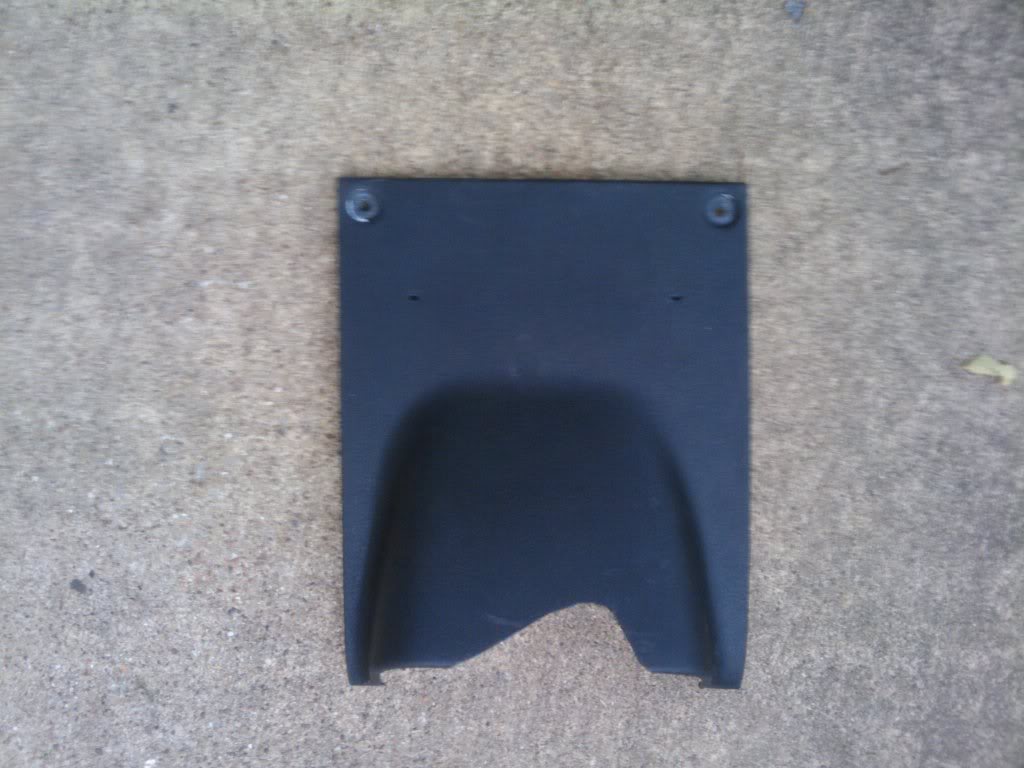
During the interior buying spree I never got a black knee panel for the dash. But, I had two non-airbag panels. One from a Canadian part out I bought years ago that had a couple extra holes in it and one from a UK part out that supplied a number of parts. I took the Canadian one with holes and trimmed it to fit around the US market combo switch cover.
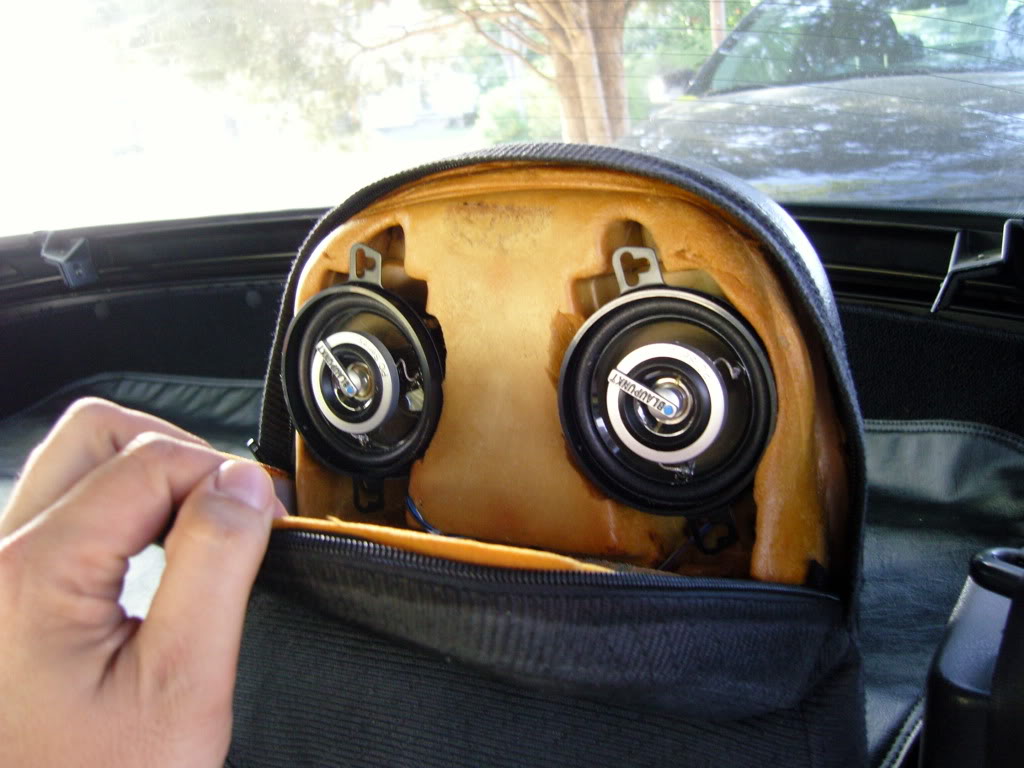
I did the standard foamectomy on the bottom and the back of the black seats I bought. The fabric was in good shape, but faded. I used black fabric spray dye to bring them back, but the dye mostly faded again. I replaced the completely blown up original speakers with a pair of Blaupunkt 3.5 inch full range speakers. These seats were already wired for headrest speakers, so I mapped out the wires and corrected it so the headrest speakers would work correctly.
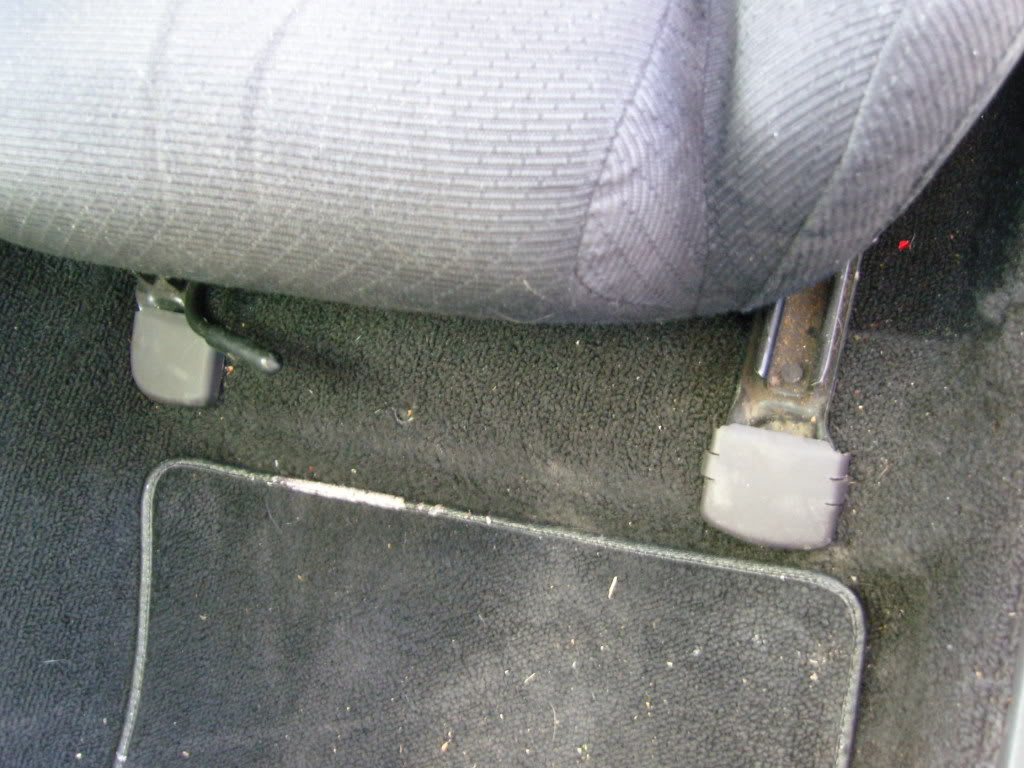
I bought new covers for the seat rail bolts. As far as I know, these were only used in the Special and Limited editions. They’re just one more piece of trim, but I am trying to minimize the exposed fasteners. Wow, that seat rail was dirty when I took the photo. It’s clean now.
I did the standard foamectomy on the bottom and the back of the black seats I bought. The fabric was in good shape, but faded. I used black fabric spray dye to bring them back, but the dye mostly faded again. I replaced the completely blown up original speakers with a pair of Blaupunkt 3.5 inch full range speakers. These seats were already wired for headrest speakers, so I mapped out the wires and corrected it so the headrest speakers would work correctly.
I bought new covers for the seat rail bolts. As far as I know, these were only used in the Special and Limited editions. They’re just one more piece of trim, but I am trying to minimize the exposed fasteners. Wow, that seat rail was dirty when I took the photo. It’s clean now.
Thread Starter
MFz Lurker
Joined: Jul 2011
Posts: 34
From: Dallas, TX
I mentioned the knee panel from the UK partout. An unlucky guy over there had a really nice 1996 Japanese import S-Special. It really was a great looking car until he had an accident and totaled it. During the part out I bought a few items from him.
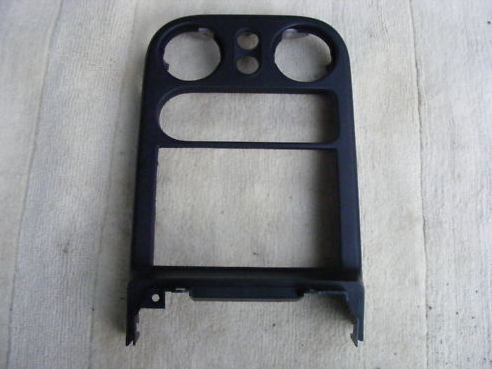
In addition to the knee panel, I bought a good condition radio surround – which is exactly the same as a US surround, and not worth shipping by itself, but I was buying a decent sized box of stuff, so he sent it along.
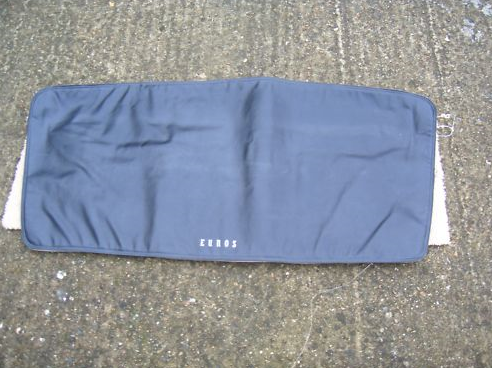
This EUNOS rear window protector. Looks blue in the photo, but it’s really black. Not sure if this is going to stay as I’m not a fan of the white logo despite its rarity in the US. It is handy to quickly stash stuff out of view when leaving the car.
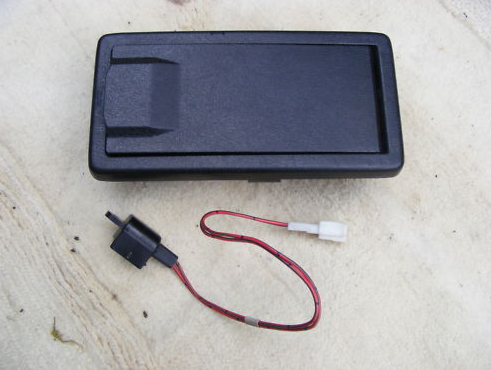
The sunglasses holder to replace the ashtray.
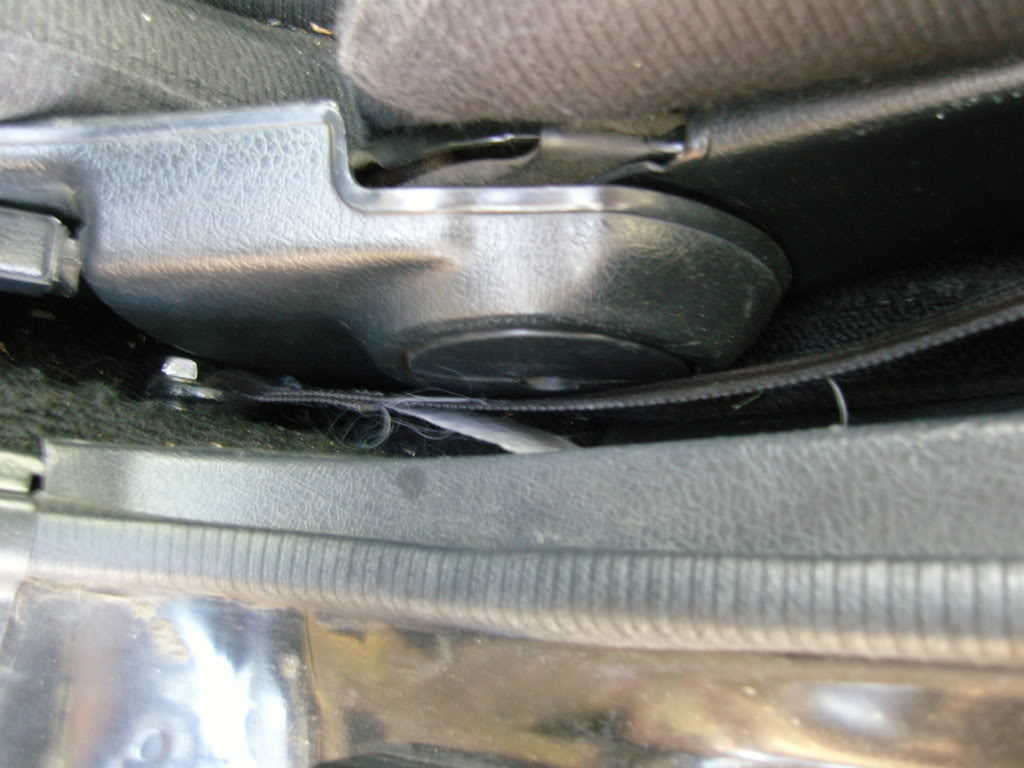
And MOST importantly, his seat belts. These are the non-airbag belts I needed. And they were in black, and in great, unfaded condition. He also included all the hardware, as the guide and plastic cover is different between NA6 and NA8 belts.

Here they are installed.
In addition to the knee panel, I bought a good condition radio surround – which is exactly the same as a US surround, and not worth shipping by itself, but I was buying a decent sized box of stuff, so he sent it along.
This EUNOS rear window protector. Looks blue in the photo, but it’s really black. Not sure if this is going to stay as I’m not a fan of the white logo despite its rarity in the US. It is handy to quickly stash stuff out of view when leaving the car.
The sunglasses holder to replace the ashtray.
And MOST importantly, his seat belts. These are the non-airbag belts I needed. And they were in black, and in great, unfaded condition. He also included all the hardware, as the guide and plastic cover is different between NA6 and NA8 belts.
Here they are installed.
Thread Starter
MFz Lurker
Joined: Jul 2011
Posts: 34
From: Dallas, TX
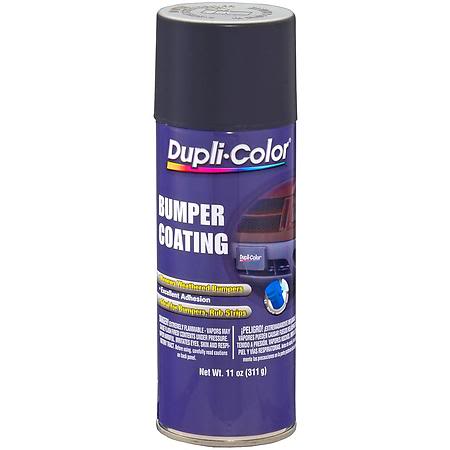
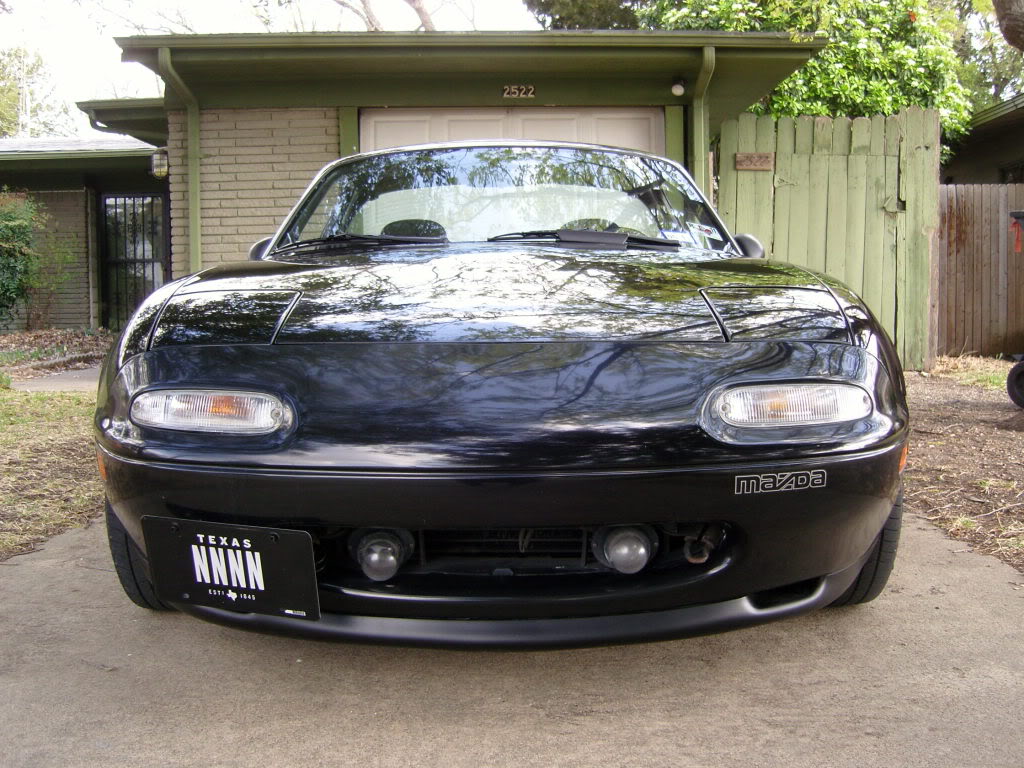
I started working on the exterior. I bought an R-lip from Slutz4 during his big partout on CR.net. It was in good shape, but was still in the original Mazda black primer. This primer isn’t really black, but more of a dark grey. So, I sanded it down with 400, then 800, then 1200 grit. Wiped it down with mineral spirits and shot it with Duplicolor Bumper Coating.
Here you can see how the stock front lip looks grey, not black.
The Duplicolor I used.
And the painted lip. The bumper black looks great on the lip.
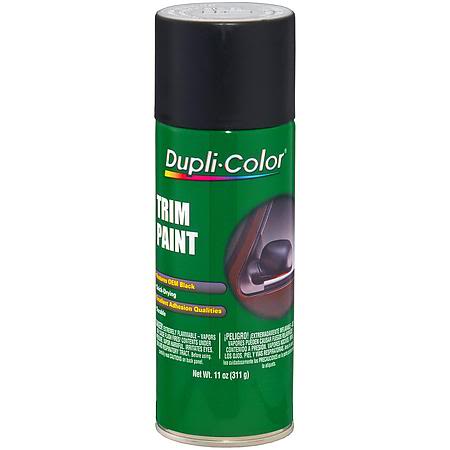
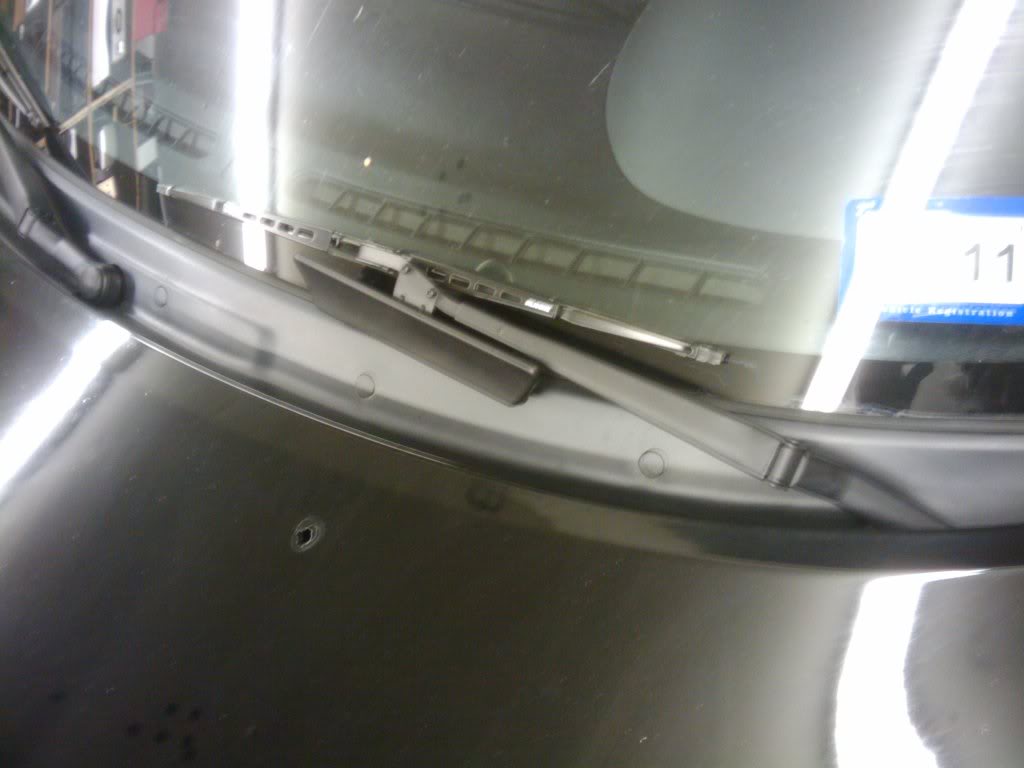
Next were the wiper arms. Most Miata arms tend to look faded, chipped and rusty where the airfoil attaches to the arm. I don’t have any before photos, but the arms got the same treatment as the lip. Sanded down with 400/800/1200 paper, then mineral spirits, then shot with Duplicolor Trim Paint. It’s got a semi-gloss finish that looks a little better than the flat black some people use. This car was missing the wiper nut covers. I had one new one in my stash of parts and another one was stolen off the track beater. The final touch was a pair of PIAA Silicone wiper blades. I like these blades for their longevity and UV resistance, which is always an issue with rubber blades in Texas.
The paint.
The finished arms.
Here you can see how the stock front lip looks grey, not black.
The Duplicolor I used.
And the painted lip. The bumper black looks great on the lip.
Next were the wiper arms. Most Miata arms tend to look faded, chipped and rusty where the airfoil attaches to the arm. I don’t have any before photos, but the arms got the same treatment as the lip. Sanded down with 400/800/1200 paper, then mineral spirits, then shot with Duplicolor Trim Paint. It’s got a semi-gloss finish that looks a little better than the flat black some people use. This car was missing the wiper nut covers. I had one new one in my stash of parts and another one was stolen off the track beater. The final touch was a pair of PIAA Silicone wiper blades. I like these blades for their longevity and UV resistance, which is always an issue with rubber blades in Texas.
The paint.
The finished arms.
Thread Starter
MFz Lurker
Joined: Jul 2011
Posts: 34
From: Dallas, TX
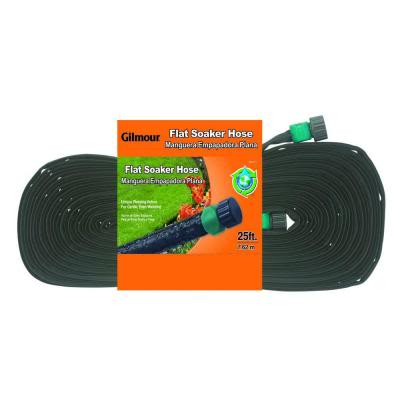
The door pulls were another project. I originally wanted to use the entire Porsche RS America door pull and ordered the parts. When they came in I realized that the pull was too short and wouldn’t cover both holes in my ’95 door panels. I tried to make the bends more shallow to stretch out the mounting points, but the bezels required some height and no matter what I did with the original parts, I couldn’t get them to fit. So, I went to the local car building supply, Home Depot, and search through the aisles for something the right width and strong enough to make a temporary handle until I can sort out a pair of original looking door pulls. The Gilmour Flat Soaker Hose was the right width and it was a sturdy flat vinyl hose inside a stitched black nylon cloth sheath – AND – it was $7 for 25 feet. I made up the special mounts that the bezel required, cut up the hose and screwed it to the original mounting locations. It looked better than I thought it would and I’ve got all the room my left knee needs.
Here’s the hose.
Here’s what the RS America door pulls look like. This is on a Porsche 914 door.
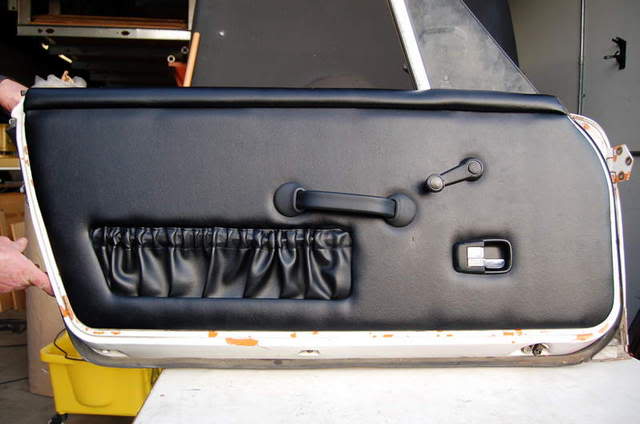
And the finished product on my Miata door. Since this photo was taken, I've taken some of the slack out of the handle and it's a little bit closer to the door.
Here’s the hose.
Here’s what the RS America door pulls look like. This is on a Porsche 914 door.
And the finished product on my Miata door. Since this photo was taken, I've taken some of the slack out of the handle and it's a little bit closer to the door.
Thread Starter
MFz Lurker
Joined: Jul 2011
Posts: 34
From: Dallas, TX
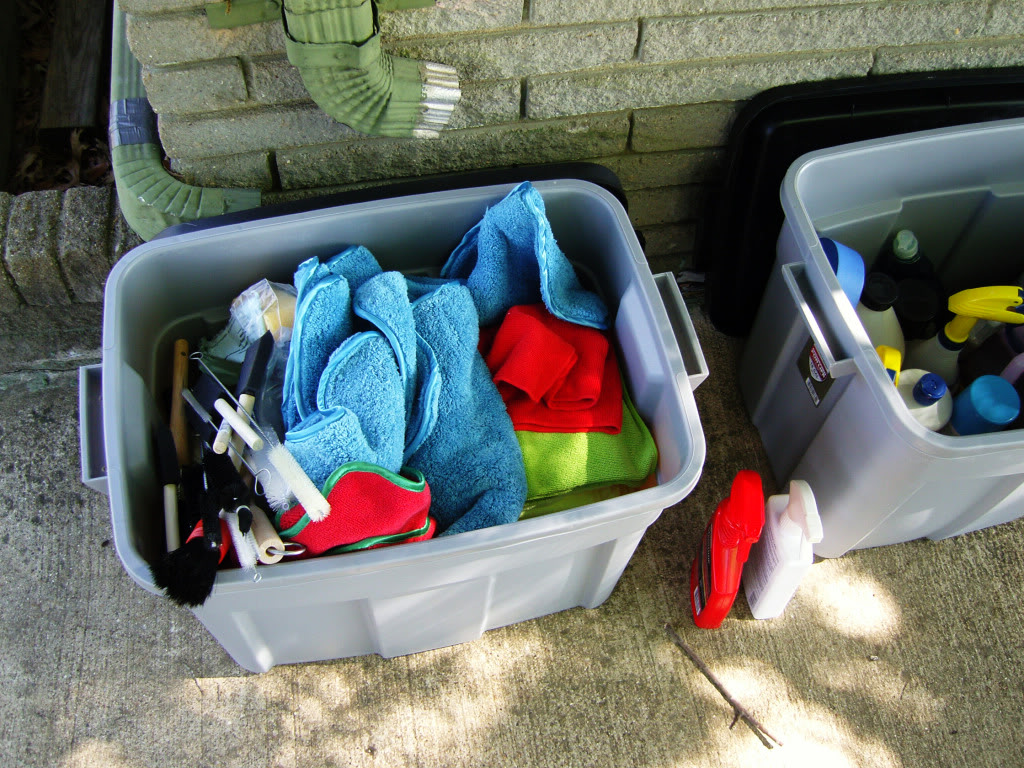
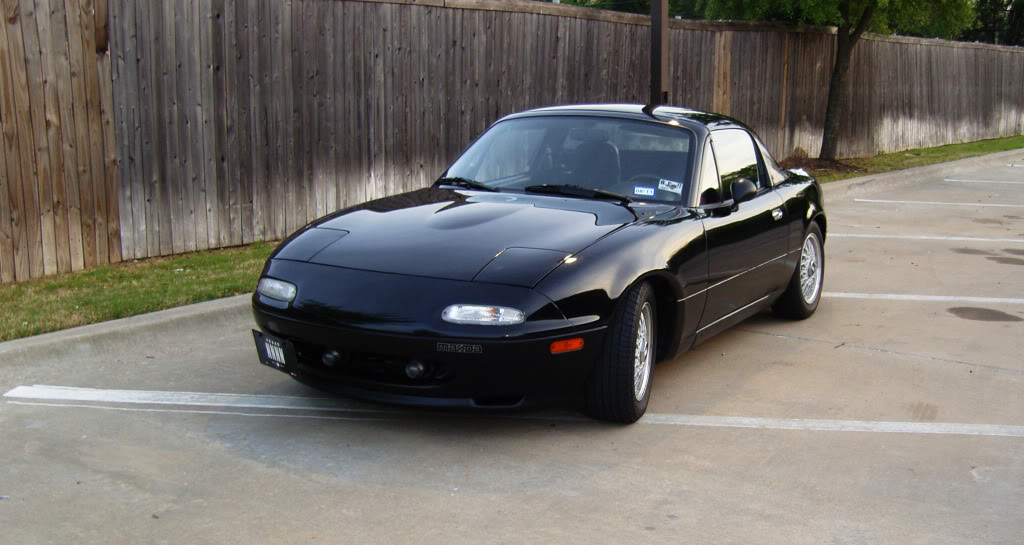
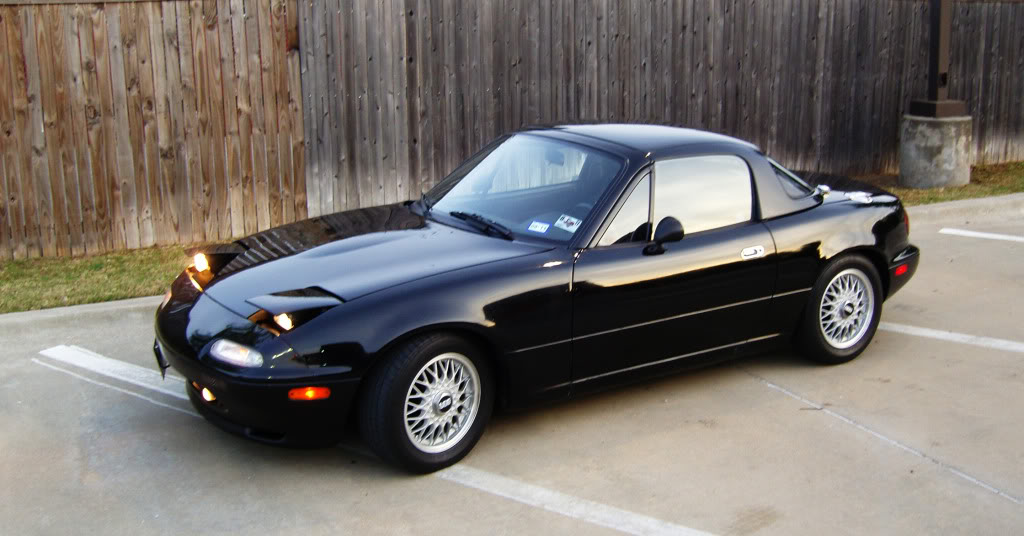
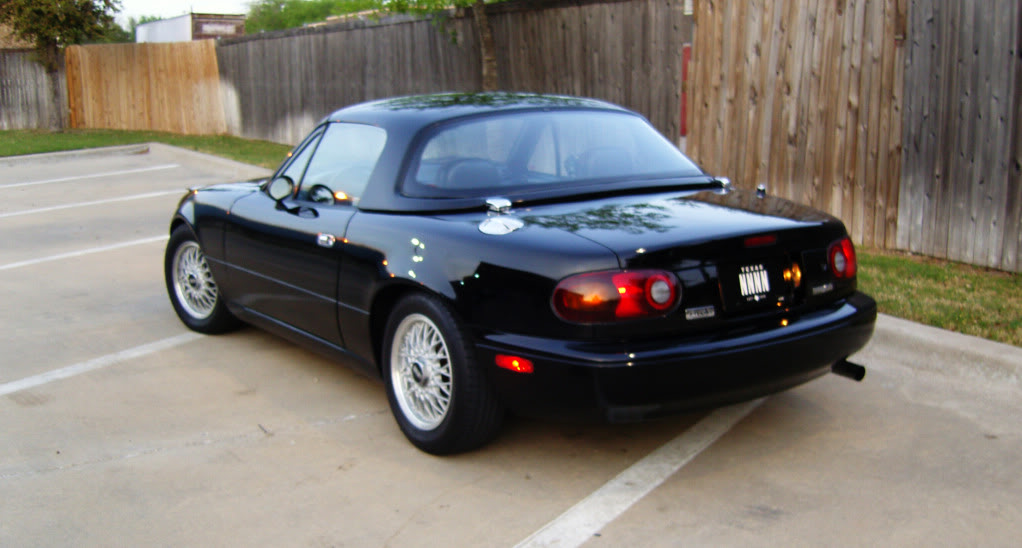
Did a wash-buff-wax on it for a road trip, so it had to look good and the pollen had been a hassle around here.
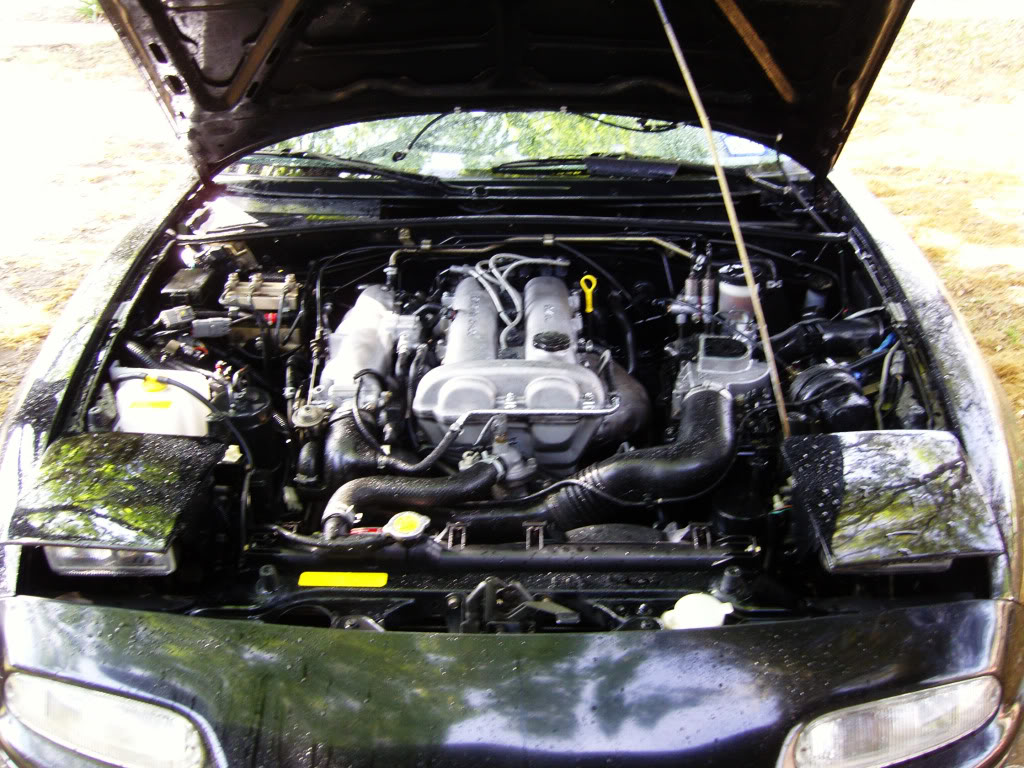
Tidied up the engine a little. It's been a long time since I've had a bone-stock engine bay. Got closer to finishing the RS-Active install. One headlight raises a little higher than the other and the plastic fittings that the shroud screws go into are missing. Both are fixable.
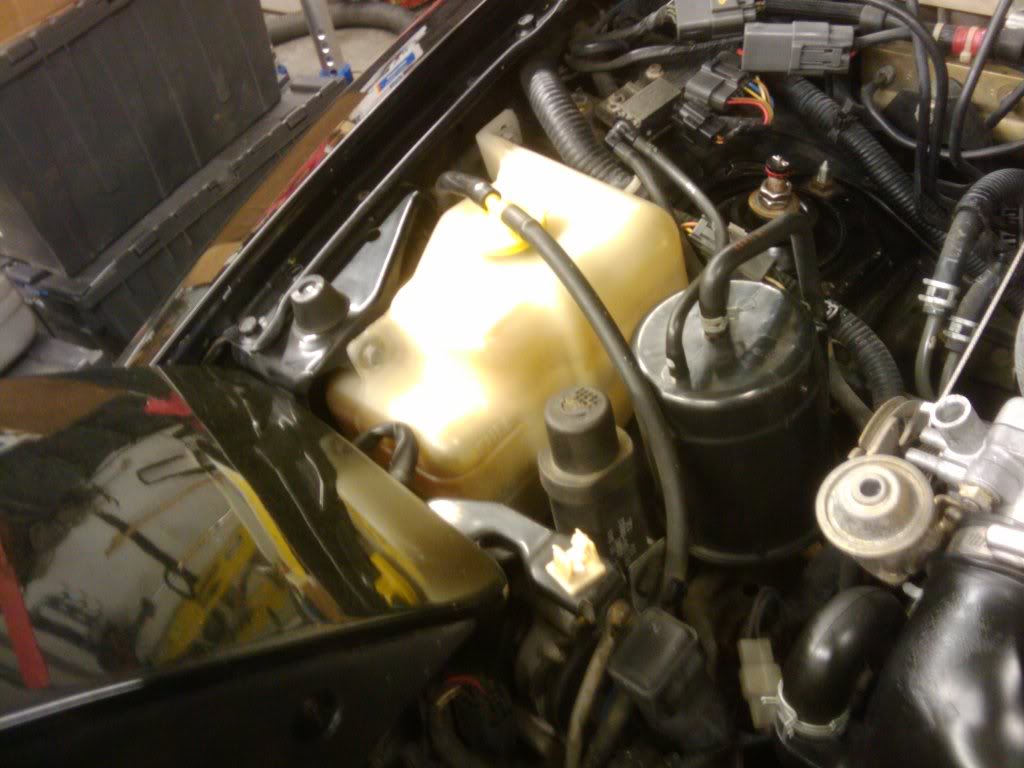
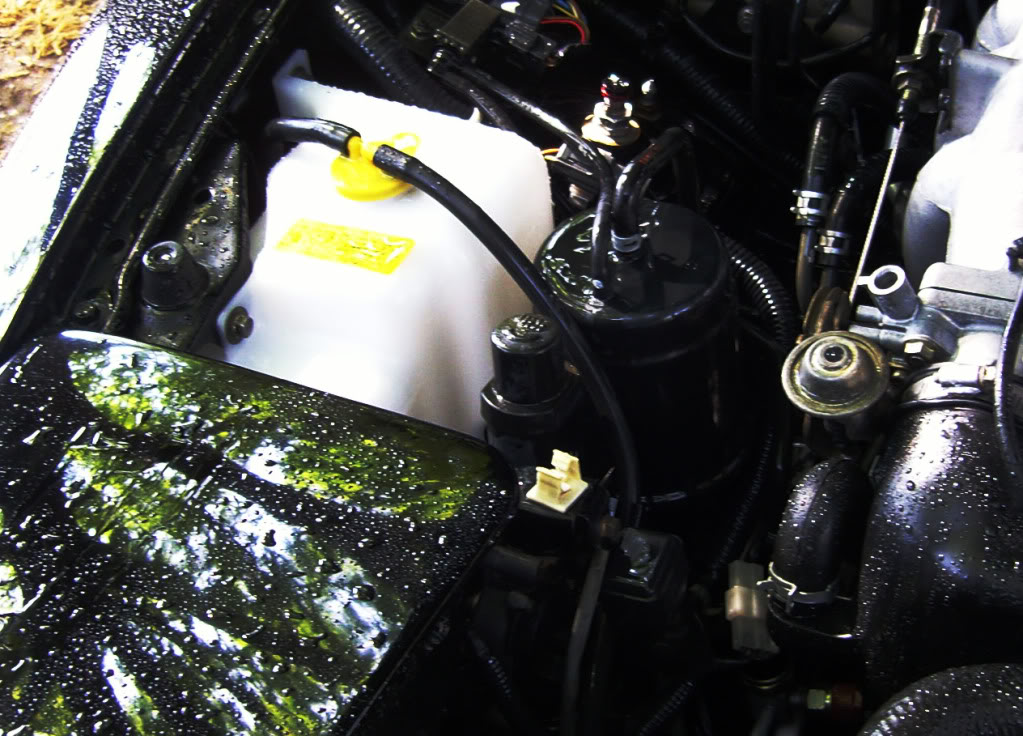
Changed out the overflow tank. The new one came with a clear top, so I kept the original yellow top.
Old stained brown tank
New clear tank
Tidied up the engine a little. It's been a long time since I've had a bone-stock engine bay. Got closer to finishing the RS-Active install. One headlight raises a little higher than the other and the plastic fittings that the shroud screws go into are missing. Both are fixable.
Changed out the overflow tank. The new one came with a clear top, so I kept the original yellow top.
Old stained brown tank
New clear tank
Thread Starter
MFz Lurker
Joined: Jul 2011
Posts: 34
From: Dallas, TX
My first generation Runabout fuel lid arrived from the UK. Thanks to Vindi49 on Clubroadster/MX5Nutz/MX5Modsters for sourcing and shipping it.
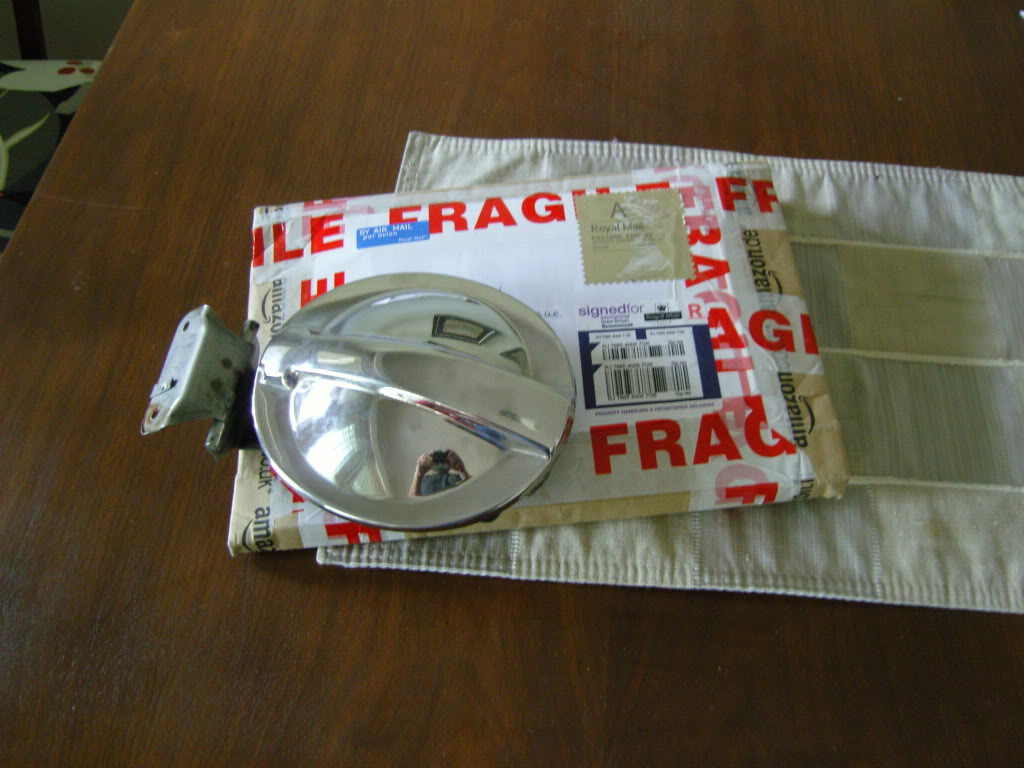
I actually like the look of the Zoom lid better than the Runabout, but I've got two issues with it. It's raw cast aluminum and will have to be polished regularly and the well around the lid is exposed and can collect leaves and other crap. The Runabout is stainless steel and closes the fuel cap area just like a stock lid. I don’t like the 2nd generation Runabout at all. The fake exposed bolt heads look terrible to me.
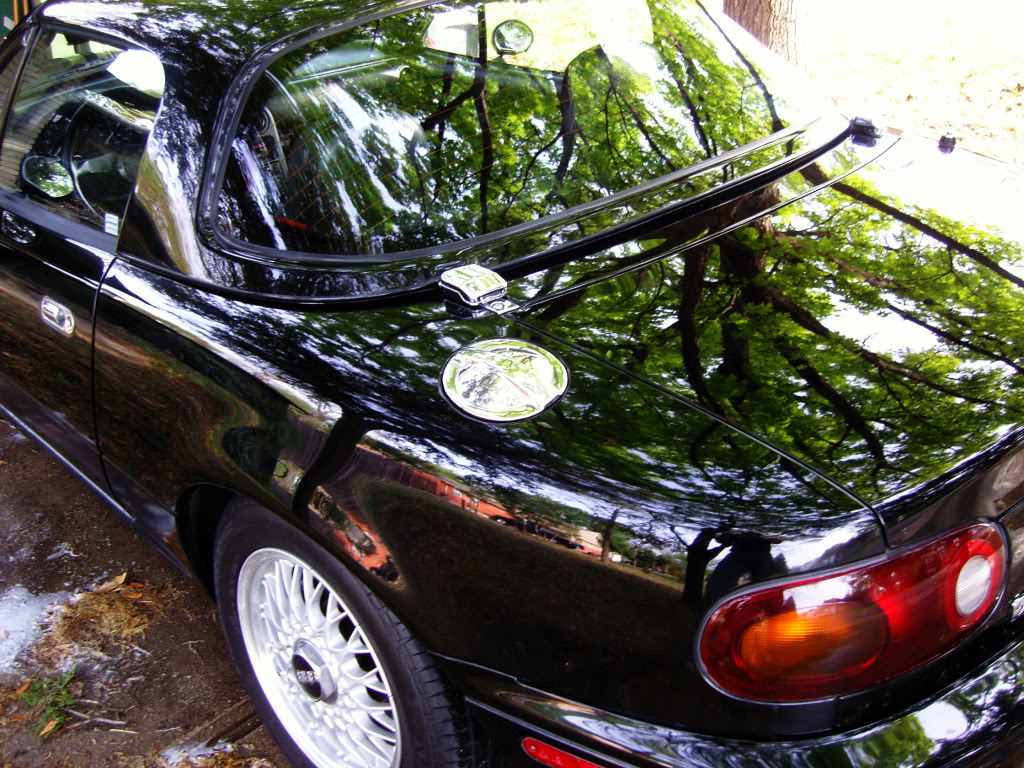
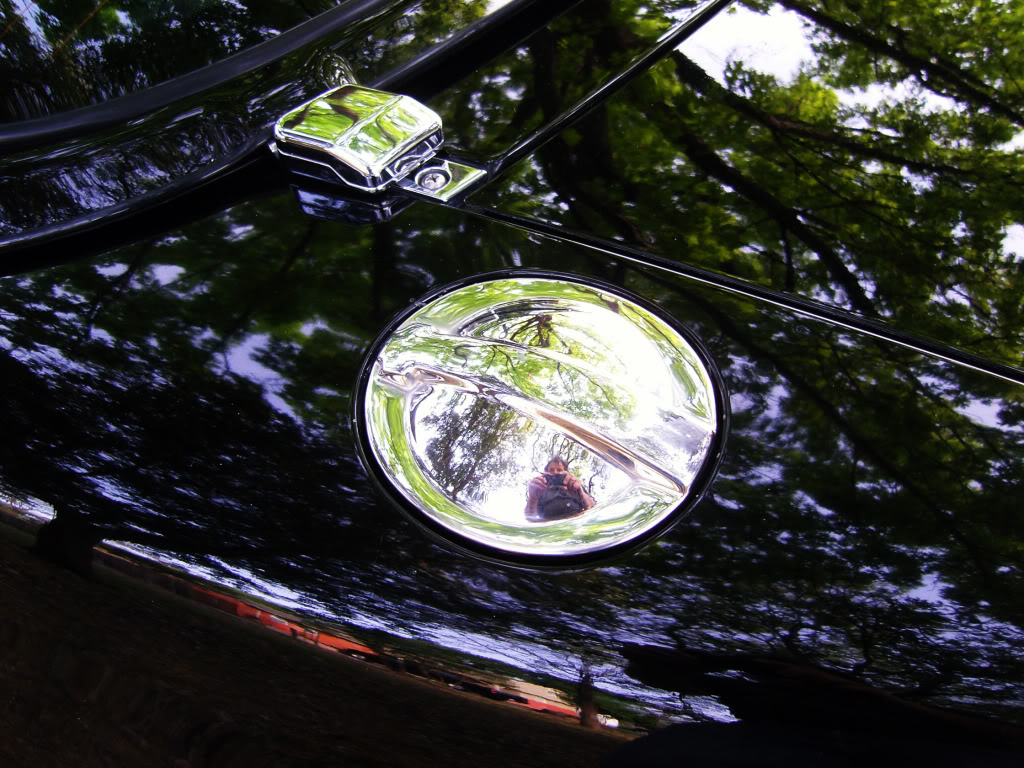

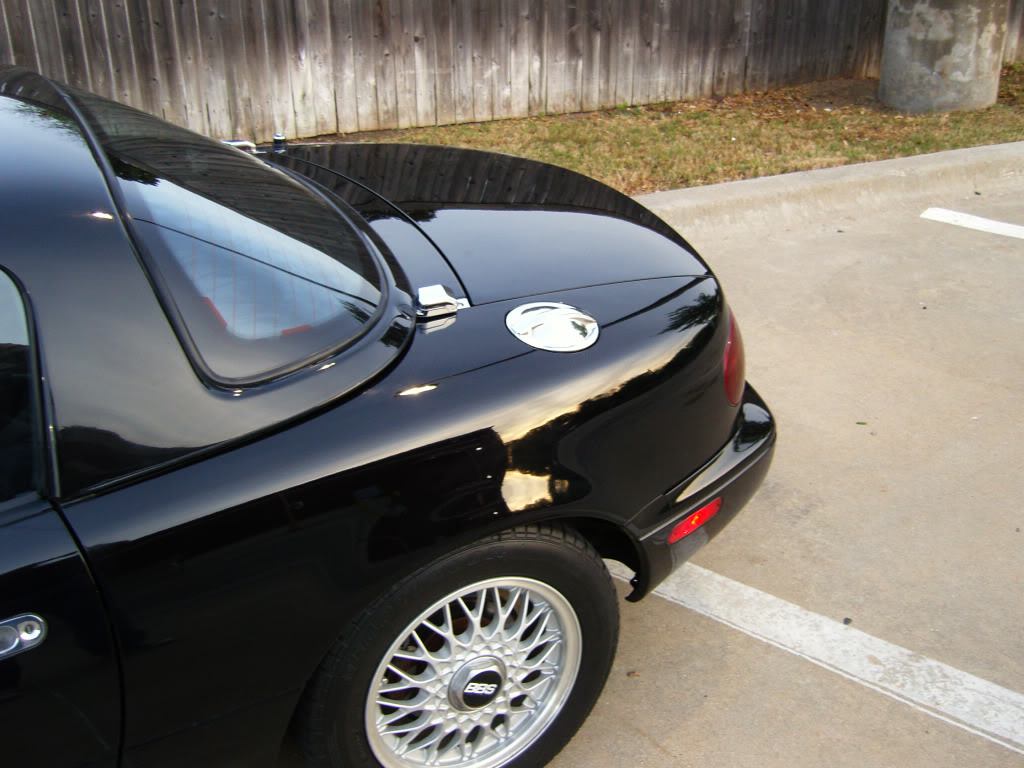
Took some new shots.
I actually like the look of the Zoom lid better than the Runabout, but I've got two issues with it. It's raw cast aluminum and will have to be polished regularly and the well around the lid is exposed and can collect leaves and other crap. The Runabout is stainless steel and closes the fuel cap area just like a stock lid. I don’t like the 2nd generation Runabout at all. The fake exposed bolt heads look terrible to me.
Took some new shots.
Thread Starter
MFz Lurker
Joined: Jul 2011
Posts: 34
From: Dallas, TX
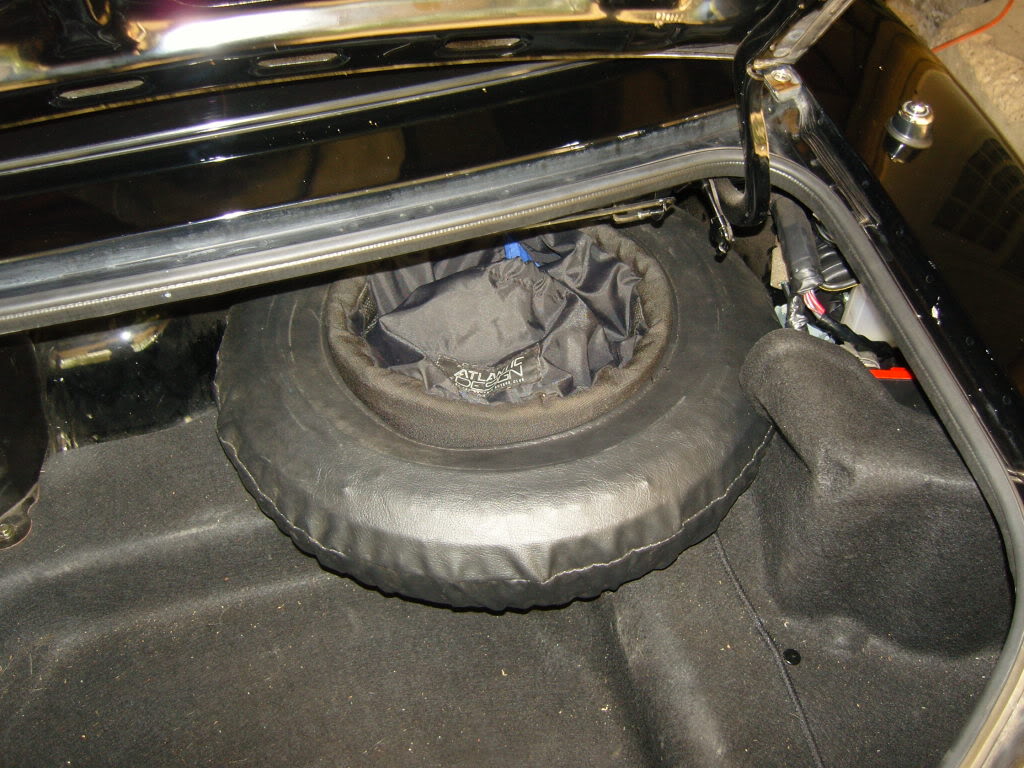
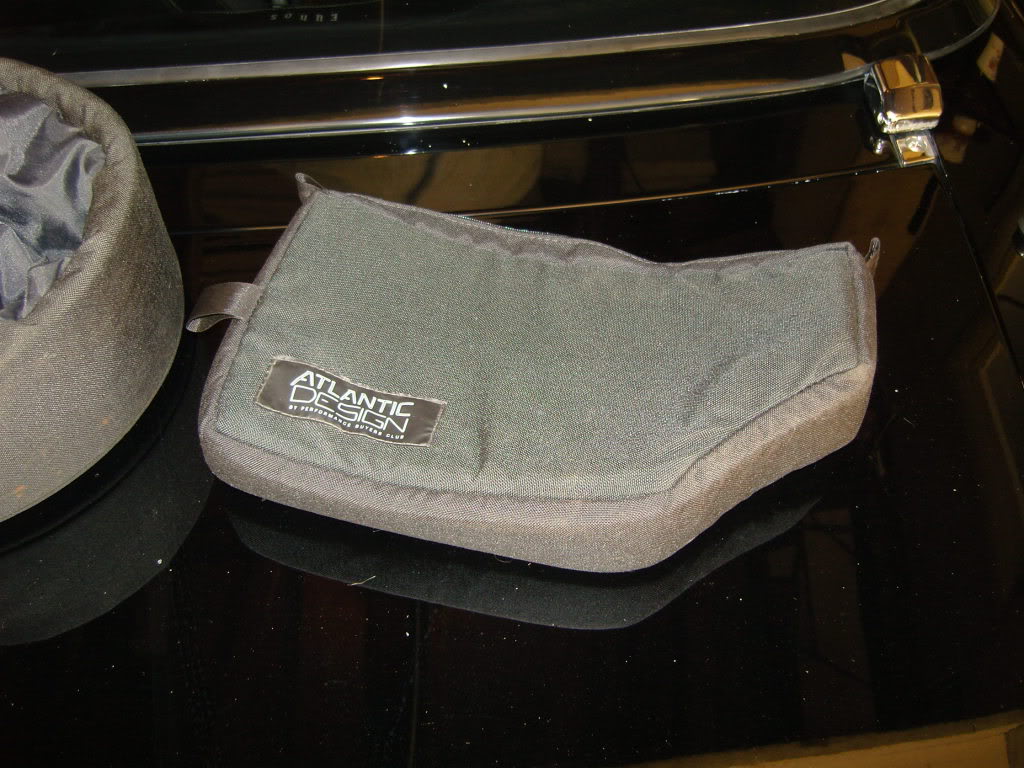
A new part came in the mail. I bought this Atlantic Design spare tire bag from Scrappy Jack on Clubroadster who sold it to me for the replacement cost of a new non-AD bag.
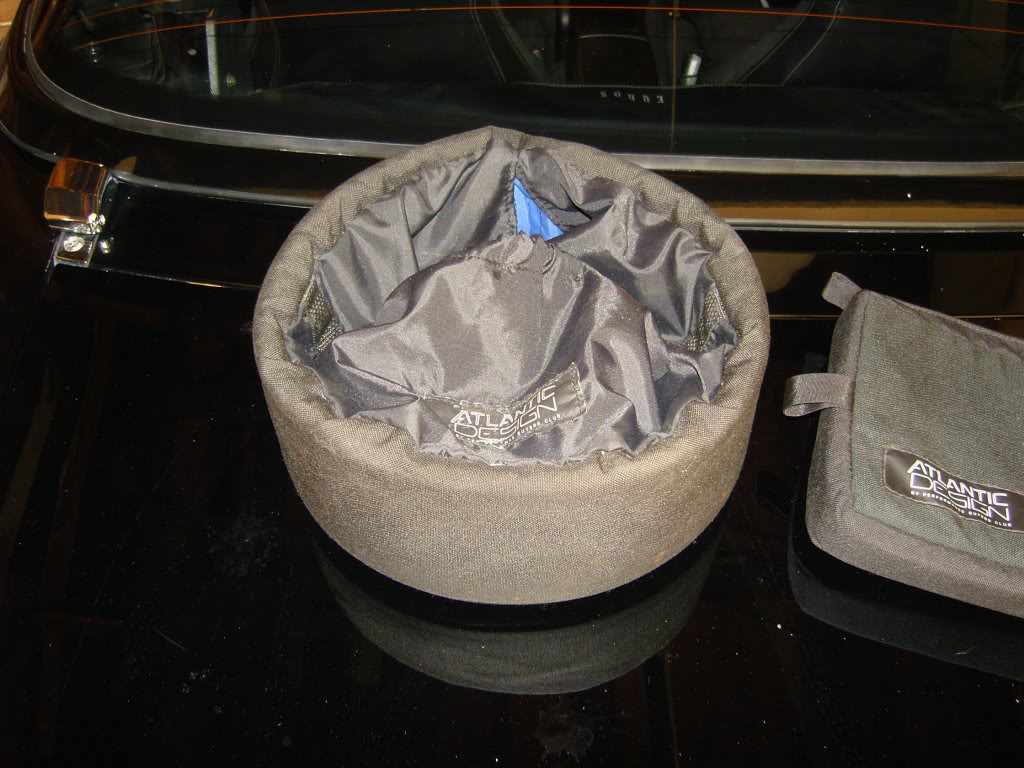
Here it is installed.
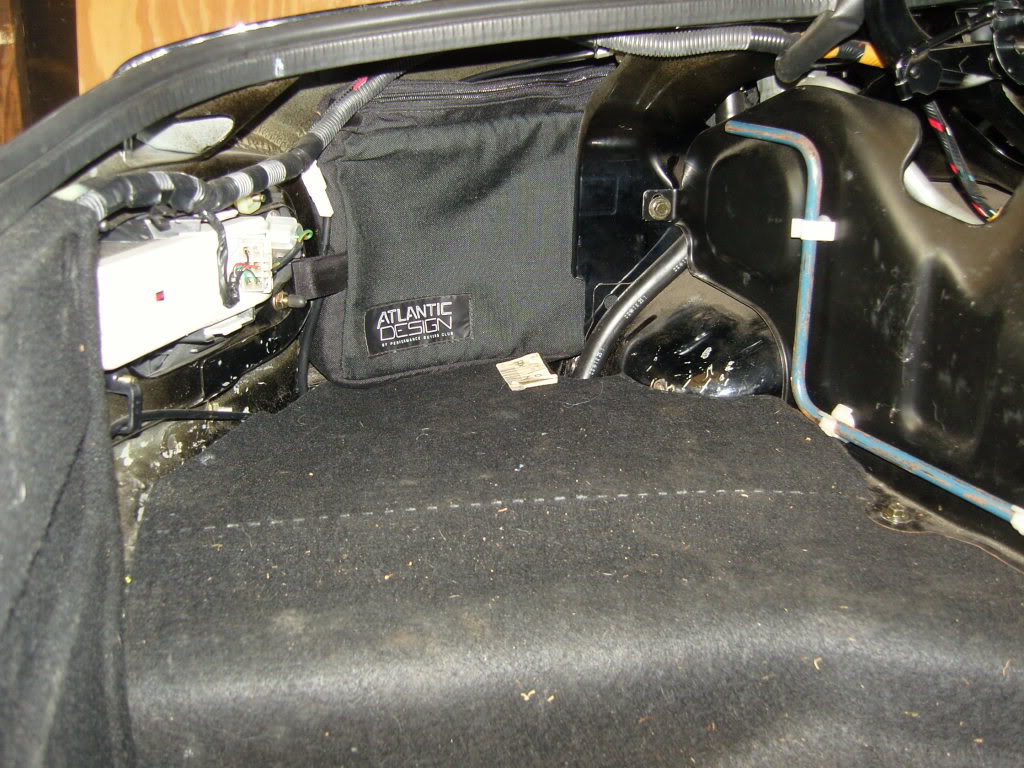
While we’re in the trunk, here’s the other stuff I’ve got back there. I’ve had a couple of these Atlantic Design trunk protector bags. They keep loose stuff from denting the left rear fender from inside the trunk. I bought this one just a few years ago.
And here it is protecting the fender.
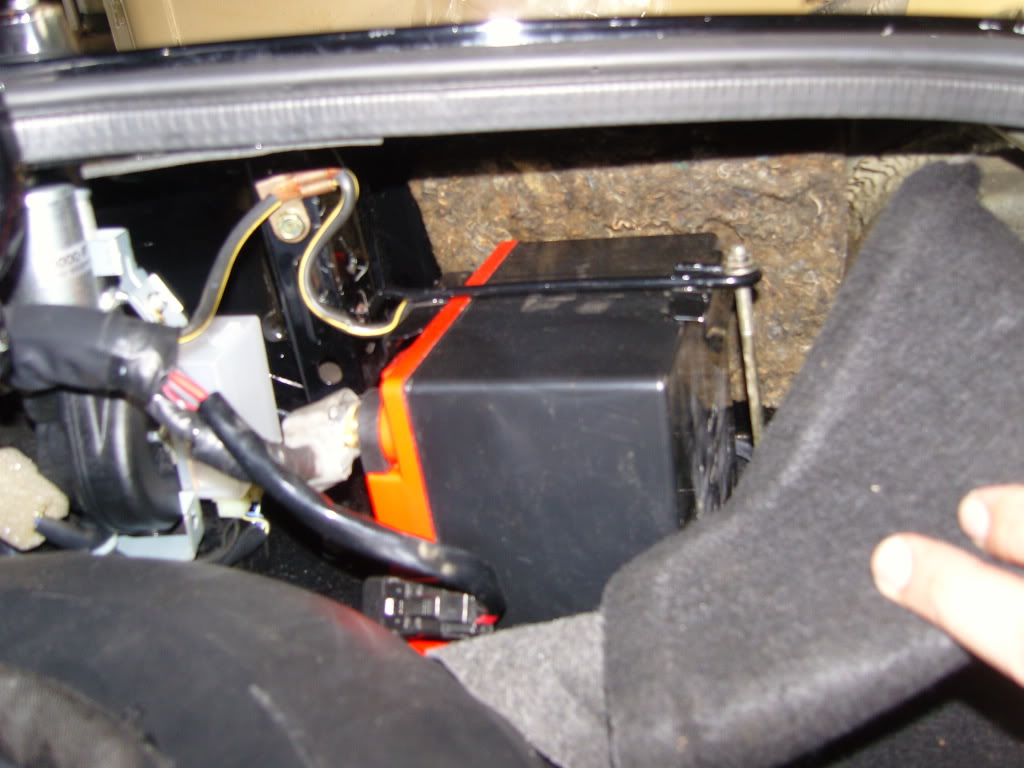
The photo sucks, but I replaced the crappy elcheapo lead-acid battery the previous owner stuck in the trunk just to sell the car. It’s an Odyssey PC925L. It’s size is nearly the same as the original Panasonic battery if you put the Odyssey on it’s side (Length 6 5/8 in, Width 4 7/8 in, Height 7 in). The "L" suffix is the reversed terminals version. I also bought a pair of automotive adapter terminals so I could use the stock wiring without modification. I used new stock battery hold-down parts and tray that I had in my stash.
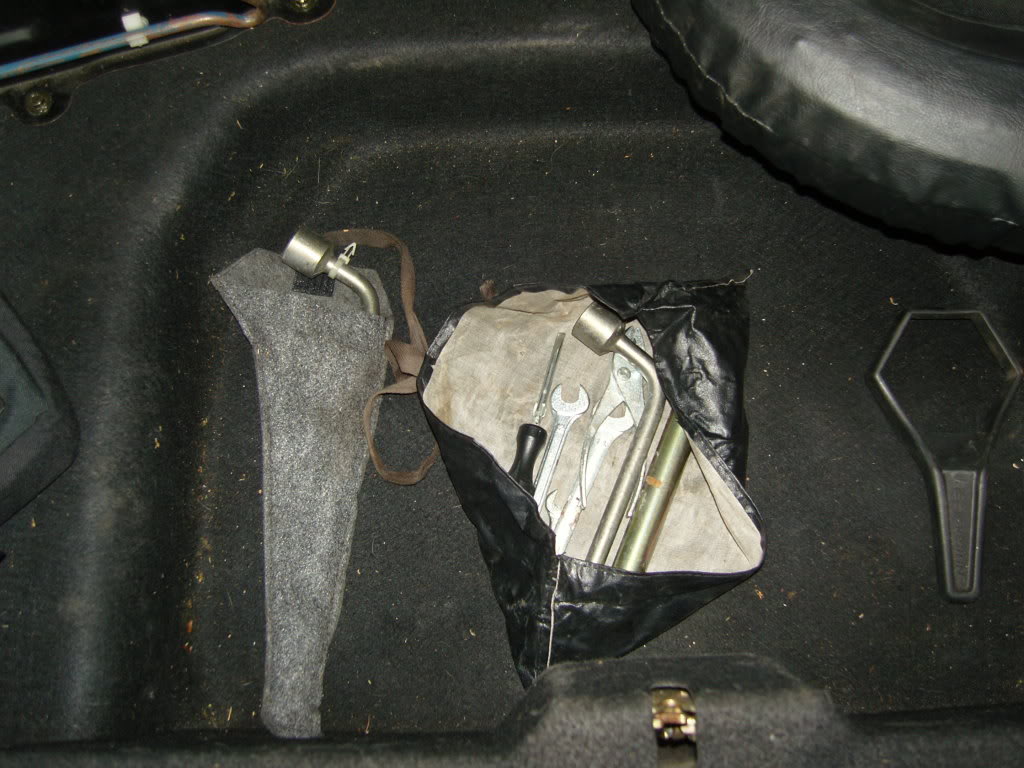
Here’s the tools. The only tools that came with the car was the lug wrench, the jack and the jack handle. I had a good lug wrench bag in my stash and bought the BBS wrench from an RX-7 racing shop near me. The OEM toolkit came from the UK some time back.
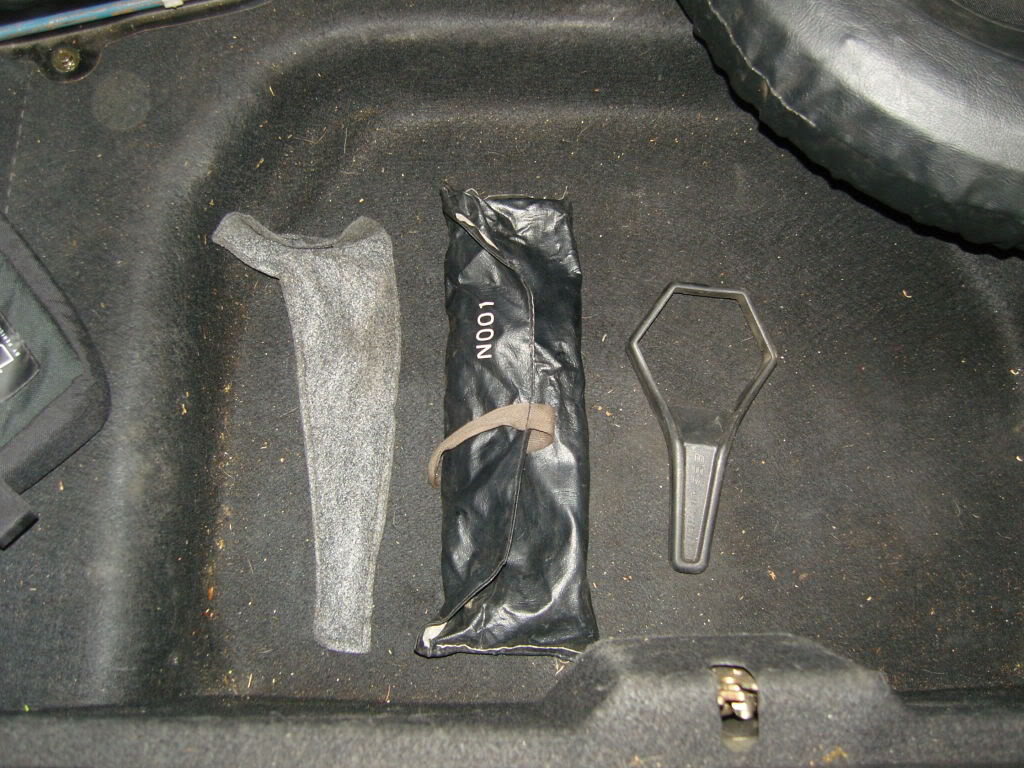
The white clip on the lug wrench was to hold the key for the Mazda locking lugs. I’ve got the paperwork for those locks, but the parts are long gone – never to return.
Here it is installed.
While we’re in the trunk, here’s the other stuff I’ve got back there. I’ve had a couple of these Atlantic Design trunk protector bags. They keep loose stuff from denting the left rear fender from inside the trunk. I bought this one just a few years ago.
And here it is protecting the fender.
The photo sucks, but I replaced the crappy elcheapo lead-acid battery the previous owner stuck in the trunk just to sell the car. It’s an Odyssey PC925L. It’s size is nearly the same as the original Panasonic battery if you put the Odyssey on it’s side (Length 6 5/8 in, Width 4 7/8 in, Height 7 in). The "L" suffix is the reversed terminals version. I also bought a pair of automotive adapter terminals so I could use the stock wiring without modification. I used new stock battery hold-down parts and tray that I had in my stash.
Here’s the tools. The only tools that came with the car was the lug wrench, the jack and the jack handle. I had a good lug wrench bag in my stash and bought the BBS wrench from an RX-7 racing shop near me. The OEM toolkit came from the UK some time back.
The white clip on the lug wrench was to hold the key for the Mazda locking lugs. I’ve got the paperwork for those locks, but the parts are long gone – never to return.
Thread Starter
MFz Lurker
Joined: Jul 2011
Posts: 34
From: Dallas, TX
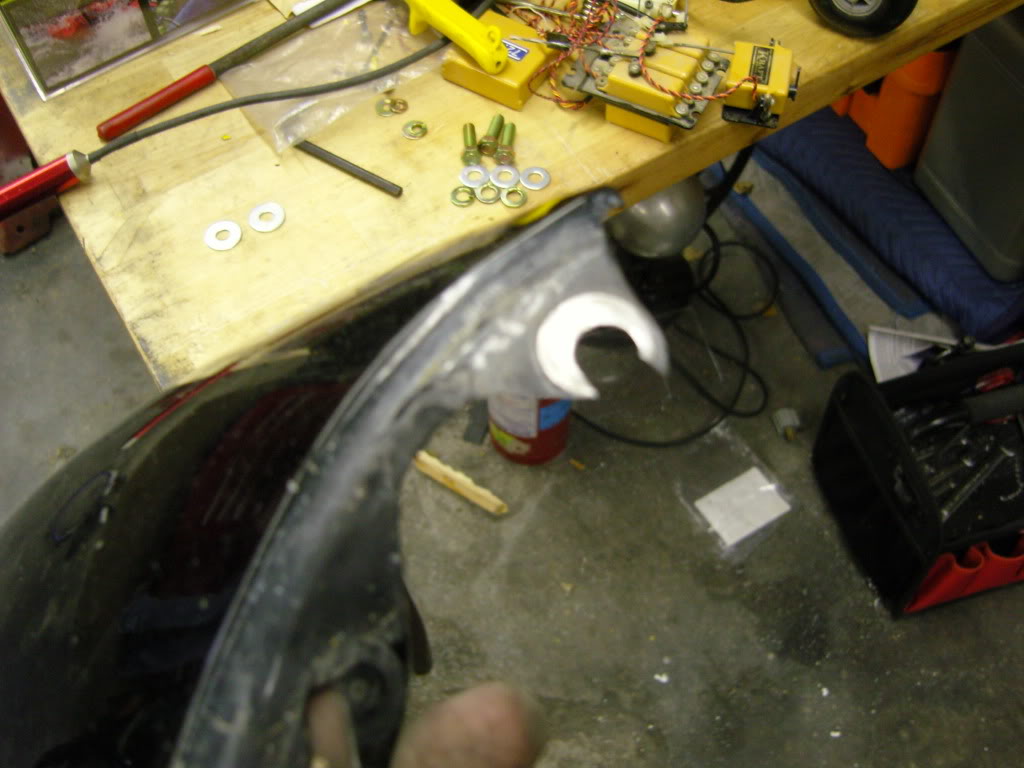
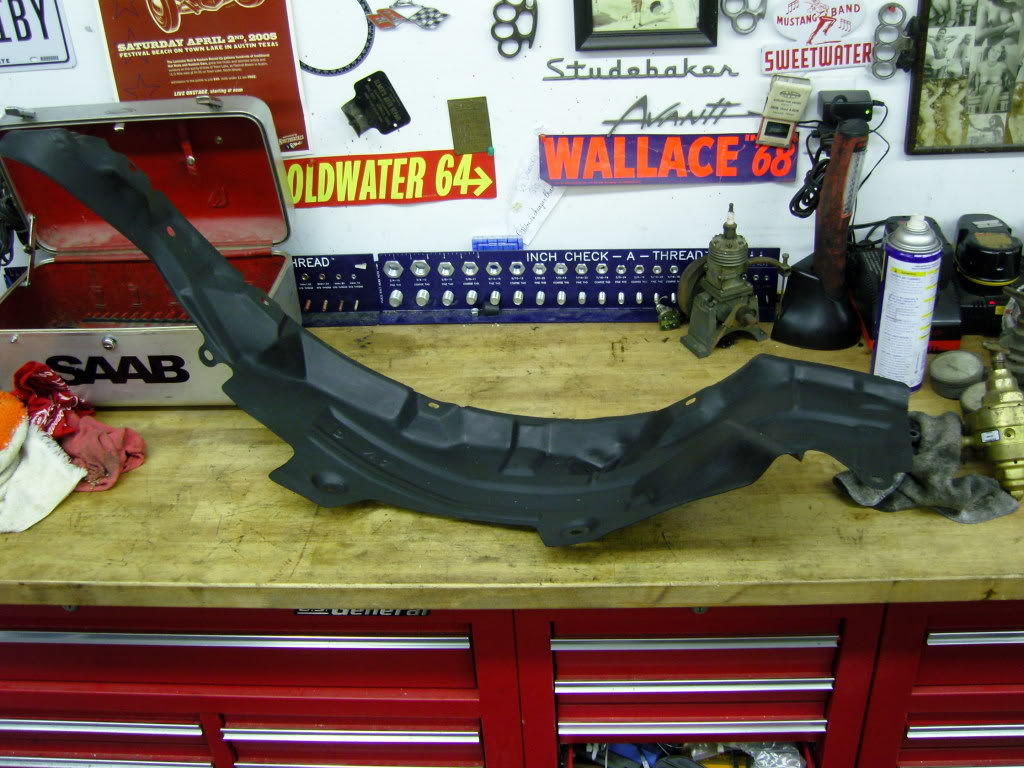
Bought a pair of Tuckin’99 front braces through a group buy Eddie Nakato from Adrenaline Racing (Eddie-N) did on M.net back in 2005. I installed them today. It wasn’t hard, but fairly time consuming. First step was to pull the wheel, fender liner and fender. I had been waiting to do this to finish removing the last of the airbag parts.
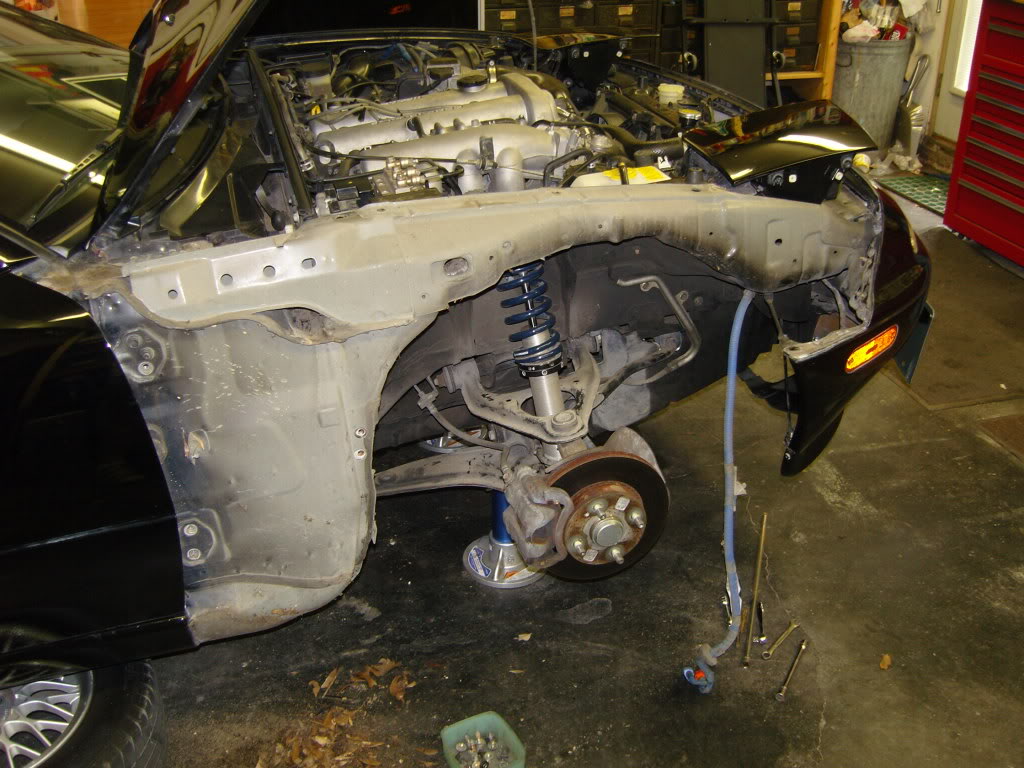
Then, remove the door hinge bolts and the wheelwell edge bolts and use the provided hardware to bolt the brace to the tub. On the left side I had to remove the relay box to position the backing plate and working around the window washer fluid bottle was a PITA, but it all went together really well.
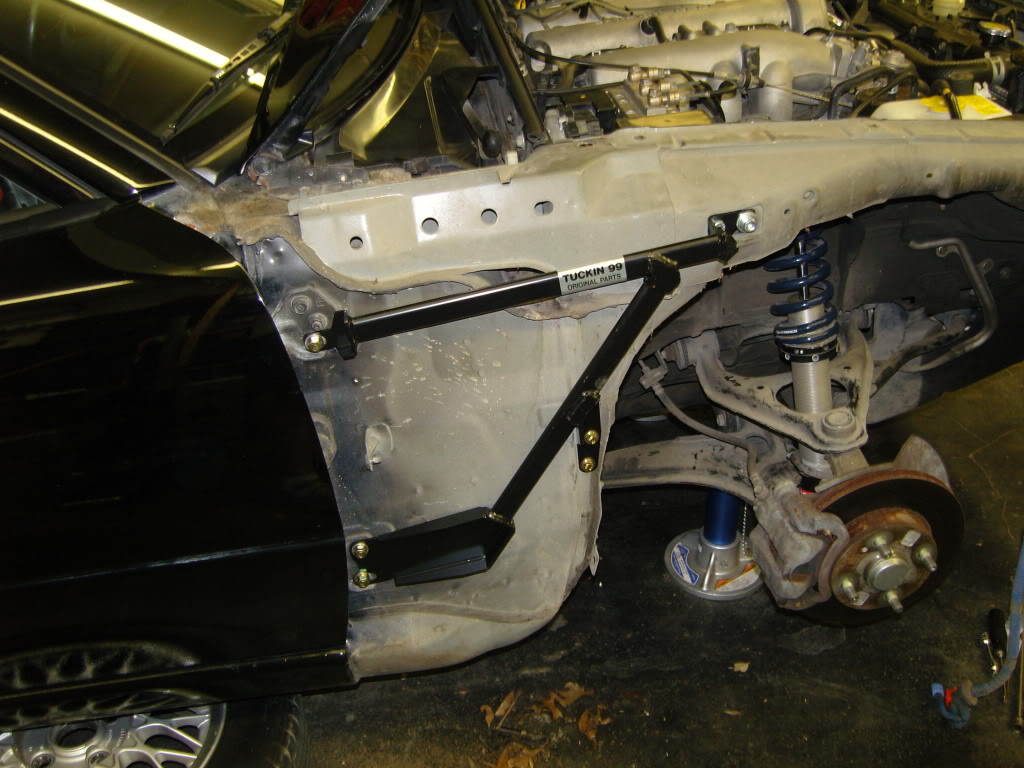
One thing I modified while I had the fender off was the very front bolt hole. The difficult one behind the bumper cover. I slotted the hole so I could take it off by loosening that bolt rather than having to remove it entirely.
I also took the opportunity to detail the fender liners.
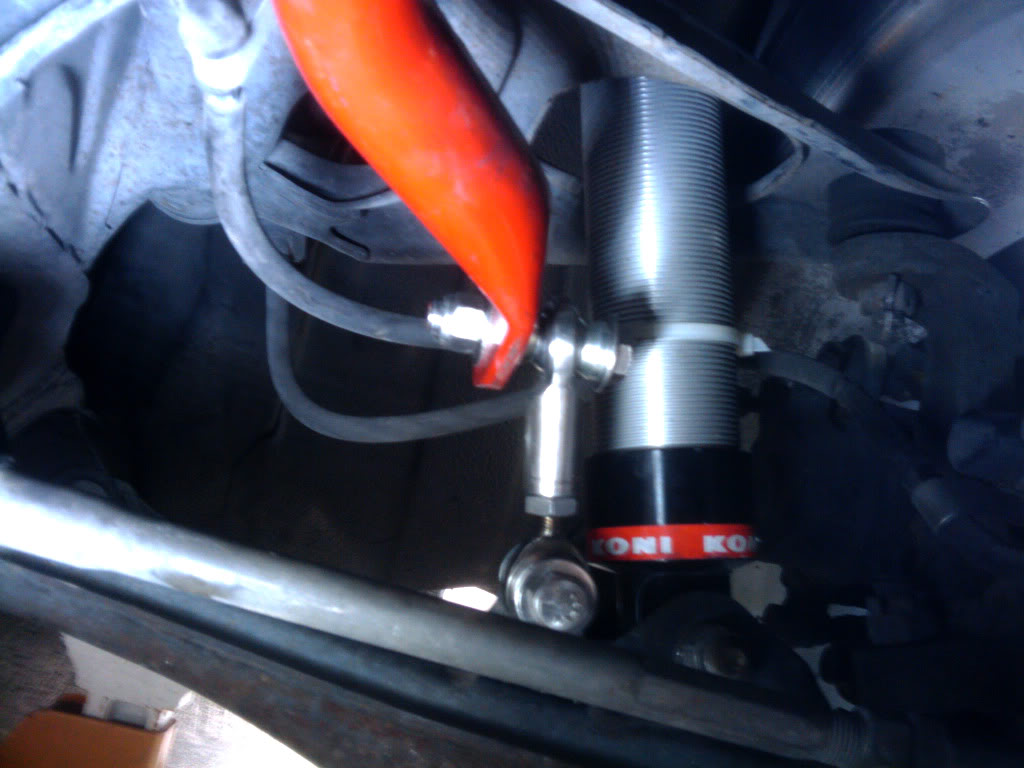
I’m building a set of custom aluminum bodied Bilstein shocks for this car, but until that’s ready I’m making do with this set of Koni 2812 aluminum monotube double adjustable shocks off my competition car (LOL).

Then, remove the door hinge bolts and the wheelwell edge bolts and use the provided hardware to bolt the brace to the tub. On the left side I had to remove the relay box to position the backing plate and working around the window washer fluid bottle was a PITA, but it all went together really well.
One thing I modified while I had the fender off was the very front bolt hole. The difficult one behind the bumper cover. I slotted the hole so I could take it off by loosening that bolt rather than having to remove it entirely.
I also took the opportunity to detail the fender liners.
I’m building a set of custom aluminum bodied Bilstein shocks for this car, but until that’s ready I’m making do with this set of Koni 2812 aluminum monotube double adjustable shocks off my competition car (LOL).
Thread Starter
MFz Lurker
Joined: Jul 2011
Posts: 34
From: Dallas, TX
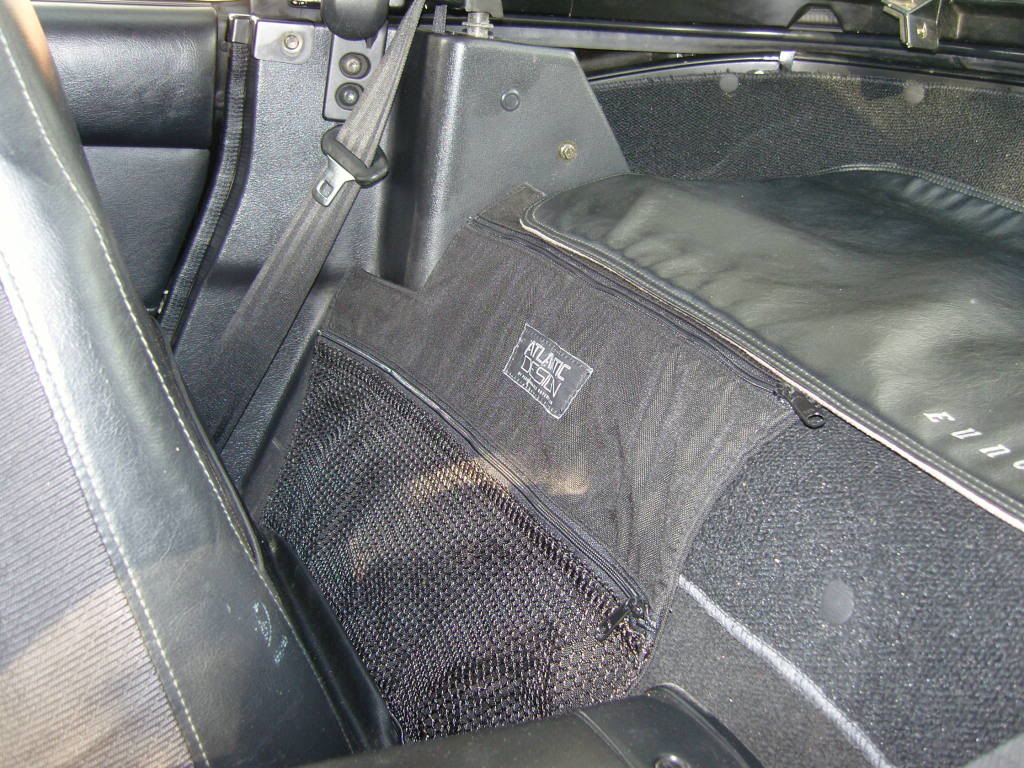
Since we’re on a roll with the Atlantic Design stuff, I bought two bags from Tronik on Clubroadster. One is the between the seats pouch just like the one Stoly on Clubroadster has, but without a label. The other is the big mystery bag. It’s an organizer that snaps behind the passenger seat with three zippered pockets. The top is solid and the bottom two are mesh. I’ve never heard of it or seen any other pictures of it. It was pretty filthy when it arrived and was obviously in a Miata that suffered from mold. But a little soaking and scrubbing cleaned it right up. The between the seat bag went into my stash. I’m putting the mystery organizer into the car.
Thread Starter
MFz Lurker
Joined: Jul 2011
Posts: 34
From: Dallas, TX
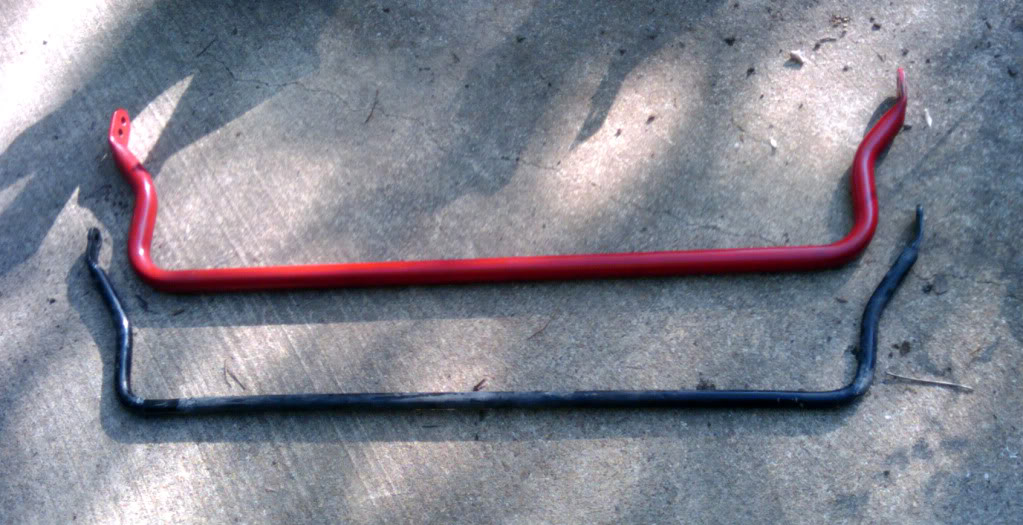
I finally got around to swapping in the Racing Beat anti roll bar I got from Slutz4 on Clubroadster. Racing Beat call it their NA8 racing bar. It’s still a 1.125” hollow bar, but the wall thickness is 3/16” rather than the standard hollow bar’s 1/8” wall thickness. It’s also got two attachment holes drilled in each end, one that matches the standard NA6 hole and the other that matches the standard NA8 hole – but you can also use it to make suspension adjustments.
http://www.racingbeat.com/Miata-1990...ars/54107.html
Here’s the big bar compared to the skinny stocker.
Snaking out the original bar and getting the Racing Beat bar positioned for the install was a PITA. I’ve never had to do this on a car with AC, PS and ABS. All that stuff hangs down behind the radiator and makes it hard to get the anti roll bar in or out. I had ordered some lube from 949 Racing. Emilio carries Energy Suspension Hyperlube. He used to carry it in little one ounce packets and a huge eight ounce tub, but now he also has a more reasonable four ounce tub. I ordered the eight ounce tub back around Christmas.
http://949racing.com/energysuspensionhyperlube-1.aspx
I had to grind down the polyurethane bushings. This was the most oversized set I’ve ever seen. A cutting disk on a 4” grinder made quick work of them. A quick wipe down and new grease and they were ready to be installed. With the bushings clearanced the only drag on the bar was from the stickiness of the grease.
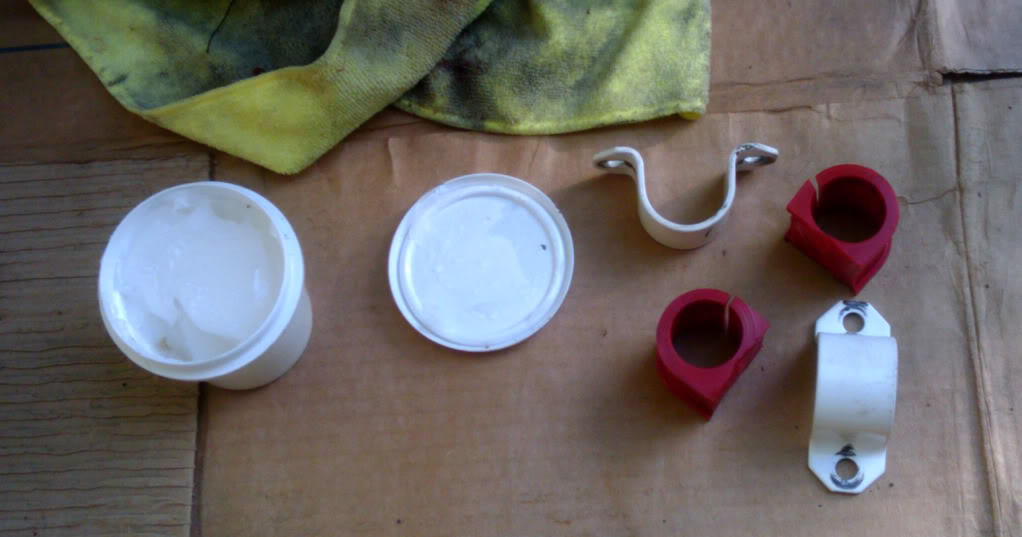
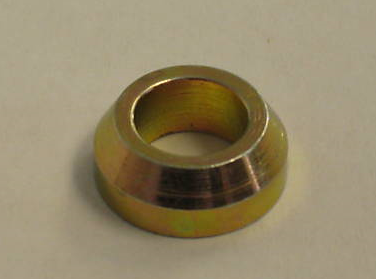
No photos of the individual components, but I pieced together a set of custom endlinks. I used stainless male and female heim joints (New Hampshire Ball Bearing), four cone washers (ebay), a lock nut, five oversized washers, two lock nuts and two 50mm bolts (Bolt Depot) per link. Everything is stainless except the cone washers which came from ebay seller “qsc8”.
http://myworld.ebay.com/ebaymotors/q...id=p4340.l2559
Here’s the final end link. You do have to remove one side to adjust it, but I’ve found that it isn’t much of an issue.
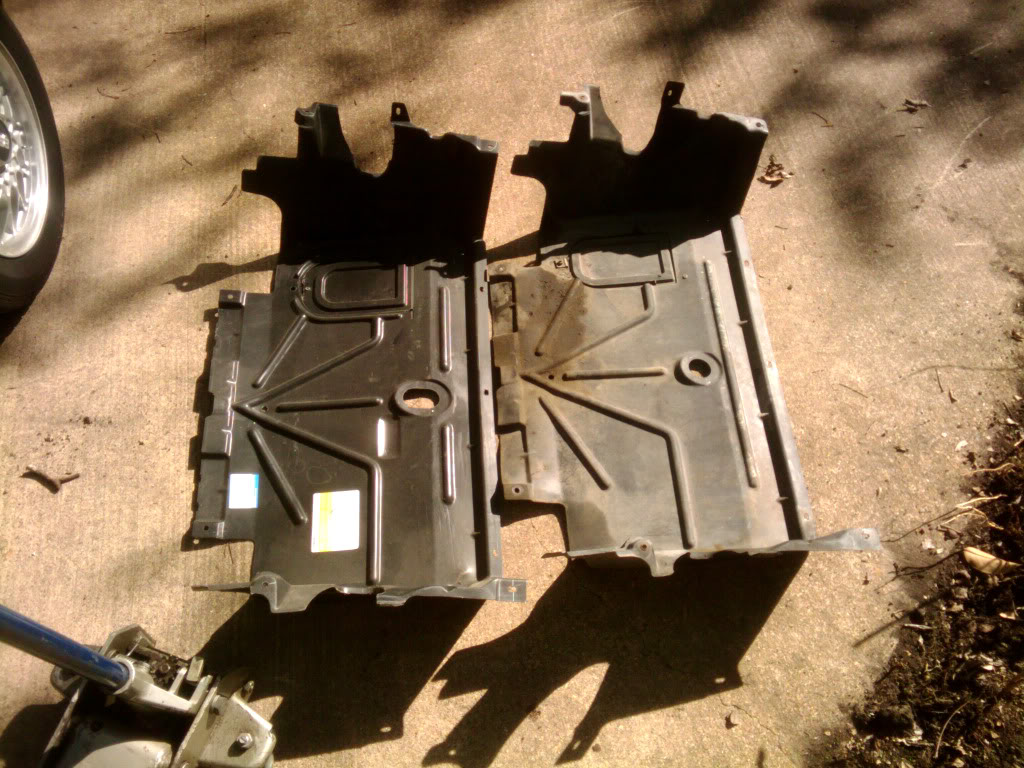
Before I buttoned everything up, I took a look at the splash pan. Like most it was bent and deformed at the trailing edge. But it wasn’t torn or broken. I thought about swapping it out for a new one I had, but the damage wasn’t bad enough. I propped up the bent parts and put a weight on the center and hit it with a heat gun. It looks like it bent back pretty close to the right contour. It turned out really well. 90% of the deformation was gone and it went back in with no issues.
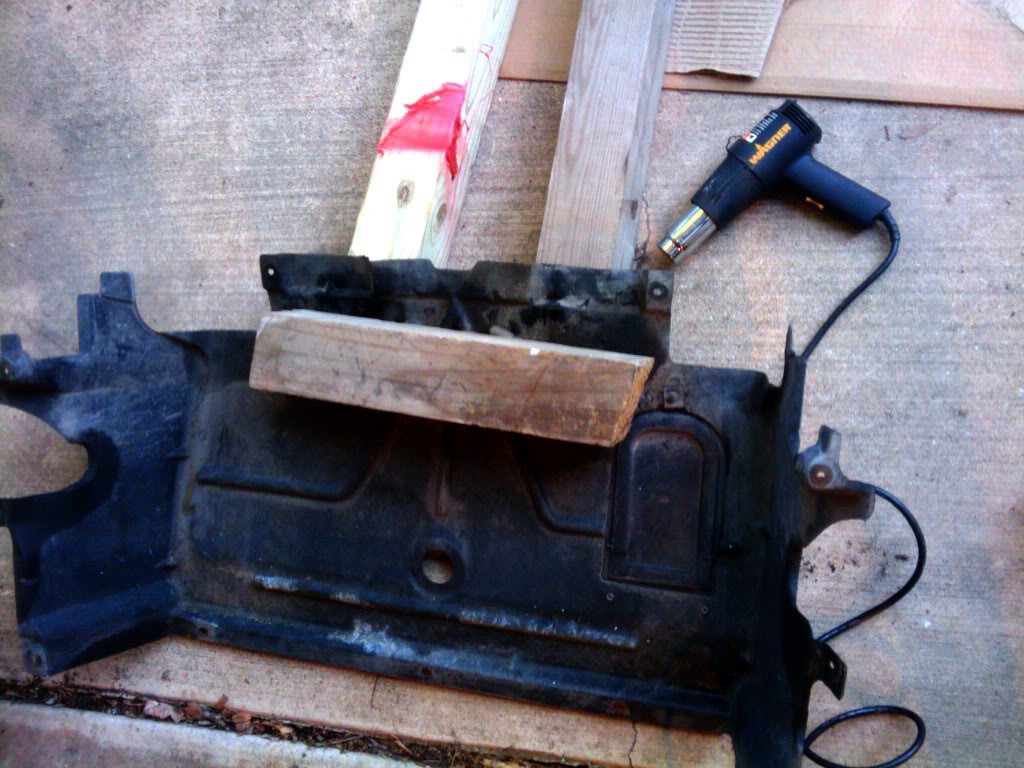
You can see the differences between the original NA6 splash pan and the current pan that fits all models.
http://www.racingbeat.com/Miata-1990...ars/54107.html
Here’s the big bar compared to the skinny stocker.
Snaking out the original bar and getting the Racing Beat bar positioned for the install was a PITA. I’ve never had to do this on a car with AC, PS and ABS. All that stuff hangs down behind the radiator and makes it hard to get the anti roll bar in or out. I had ordered some lube from 949 Racing. Emilio carries Energy Suspension Hyperlube. He used to carry it in little one ounce packets and a huge eight ounce tub, but now he also has a more reasonable four ounce tub. I ordered the eight ounce tub back around Christmas.
http://949racing.com/energysuspensionhyperlube-1.aspx
I had to grind down the polyurethane bushings. This was the most oversized set I’ve ever seen. A cutting disk on a 4” grinder made quick work of them. A quick wipe down and new grease and they were ready to be installed. With the bushings clearanced the only drag on the bar was from the stickiness of the grease.
No photos of the individual components, but I pieced together a set of custom endlinks. I used stainless male and female heim joints (New Hampshire Ball Bearing), four cone washers (ebay), a lock nut, five oversized washers, two lock nuts and two 50mm bolts (Bolt Depot) per link. Everything is stainless except the cone washers which came from ebay seller “qsc8”.
http://myworld.ebay.com/ebaymotors/q...id=p4340.l2559
Here’s the final end link. You do have to remove one side to adjust it, but I’ve found that it isn’t much of an issue.
Before I buttoned everything up, I took a look at the splash pan. Like most it was bent and deformed at the trailing edge. But it wasn’t torn or broken. I thought about swapping it out for a new one I had, but the damage wasn’t bad enough. I propped up the bent parts and put a weight on the center and hit it with a heat gun. It looks like it bent back pretty close to the right contour. It turned out really well. 90% of the deformation was gone and it went back in with no issues.
You can see the differences between the original NA6 splash pan and the current pan that fits all models.