Exterior How to: Make a Red Hardtop Not Red - Two Methods

Thread Starter
Moderator
Joined: Jul 2011
Posts: 1,902
From: Tampa, FL; Lake Jackson (Atlanta), GA
Method One:
1. Give large sum of money to professional body and paint man.
2. Receive nicely refinished not red hardtop.
Method Two:
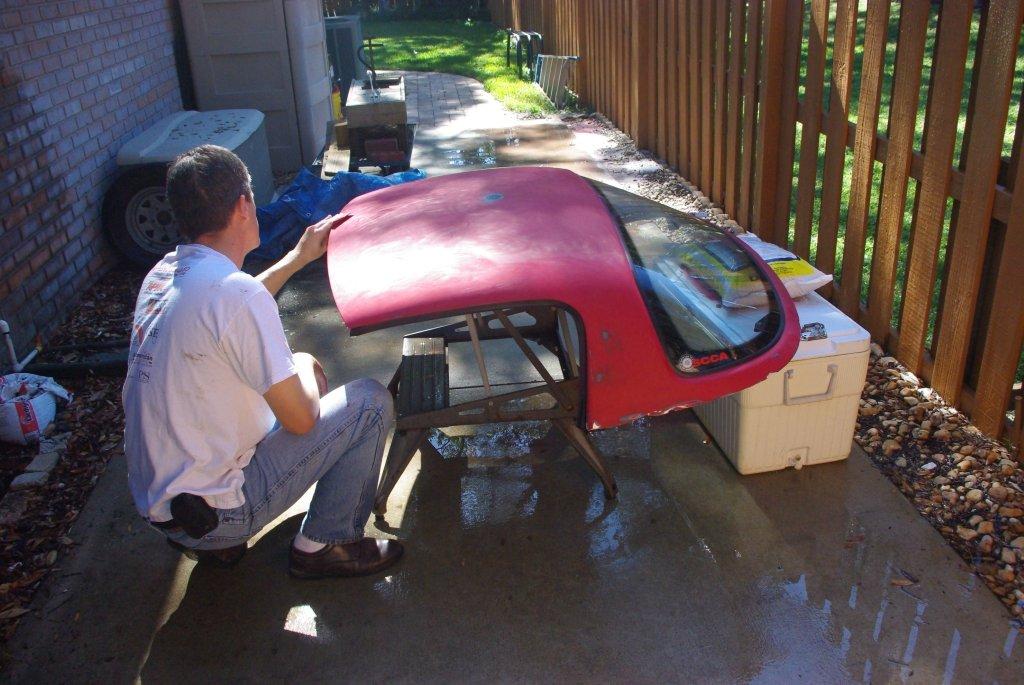
1. Place red hardtop on sawhorses or other stable means of support.
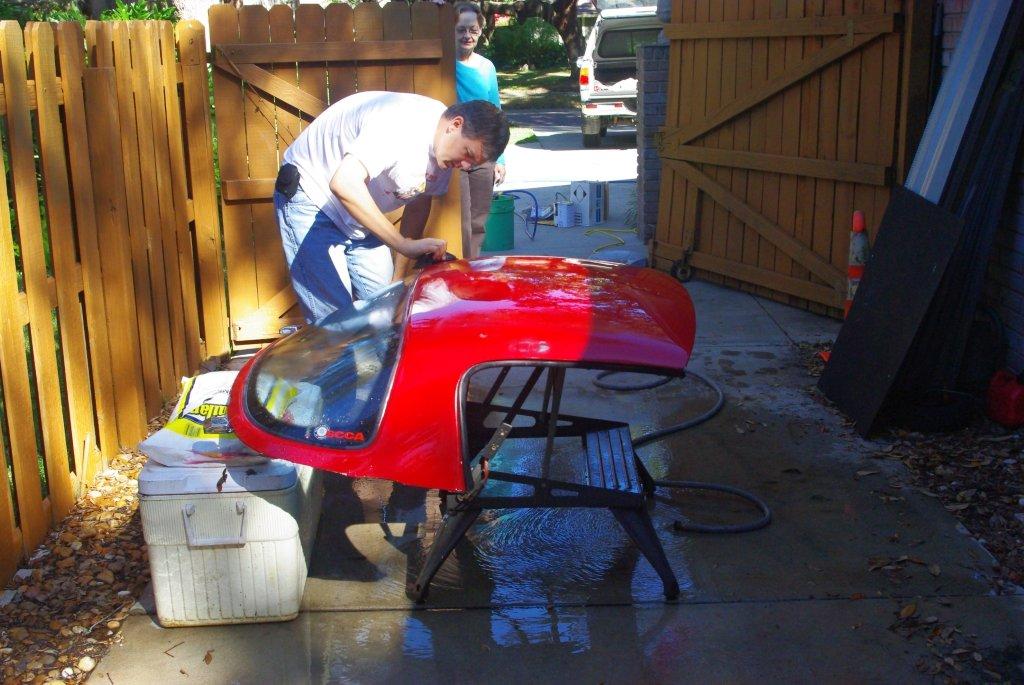
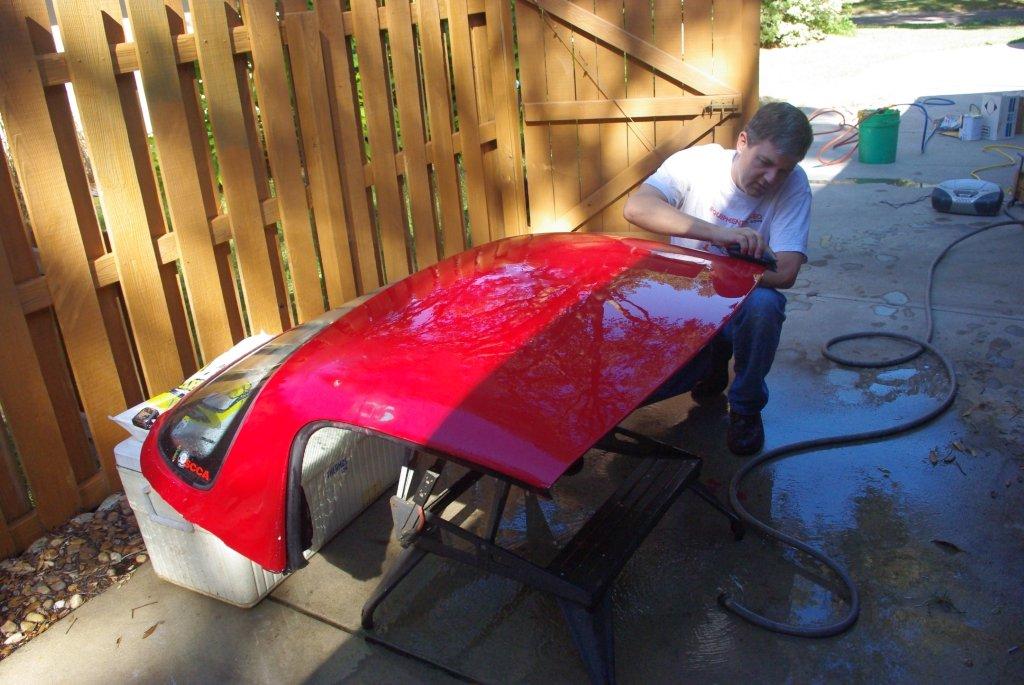
2. Gently wet sand entire painted surface of hardtop with 400 grit wet/dry sandpaper in circular motions. Let dry occasionally to help find spots you might have missed.
3. Gently sand around and in areas with chips, deep scratches, or gouges until they smoothly transition into the surrounding paint. Depending on depth, the transition area may extend between one and three inches from the center of the imperfection. Remember to sand in a circular motion and not to focus too much sanding in a small area or you will end up with a visible depression in your finished work. You should end up with a nice wide bullseye effect around the damaged location. Do not sand any deeper than necessary to even out the high and low spots.
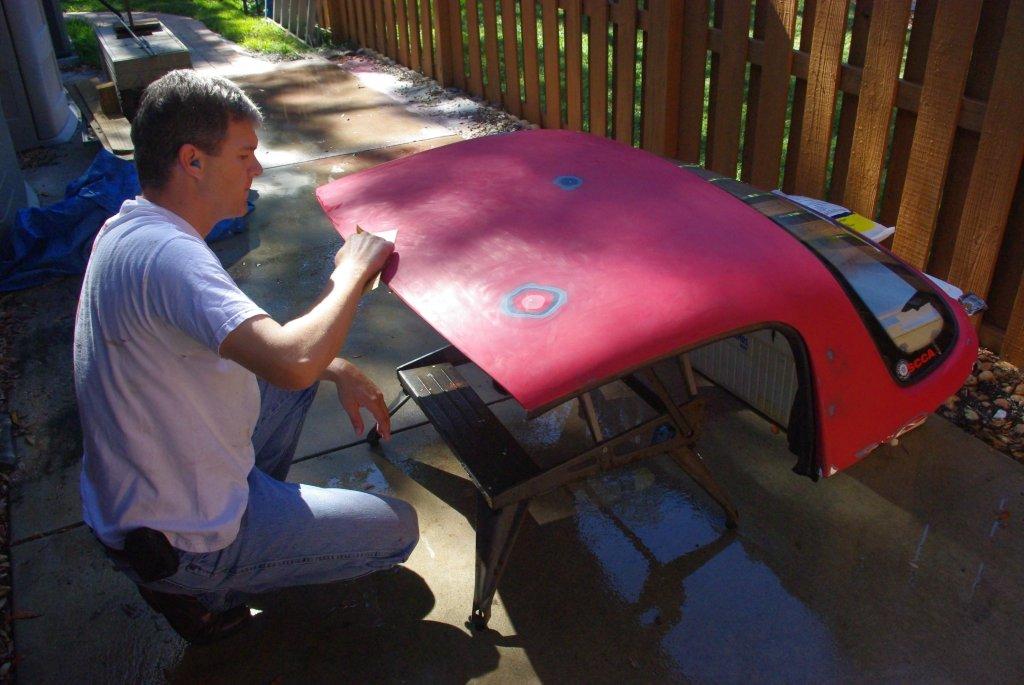
A paint job with poor surface prep will never look good. This step is very important to your end result.
4. Some damage may require a small amount of body filler for best results. Use of body filler will not be covered here.
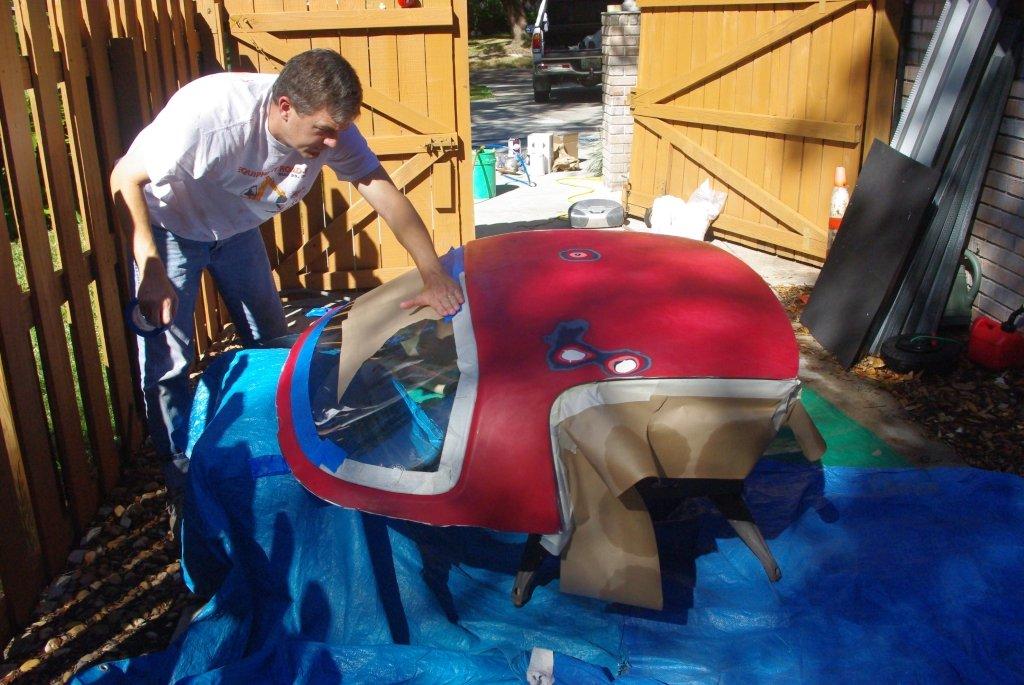
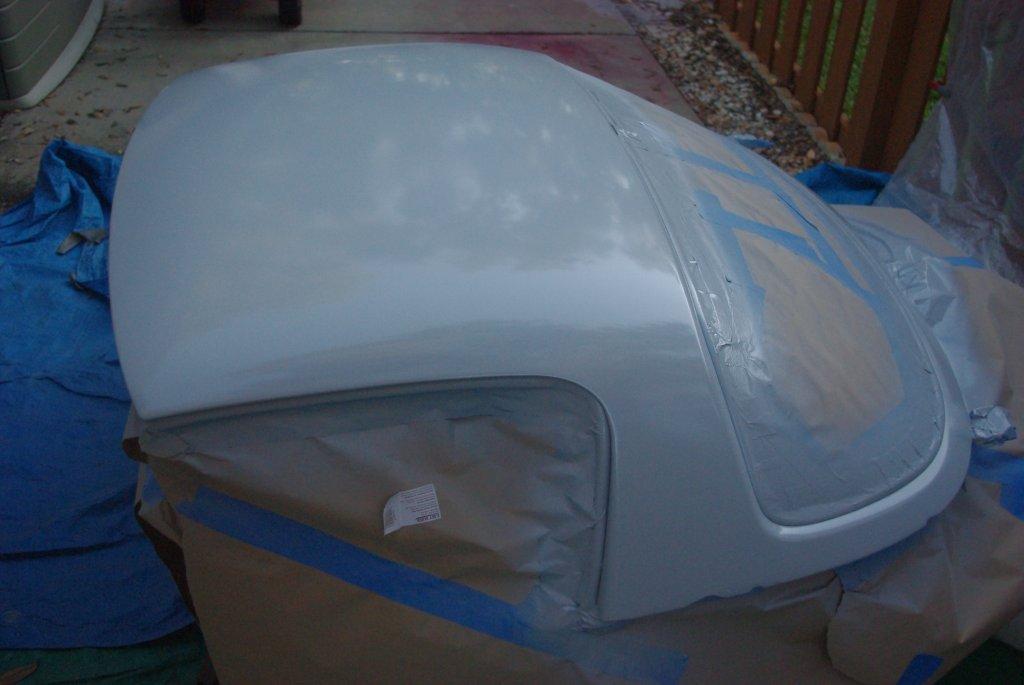
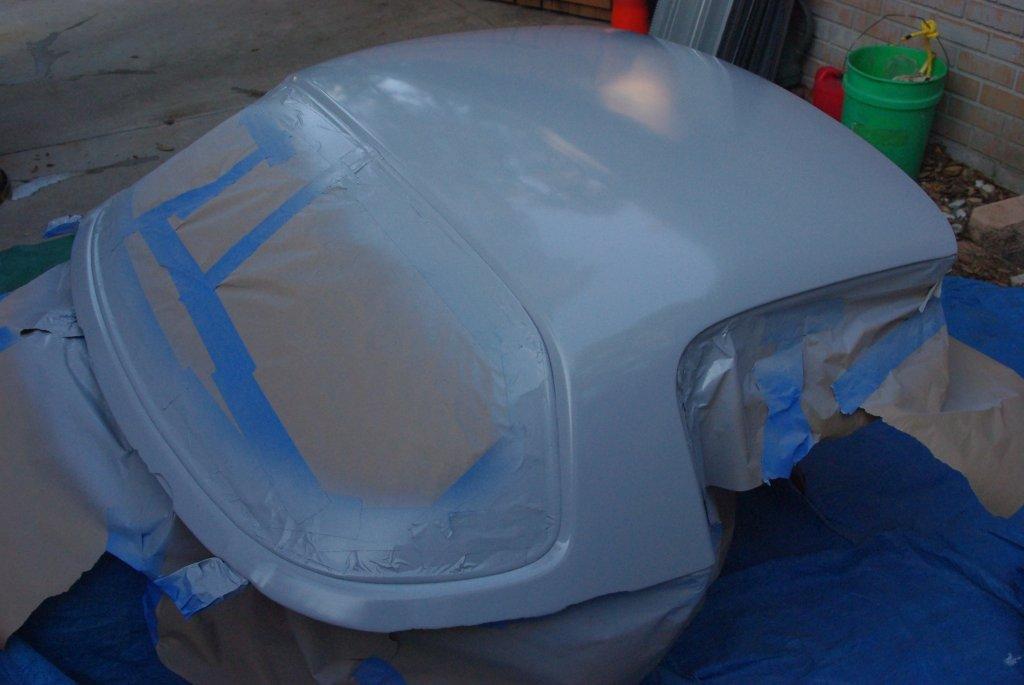
5. Use masking tape and paper (newspaper works well) to mask off all areas you do not wish to have painted.
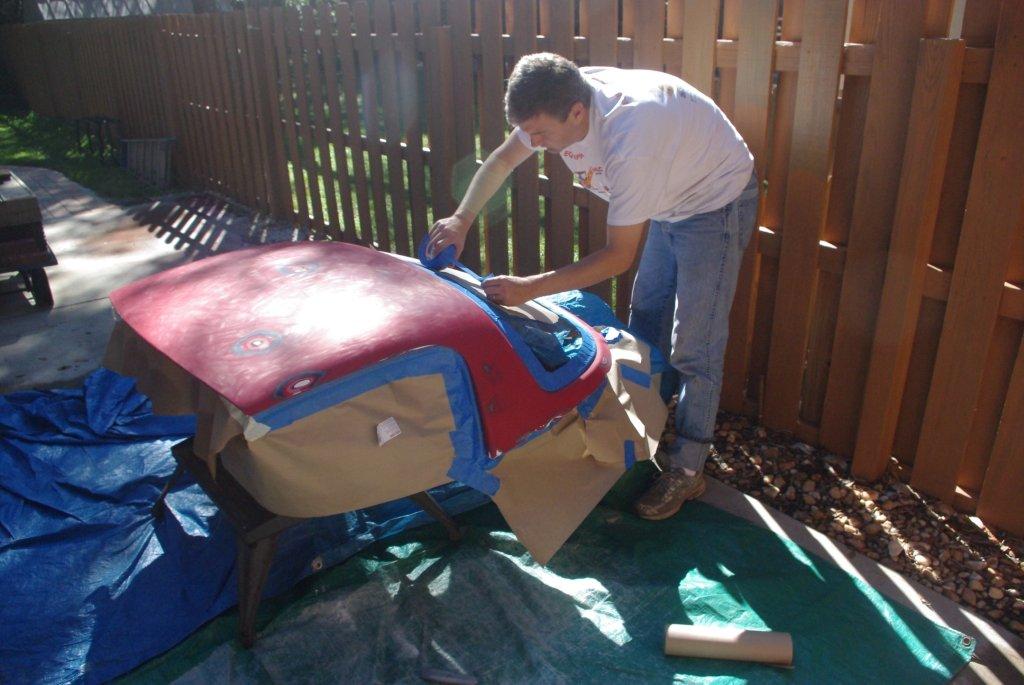
Be careful to be accurate when masking, especially around the back window area. An exacto knife or razor blade is helpful in fine trimming along edges.
6. Wipe entire surface to be painted with paint reducer ($20 a gallon) and a cotton cloth (or old clean t-shirt) to remove any remaining waxes and oils.
7. Use a high pressure air hose to blow any remaining water out of the window and side rubber areas taking time to get it all.
8. Wet the ground in the immediate area to help prevent dust coming up.
9. Use a "tack cloth" ($4) to remove any remaining lint or debris from the surface to be painted.
10. Thoroughly mix "high build alkyd primer" to get the particles in suspension. Put some primer into cup of paint gun. I used a plastic ladle to extract primer from the can without spilling it. My primer was premixed with medium reducer but was still somewhat thick so more medium reducer was added once in the cup. My paint gun is a HVLP DeVilbiss unit but Harbor Freight and Craftsman sell reasonably good quality guns for driveway work for very little money. Air compressor, water separator, and hoses sold separately. One gallon of this primer was $20. I used about 1.5 pints for the top.
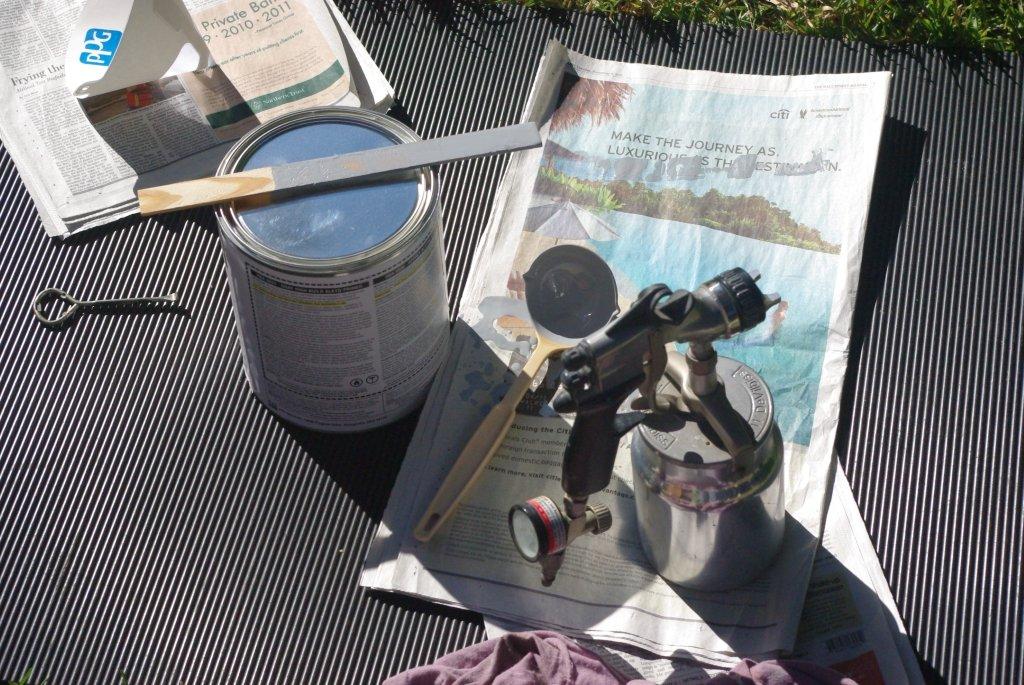
Be sure to use a quality filter mask when priming your top.
Basic paint gun technique should be studied elsewhere online.
11. Give the primer at least an hour or two to outgas and properly harden. Any dust, debris, and bugs that happened to have found their way into your primer coat can be gently spot sanded with 600 grit paper at this point. Do not touch the primer coat with your fingers or the paint may not stick in that location. The primer coat will shrink as it dries and may reveal how poorly your prep work was executed prior to the application of the primer. "High build" primer covers surface imperfections better because it contains more solids.
11a. You may choose to sand and further prep certain areas on your top at this point because you figured out they look like crap. You may do this and then reprime the area or the entire top. You will need to wipe lightly with reducer and follow with a tack rag before repriming the area.
Once you are satisfied with your priming job or have given up in disgust, you must go over the area with your tack cloth just prior to painting. Be sure to re-wet the ground before using the tack cloth.
12. Mix paint to put particles in suspension. Mix paint ($37qt.), reducer ($20gal), fisheye eliminator ($18pt), flex additive ($18pt), and hardener ($19pt.) in the quantities suggested by paint manufacturer (I used PPG). The top required about 1 pint of paint, a 1/2 cup reducer, a dash of fisheye eliminator and flex, and about 1/4 cup hardener, iirc. Two quarts of paint and the remaining quantities of other chemicals should likely do the whole car when the time comes.
Sidebar: I chose to use acrylic enamel paint because it is a one stage paint that is durable and easy to work with. A one stage paint job means that there is no clear coat thereby eliminating one more chance for debris to enter the layers of your driveway or garage paint job. Another reason to steer clear of clearcoat is that it is temperamental and sensitive to ambient atmospheric moisture and temperature and will cloud up or peel off in sheets if the temperature is too close to the dewpoint. This is a problem in humid climates like here in Florida.
Be aware that the hardener is related to the agents active in superglue. It becomes very hard and resistant to dust in a short amount of time. The flex additive is a preventative measure I threw in to add a small measure of pliability in case of top flexing or impact.
13. Put on scuba tank and regulator. You don't want to breathe in superglue particles while they are wet. A canister type filtration mask is certainly helpful if you don't have a fresh air supply like a scuba tank. And don't try to use the little round paper thin dust masks that are 3 for $3 or your alveoli in your lungs will stick together permanently.
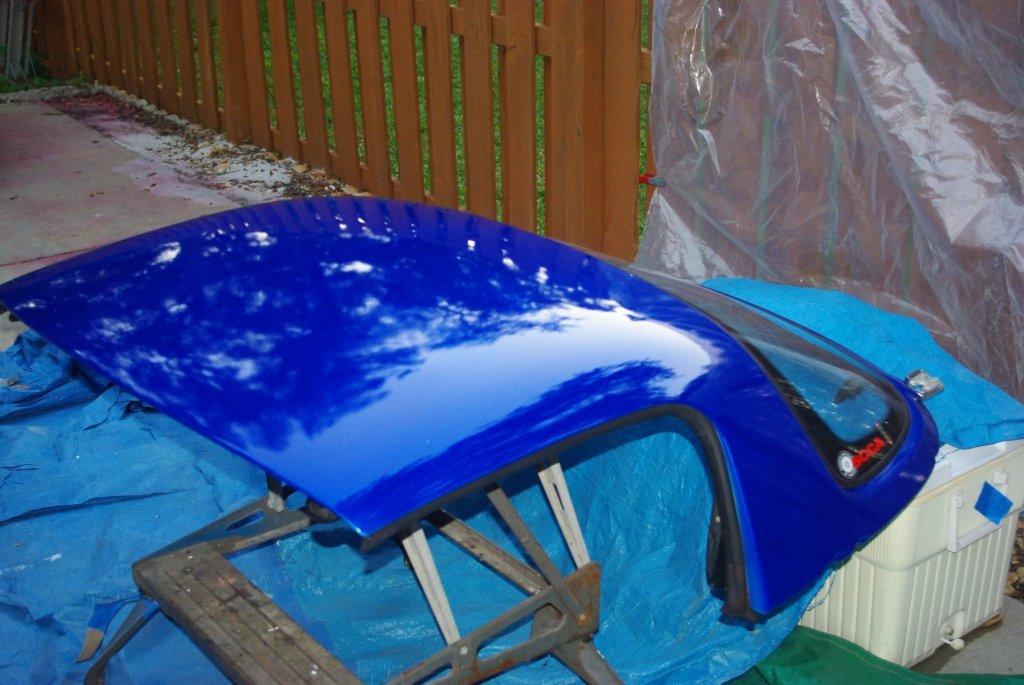
14. Paint that sucker not red.
15. Have a cocktail and watch bugs and debris become immortalized in your wet not red paint.
16. Have another cocktail and test the firmness of the paint by touching the overspray on the masking tape. Still tacky? Yep, more lint, dust and bugs in your future. The good news is it will likely harden enough at the surface within 45 minutes that no more debris will stick. And much of the surface trash will buff out later. But you really need to give it 3 or 4 weeks before going after it with a buffer and cutting compound.
17. After the paint becomes hard you can carefully remove the masking tape and paper.
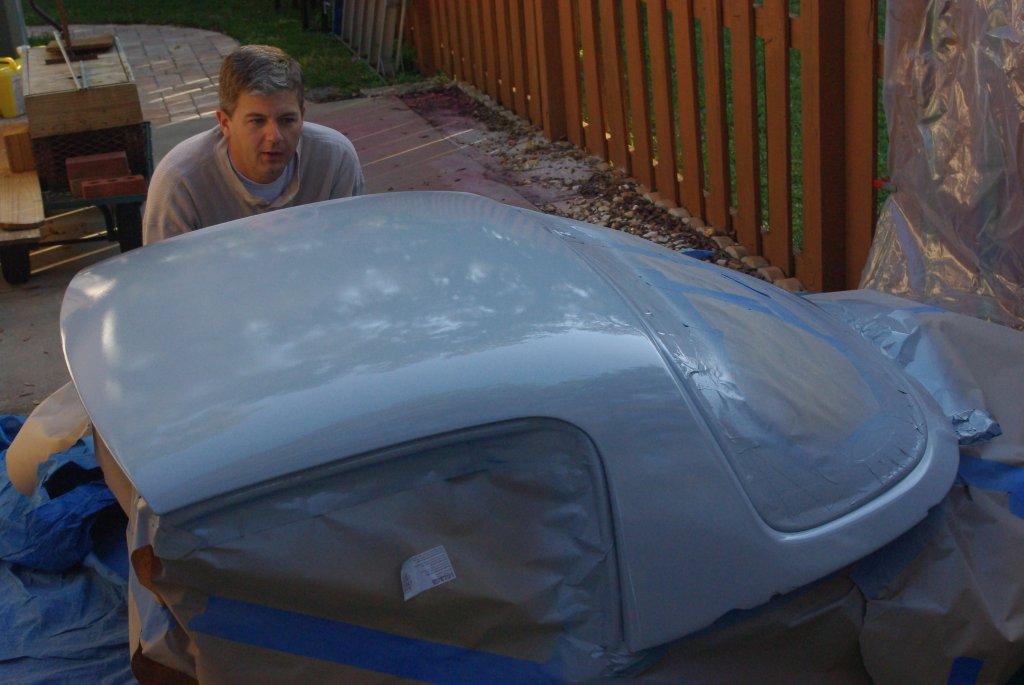
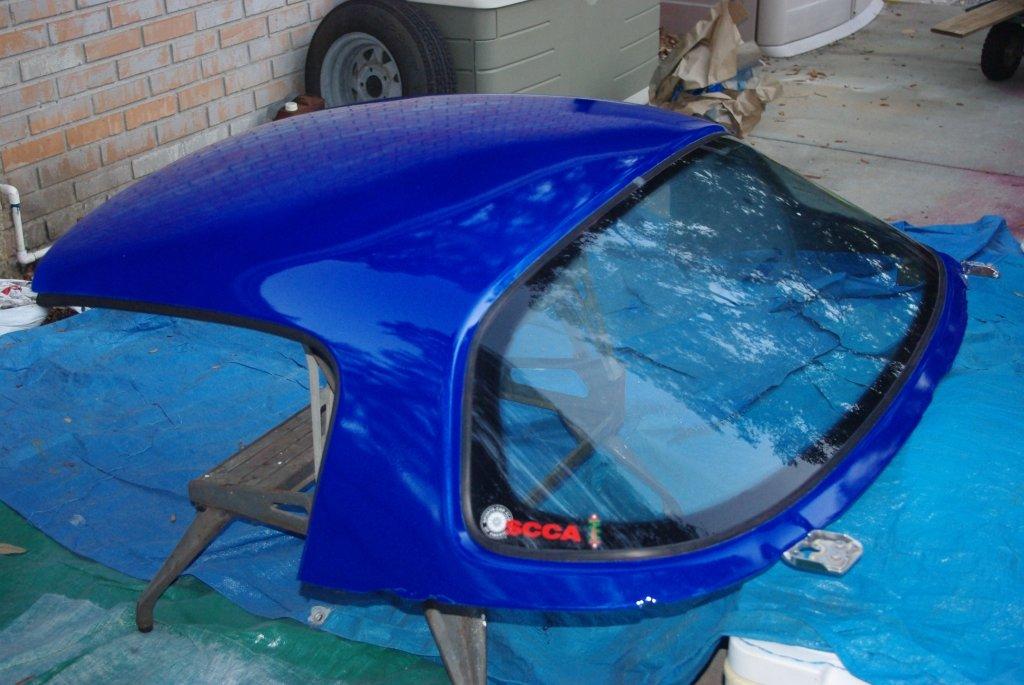
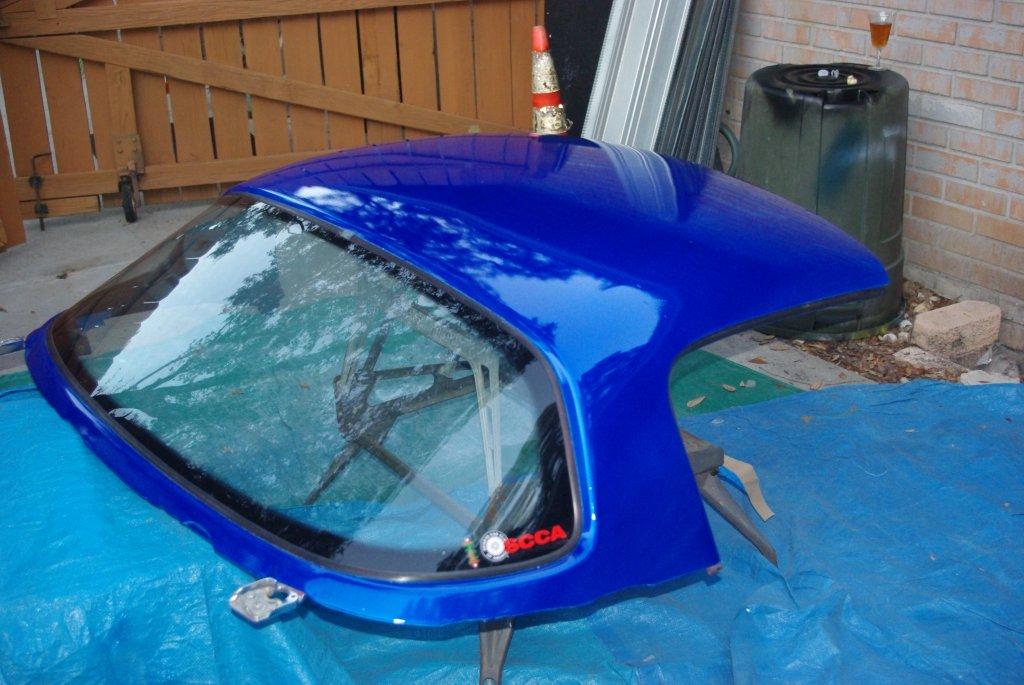
Hey, look! It's a not red hardtop.
And to answer the question about the lower edge being chewed up, yes this top had a rough life and no, I didn't want to try to fix it. It will get some trim molding along the edge that will cover most of it. And besides, if I wanted it to be perfect I wouldn't be painting it in a driveway. I didn't want perfect, just not red.
1. Give large sum of money to professional body and paint man.
2. Receive nicely refinished not red hardtop.
Method Two:
1. Place red hardtop on sawhorses or other stable means of support.
2. Gently wet sand entire painted surface of hardtop with 400 grit wet/dry sandpaper in circular motions. Let dry occasionally to help find spots you might have missed.
3. Gently sand around and in areas with chips, deep scratches, or gouges until they smoothly transition into the surrounding paint. Depending on depth, the transition area may extend between one and three inches from the center of the imperfection. Remember to sand in a circular motion and not to focus too much sanding in a small area or you will end up with a visible depression in your finished work. You should end up with a nice wide bullseye effect around the damaged location. Do not sand any deeper than necessary to even out the high and low spots.
A paint job with poor surface prep will never look good. This step is very important to your end result.
4. Some damage may require a small amount of body filler for best results. Use of body filler will not be covered here.
5. Use masking tape and paper (newspaper works well) to mask off all areas you do not wish to have painted.
Be careful to be accurate when masking, especially around the back window area. An exacto knife or razor blade is helpful in fine trimming along edges.
6. Wipe entire surface to be painted with paint reducer ($20 a gallon) and a cotton cloth (or old clean t-shirt) to remove any remaining waxes and oils.
7. Use a high pressure air hose to blow any remaining water out of the window and side rubber areas taking time to get it all.
8. Wet the ground in the immediate area to help prevent dust coming up.
9. Use a "tack cloth" ($4) to remove any remaining lint or debris from the surface to be painted.
10. Thoroughly mix "high build alkyd primer" to get the particles in suspension. Put some primer into cup of paint gun. I used a plastic ladle to extract primer from the can without spilling it. My primer was premixed with medium reducer but was still somewhat thick so more medium reducer was added once in the cup. My paint gun is a HVLP DeVilbiss unit but Harbor Freight and Craftsman sell reasonably good quality guns for driveway work for very little money. Air compressor, water separator, and hoses sold separately. One gallon of this primer was $20. I used about 1.5 pints for the top.
Be sure to use a quality filter mask when priming your top.
Basic paint gun technique should be studied elsewhere online.
11. Give the primer at least an hour or two to outgas and properly harden. Any dust, debris, and bugs that happened to have found their way into your primer coat can be gently spot sanded with 600 grit paper at this point. Do not touch the primer coat with your fingers or the paint may not stick in that location. The primer coat will shrink as it dries and may reveal how poorly your prep work was executed prior to the application of the primer. "High build" primer covers surface imperfections better because it contains more solids.
11a. You may choose to sand and further prep certain areas on your top at this point because you figured out they look like crap. You may do this and then reprime the area or the entire top. You will need to wipe lightly with reducer and follow with a tack rag before repriming the area.
Once you are satisfied with your priming job or have given up in disgust, you must go over the area with your tack cloth just prior to painting. Be sure to re-wet the ground before using the tack cloth.
12. Mix paint to put particles in suspension. Mix paint ($37qt.), reducer ($20gal), fisheye eliminator ($18pt), flex additive ($18pt), and hardener ($19pt.) in the quantities suggested by paint manufacturer (I used PPG). The top required about 1 pint of paint, a 1/2 cup reducer, a dash of fisheye eliminator and flex, and about 1/4 cup hardener, iirc. Two quarts of paint and the remaining quantities of other chemicals should likely do the whole car when the time comes.
Sidebar: I chose to use acrylic enamel paint because it is a one stage paint that is durable and easy to work with. A one stage paint job means that there is no clear coat thereby eliminating one more chance for debris to enter the layers of your driveway or garage paint job. Another reason to steer clear of clearcoat is that it is temperamental and sensitive to ambient atmospheric moisture and temperature and will cloud up or peel off in sheets if the temperature is too close to the dewpoint. This is a problem in humid climates like here in Florida.
Be aware that the hardener is related to the agents active in superglue. It becomes very hard and resistant to dust in a short amount of time. The flex additive is a preventative measure I threw in to add a small measure of pliability in case of top flexing or impact.
13. Put on scuba tank and regulator. You don't want to breathe in superglue particles while they are wet. A canister type filtration mask is certainly helpful if you don't have a fresh air supply like a scuba tank. And don't try to use the little round paper thin dust masks that are 3 for $3 or your alveoli in your lungs will stick together permanently.
14. Paint that sucker not red.
15. Have a cocktail and watch bugs and debris become immortalized in your wet not red paint.
16. Have another cocktail and test the firmness of the paint by touching the overspray on the masking tape. Still tacky? Yep, more lint, dust and bugs in your future. The good news is it will likely harden enough at the surface within 45 minutes that no more debris will stick. And much of the surface trash will buff out later. But you really need to give it 3 or 4 weeks before going after it with a buffer and cutting compound.
17. After the paint becomes hard you can carefully remove the masking tape and paper.
Hey, look! It's a not red hardtop.
And to answer the question about the lower edge being chewed up, yes this top had a rough life and no, I didn't want to try to fix it. It will get some trim molding along the edge that will cover most of it. And besides, if I wanted it to be perfect I wouldn't be painting it in a driveway. I didn't want perfect, just not red.
Last edited by sixshooter; Nov 16, 2011 at 01:49 PM.


MFz Regular
Joined: Oct 2011
Posts: 248
From: Charlotte
Very nice write up, but you missed a VERY important step...
Aquire hardtop. This is a step I have unfortunately not gotten around to yet...
Otherwise looks great! and not red!
How much did it cost all said and done? and how many man hours were put into it?
Aquire hardtop. This is a step I have unfortunately not gotten around to yet...
Otherwise looks great! and not red!
How much did it cost all said and done? and how many man hours were put into it?
Thread Starter
Moderator
Joined: Jul 2011
Posts: 1,902
From: Tampa, FL; Lake Jackson (Atlanta), GA
Not zachary. It is currently Montego blue, which I hate. But eventually it will be the same shade of blue. It is a Nissan color called Daytona Blue Metallic (code B17). I looked around for several months before deciding on it.
I paid roughly $150 for all of it and have enough primer, paint, and other ingredients to paint the whole car (which is the eventual goal). I have access to a buddy's paint booth but it is 6 hours away. I may try to do the rest of the car up there to minimize trash in the paint but if I don't, so what.
I got this hardtop really cheap from a guy on the local Miata forum. I did't mind the fact that it had damage because I wasn't concerned much with looks. NASA requires a convertible top be down on the track and I am doing Road Atlanta in December. I wanted a hardtop for comfort reasons.
It isn't Montego blue, but I'm really happy it is not red.
MFz Regular
Joined: Oct 2011
Posts: 248
From: Charlotte
^ they do? FFUUUUUUUUUU this is gonna suck...
If were not in the same group mind if I borrow it?
150 doesnt seem too bad for enough paint for the whole car, I may be looking into this soon enough.
How much is really cheap?? the cheapest ive seen them for locally is 800... I REALLY want a hardtop, but I just cant justify 800 dollars for one. Hell, I dont even have 800 dollars right now, being in school kinda sucks sometimes. I dont care if its not in the best of shape, just as you dont, I just want something that is a bit more comfortable for DD and such. less leaky in the car, more heat retention, ... just the fact that its a hard top, ect.
Thread Starter
Moderator
Joined: Jul 2011
Posts: 1,902
From: Tampa, FL; Lake Jackson (Atlanta), GA
The problem with hardtops is that they are easily stolen in 38.6 seconds once someone gets your door open if you use the factory quick release latches. Just ask Hustler. Using brackets and more uncommon bolts will dissuade some casual thieves and provide more security. Locking mechanisms requiring a key to remove the top are also readily available at around $100.
This is an early hardtop with no headliner, no defrost grid in the back window, and is chewed up around the trailing edge. It was ~$400 on the local Miata forum. I had local guys wanting to arm wrestle me for it because I beat them to the purchase. I have seen them at $600-$700 quite often. Just be vigilant.
$150 will net you a not red car, but even if you spend a good amount of time prepping and are careful painting, it could still look like you did it in the driveway for $150. Painting it under a canopy or out from under trees would have been helpful to me for debris prevention but, meh, what can you do? I did it over at my parents' house and enlisted my father's assistance since he has painted cars in the driveway before, too. It's always good to get a second opinion on technical issues like paint supplement mix ratios and also good to have an extra set of hands when moving around a hardtop. My driveway has no overhanging trees but is on a busier street so the dust being kicked up by passing cars was a major consideration that helped me decide to do it over there as well. It's a series of trade-offs.
Thread Starter
Moderator
Joined: Jul 2011
Posts: 1,902
From: Tampa, FL; Lake Jackson (Atlanta), GA
I wanted to console you about not having a hardtop up at Road Atlanta. It's not the huge loss you might think. I'm still required to keep the windows down the whole time.
I was expecting a greater difference between open and hardtop but at 80mph the wind buffeting hitting the back of my head was uncomfortable. It was easily on par with top down wind hitting the back of my head. I'm sure I had fewer smaller swirls and eddies around the cabin that would rob heat but not like I was expecting. Luckily it was 84*F here yesterday...
I was expecting a greater difference between open and hardtop but at 80mph the wind buffeting hitting the back of my head was uncomfortable. It was easily on par with top down wind hitting the back of my head. I'm sure I had fewer smaller swirls and eddies around the cabin that would rob heat but not like I was expecting. Luckily it was 84*F here yesterday...