Engine NB: Cold Air Intake on the cheap
 10-25-2011, 08:51 PM
#1
BAMFr

Thread Starter

Join Date: Jul 2011
Location: NC
Posts: 1,787
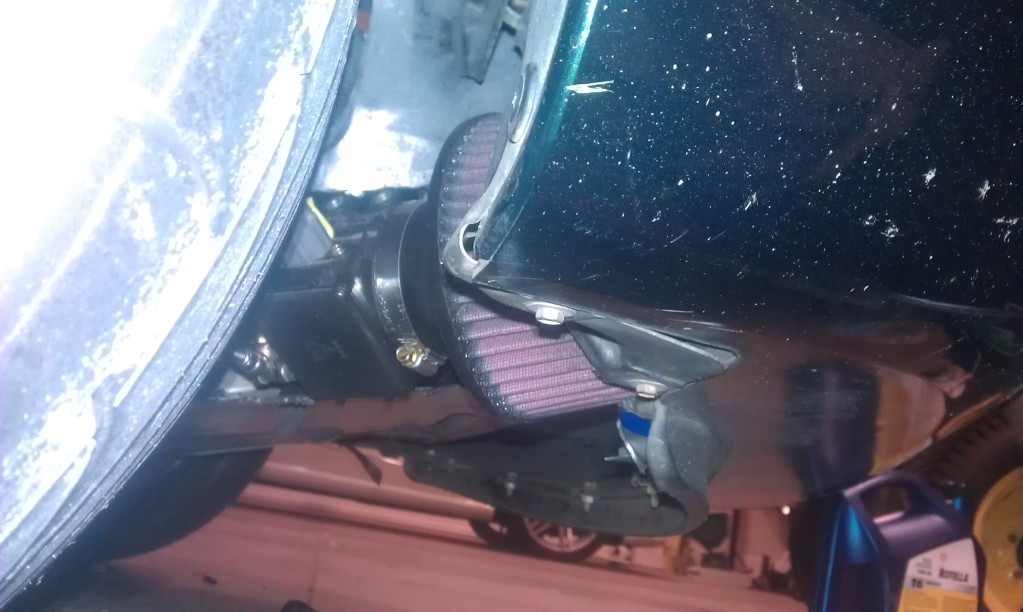
Well, due to interest in my Intake, I am writing a how-to for it. Finished Product:


WARNING: I ONLY run this intake on the track. I think it can be ran on the street if you are careful not to drive in large amounts of water or with some minor work to protect the filter from external debris.
Sorry, all my pictures suck for this as I am taking them after the fact here. I will try to get better ones over the next few days.
Parts to buy:
2.75" to 2.5" 90* bend silicone
2.5" to 2.5" 90* bend silicone
2.5" ~15.5" aluminum piping ****SEE NOTE****
Clamps (you can reuse the stock clamps if you like, and buy the rest)
Intake filter (K&N, AEM, Spectre, whatever)
Tools:
Tin snipes and/or dremel with cutting wheel
random sockets
electrical tape
small cutters to get at the electric tape already on the harness
Drill + drill bit (drill bit will need to be 1/2"+ to make a large enough hole for the IAT sensor+ its gasket)
Angle grinder to cut the aluminum piping if its too long
Note:Aluminum piping...This all depends on how you want to position the intake in the wheel well area. My measurements were pretty much spot on at 14". You can also effectively change the length by changing the overlap with the silicone. I would aim for 14"-15" and use the silicone for the fine tuning on fitment. If you use the ebay seller I note below, they offer a cutting service on the intake pipe for $1-$2.
This totally cost me $70 for everything except the intake filter. You can get shittier silicone for half the cost, making the price $50+intake filter. I got the filter for about $35 from summitracing, putting the total cost between $90-$120 depending on shipping. Here is the ebay seller I used (I got all my silicone parts except the 2.5" to 2.5" as it was out of stock at the time):
http://myworld.ebay.com/siliconeinta...:X:CEM:US:1181
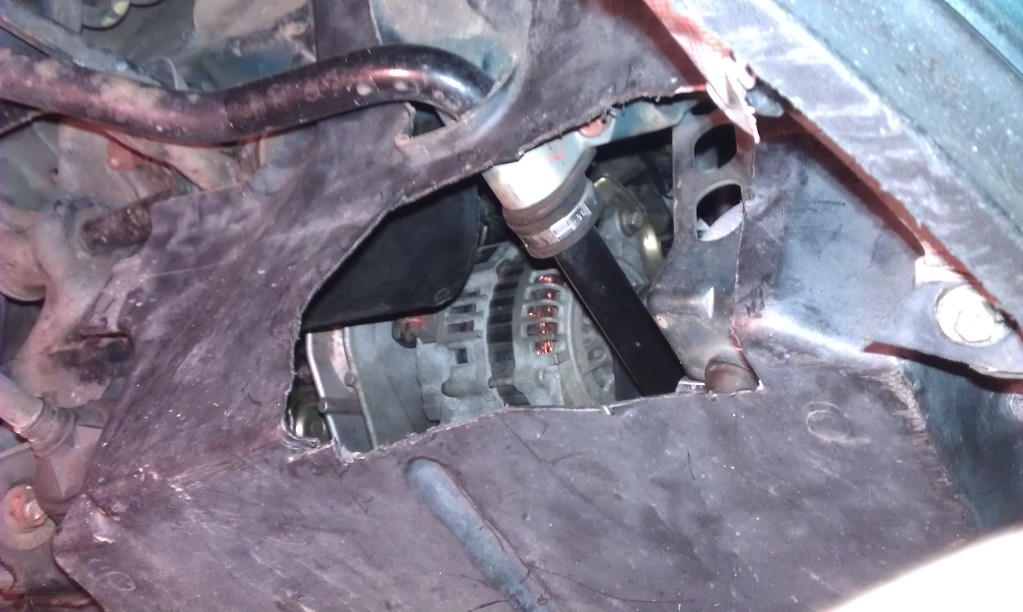
To begin, remove the stock intake and airbox. Step one is to free up the MAF/IAT wires from the factory harness so they can be routed down. This pretty self-explanatory. Just cut the electric tape at the edge, being careful not to nick a wire or cut the plastic sleeve. then unfurl the electric tape all the way down. You want to get it free all the way to the throttle body.
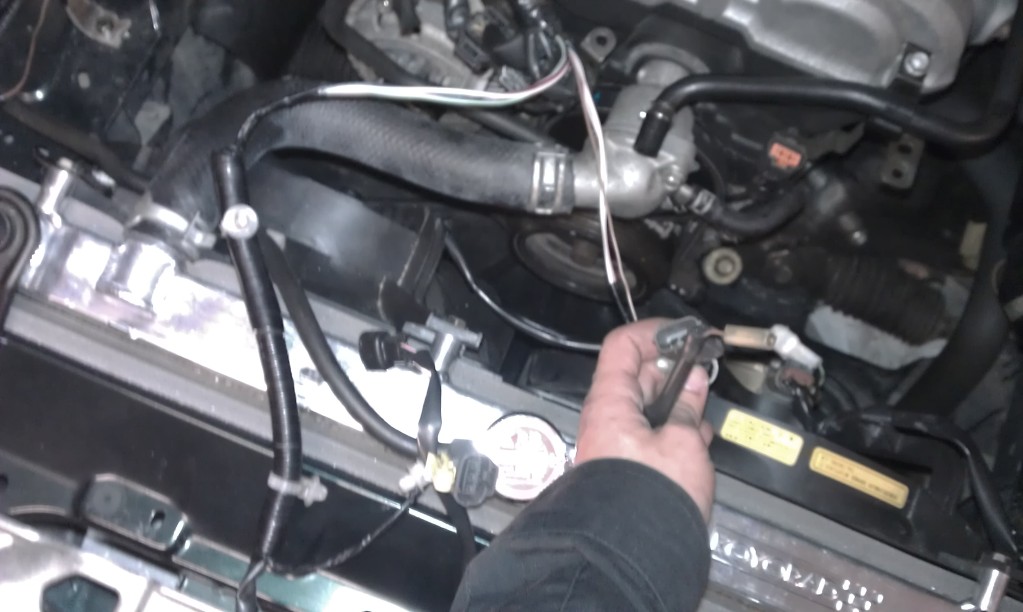
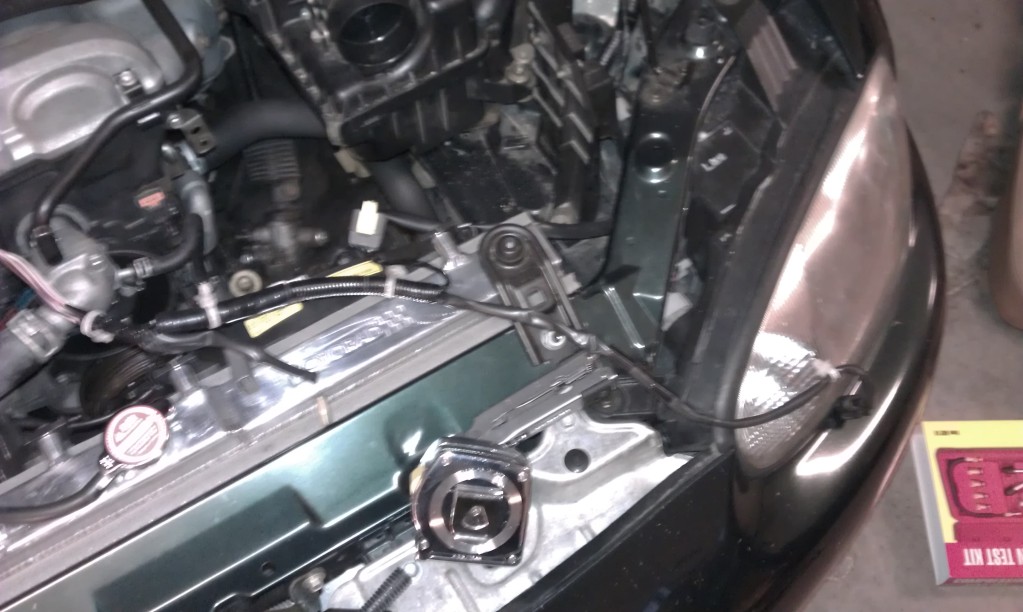

You will have to seperate it from the Crank Position Sensor and the power steering pump wires. re-wrap those up with electric tape and put them back where they belong. You don't have to, but I suggest you do this, unwrap it from the cluster of connectors seen in my last picture. (the ones next to the thermostat where the exposed wires are coming from). re-wrap everything with electrical tape and make sure you leave the plastic sleeve on the MAF/IAT wires, like I did. Not an end-all, but its for safety and peace of mind.
-Anyways, next step is to get the aluminum pipe ready. You need to cut it to length then drill the IAT sensor hole. You can see mine is near the pink/red silicone in the 3rd picture at the top. It does NOT matter if the IAT is before or after the MAF.
-The rest is just piecing things together. At this point, I would test fit the silicone pieces, you MAY have to trim the TB 90* elbow( 2.5" to 2.5") so that it doesn't hit against the upper radiator hose. How to connect:
2.5"->90*->2.5" ---> aluminum tube ---> 2.5" -> 90* -> 2.75" ---> MAF Sensor+Air Straightener ---> Air Filter
Suggestions for improvement:
-Need to extend the air Filter further into the front bumper. At that point, you can pretty much safely run this on the street and/or the track and not worry about the air filter getting physically damaged or water into the intake.
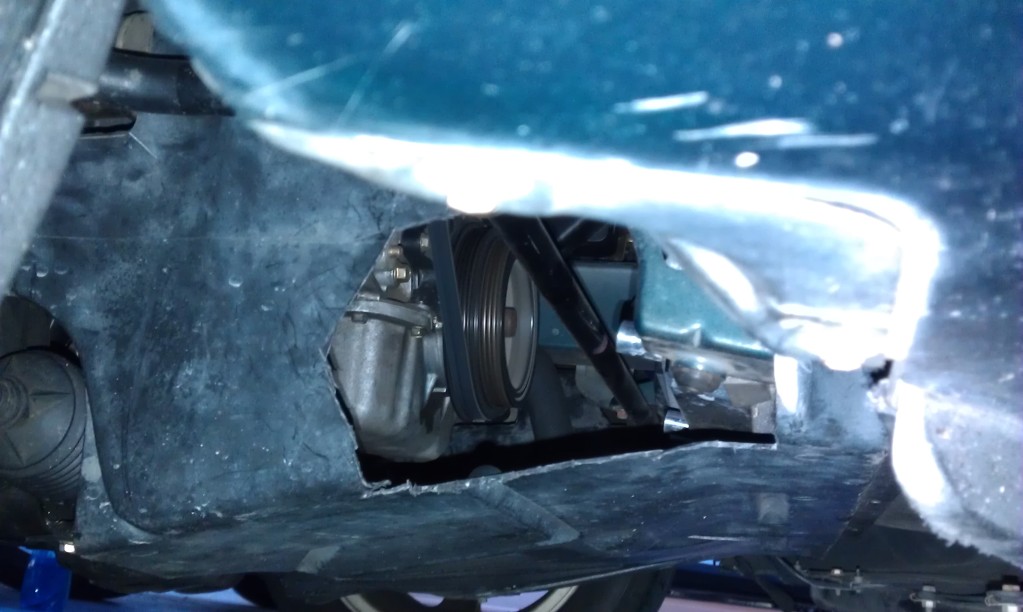
-nicer cutting of the under tray?
-Sealing the hole in the under tray if you plan to run it street/track. This will help keep the undertray's profile intact and allow it to do what it was intended to do. Personally, I won't make any claims to cooling or whatever, as thats off-topic.
WARNING: I ONLY run this intake on the track. I think it can be ran on the street if you are careful not to drive in large amounts of water or with some minor work to protect the filter from external debris.
Sorry, all my pictures suck for this as I am taking them after the fact here. I will try to get better ones over the next few days.
Parts to buy:
2.75" to 2.5" 90* bend silicone
2.5" to 2.5" 90* bend silicone
2.5" ~15.5" aluminum piping ****SEE NOTE****
Clamps (you can reuse the stock clamps if you like, and buy the rest)
Intake filter (K&N, AEM, Spectre, whatever)
Tools:
Tin snipes and/or dremel with cutting wheel
random sockets
electrical tape
small cutters to get at the electric tape already on the harness
Drill + drill bit (drill bit will need to be 1/2"+ to make a large enough hole for the IAT sensor+ its gasket)
Angle grinder to cut the aluminum piping if its too long
Note:Aluminum piping...This all depends on how you want to position the intake in the wheel well area. My measurements were pretty much spot on at 14". You can also effectively change the length by changing the overlap with the silicone. I would aim for 14"-15" and use the silicone for the fine tuning on fitment. If you use the ebay seller I note below, they offer a cutting service on the intake pipe for $1-$2.
This totally cost me $70 for everything except the intake filter. You can get shittier silicone for half the cost, making the price $50+intake filter. I got the filter for about $35 from summitracing, putting the total cost between $90-$120 depending on shipping. Here is the ebay seller I used (I got all my silicone parts except the 2.5" to 2.5" as it was out of stock at the time):
http://myworld.ebay.com/siliconeinta...:X:CEM:US:1181
To begin, remove the stock intake and airbox. Step one is to free up the MAF/IAT wires from the factory harness so they can be routed down. This pretty self-explanatory. Just cut the electric tape at the edge, being careful not to nick a wire or cut the plastic sleeve. then unfurl the electric tape all the way down. You want to get it free all the way to the throttle body.
You will have to seperate it from the Crank Position Sensor and the power steering pump wires. re-wrap those up with electric tape and put them back where they belong. You don't have to, but I suggest you do this, unwrap it from the cluster of connectors seen in my last picture. (the ones next to the thermostat where the exposed wires are coming from). re-wrap everything with electrical tape and make sure you leave the plastic sleeve on the MAF/IAT wires, like I did. Not an end-all, but its for safety and peace of mind.
-Anyways, next step is to get the aluminum pipe ready. You need to cut it to length then drill the IAT sensor hole. You can see mine is near the pink/red silicone in the 3rd picture at the top. It does NOT matter if the IAT is before or after the MAF.
-The rest is just piecing things together. At this point, I would test fit the silicone pieces, you MAY have to trim the TB 90* elbow( 2.5" to 2.5") so that it doesn't hit against the upper radiator hose. How to connect:
2.5"->90*->2.5" ---> aluminum tube ---> 2.5" -> 90* -> 2.75" ---> MAF Sensor+Air Straightener ---> Air Filter
Suggestions for improvement:
-Need to extend the air Filter further into the front bumper. At that point, you can pretty much safely run this on the street and/or the track and not worry about the air filter getting physically damaged or water into the intake.
-nicer cutting of the under tray?
-Sealing the hole in the under tray if you plan to run it street/track. This will help keep the undertray's profile intact and allow it to do what it was intended to do. Personally, I won't make any claims to cooling or whatever, as thats off-topic.
Last edited by Track; 10-30-2011 at 04:35 PM.


 10-28-2011, 06:24 PM
#6
BAMFr
Thread Starter
Join Date: Jul 2011
Location: NC
Posts: 1,787
No problem Alex! Glad to see you got back on here. I think if you do this, you could realllly improve on my shoddy work. I have been brainstorming ideas to improve it, and I think extending the intake further into the front bumper would be great, especially if one used some aluminum between the filter and the wheel to block any debris or water from getting in.
At that point, I would daily the ---- out of this intake.
At that point, I would daily the ---- out of this intake.
10-29-2011, 11:27 PM
#9
MFz Regular

Join Date: Aug 2011
Location: Oregon City, OR
Posts: 200
Just giving you crap for your jagged edges, that's all. Try an angle grinder next time, it'll melt the plastic but break off the molten plastic with your fingers and you'll end up with a straighter, cleaner edge.
10-29-2011, 11:30 PM
#10
BAMFr
Thread Starter
Join Date: Jul 2011
Location: NC
Posts: 1,787
I gotta spend more time on MT (although the CR guys are starting to complain lol) so I get to know you guys better
 .
.