
What did you do to your NB today?


MFz Lurker
Joined: May 2013
Posts: 13
From: batavia,il.

MFz Lurker
Joined: Apr 2013
Posts: 9
From: Mississauga ON
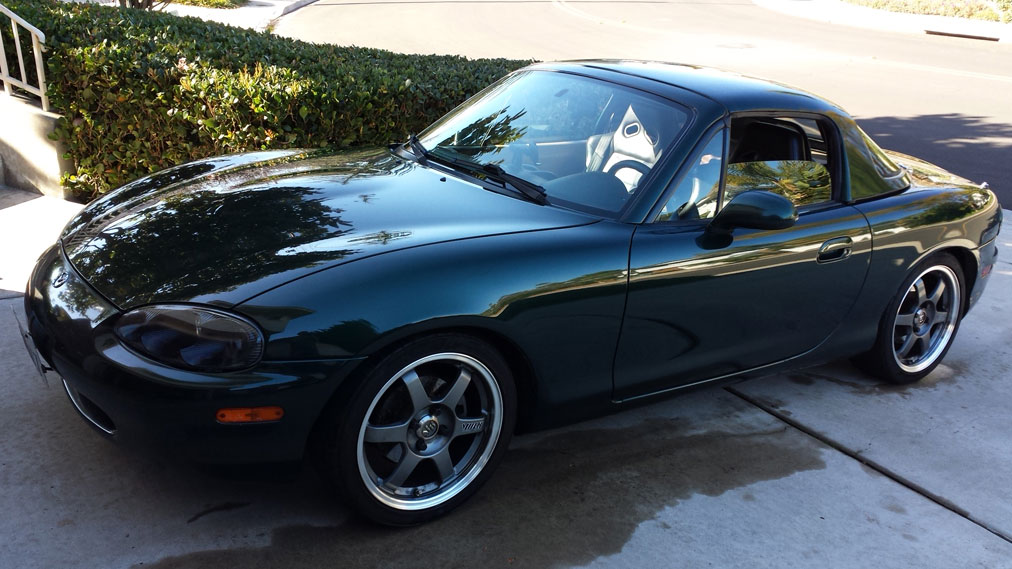
I had heard about the amount of stuff that gets into the fenders, so I opened mine up yesterday. There is a plastic screw on the underside of the wheel well liner and four more that you have to remove along the edge of the wheel well. Pull the plastic forward and inward to reveal all sorts of damp, decaying vegetation. I had some 3/4 inch clear tubing so I took one end and shoved it into the Dyson vacuum cleaner with my hand sealing the gap and proceeded to vacuum out all the debris which was mostly maple seeds and small boxwood hedge leaves. This stuff eventually makes its way into the rocker panels and keeps them wet internally. Worthwhile maintenance as it is raining today and will rain all week.
Moderator
Joined: Jul 2011
Posts: 1,902
From: Tampa, FL; Lake Jackson (Atlanta), GA
I had heard about the amount of stuff that gets into the fenders, so I opened mine up yesterday. There is a plastic screw on the underside of the wheel well liner and four more that you have to remove along the edge of the wheel well. Pull the plastic forward and inward to reveal all sorts of damp, decaying vegetation. I had some 3/4 inch clear tubing so I took one end and shoved it into the Dyson vacuum cleaner with my hand sealing the gap and proceeded to vacuum out all the debris which was mostly maple seeds and small boxwood hedge leaves. This stuff eventually makes its way into the rocker panels and keeps them wet internally. Worthwhile maintenance as it is raining today and will rain all week.


MFz Regular

Joined: Oct 2013
Posts: 107
From: North Stonington, Connecticut
I've installed FrankB's windshield washer tank permanently, in the windshield cowl area. I didn't like the rubber plug cap he provided.....too stiff and hard to remove. I had a Moroso fill cap welded to the tank, set low enough to clear the hood. Now I have a screw cap and an O-Ring seal. I also added one more attachment point to ensure it stays in place.
I'm finishing the install of a master cylinder brace, which uses a piece of 2" x 3" x 1" long structural steel angle, 1/4" thick. It bolts to the lightening holes in the stock shock tower brace, and uses a Grainger repair piece for "C Clamps" to press against the master cylinder.
However, I spent most of the day today and yesterday cleaning my 6UL wheels of carbotech dust that was virtually cemented to the rims. I tried several techniques to remove it. The best that I've found so far are Dawn dishwashing liquid and Meguiars Quick Detailer, using paper towels and a small piece of clay bar. The magic liquids from the stores have virtually no effect on carbotech dust.
Rest assured, I'll keep the rims waxed in the future to ease that task.")
Finally, last week I has a set of Bridgestone RE-11A tires mounted.
I'm finishing the install of a master cylinder brace, which uses a piece of 2" x 3" x 1" long structural steel angle, 1/4" thick. It bolts to the lightening holes in the stock shock tower brace, and uses a Grainger repair piece for "C Clamps" to press against the master cylinder.
However, I spent most of the day today and yesterday cleaning my 6UL wheels of carbotech dust that was virtually cemented to the rims. I tried several techniques to remove it. The best that I've found so far are Dawn dishwashing liquid and Meguiars Quick Detailer, using paper towels and a small piece of clay bar. The magic liquids from the stores have virtually no effect on carbotech dust.
Rest assured, I'll keep the rims waxed in the future to ease that task.
Finally, last week I has a set of Bridgestone RE-11A tires mounted.
MFz Regular
Joined: Oct 2013
Posts: 107
From: North Stonington, Connecticut
I made a master cylinder brace for the MSM. Apparently none are available commercially. I used a 1" wide piece of 2" x 3" x 1/4" steel angle iron, a few bolts and a Grainger clamp repair piece - item 3CXU7 - Swivel Foot Spindle,3/8-16,0.63,3.38
Looking Down at Shock Tower Brace.JPG
Looking from Front of Engine Bay towards Master Cylinder.JPG
Should there be any interest, I can generate a PDF of my AutoCAD drawing.
Looking Down at Shock Tower Brace.JPG
Looking from Front of Engine Bay towards Master Cylinder.JPG
Should there be any interest, I can generate a PDF of my AutoCAD drawing.
MFz Regular
Joined: Oct 2013
Posts: 107
From: North Stonington, Connecticut
Again, this has been in place for a while, but I thought I'd show it off 
The new gauges are Glow Shift, and the installation required a LOT of cutting on the stock instrument cluster, mostly with a dremel tool.
While it's still a work in progress, I've replaced two gauges in the instrument cluster with working gauges, boost pressure, top center and oil temperature, lower right. Also you'll note two points of light to the left of the speedometer and to the right of the tach. Those are LEDs that light when the oil pressure is less than 7 PSI. They use the stock oil pressure gauge circuitry....which is all the stock gauge shows.
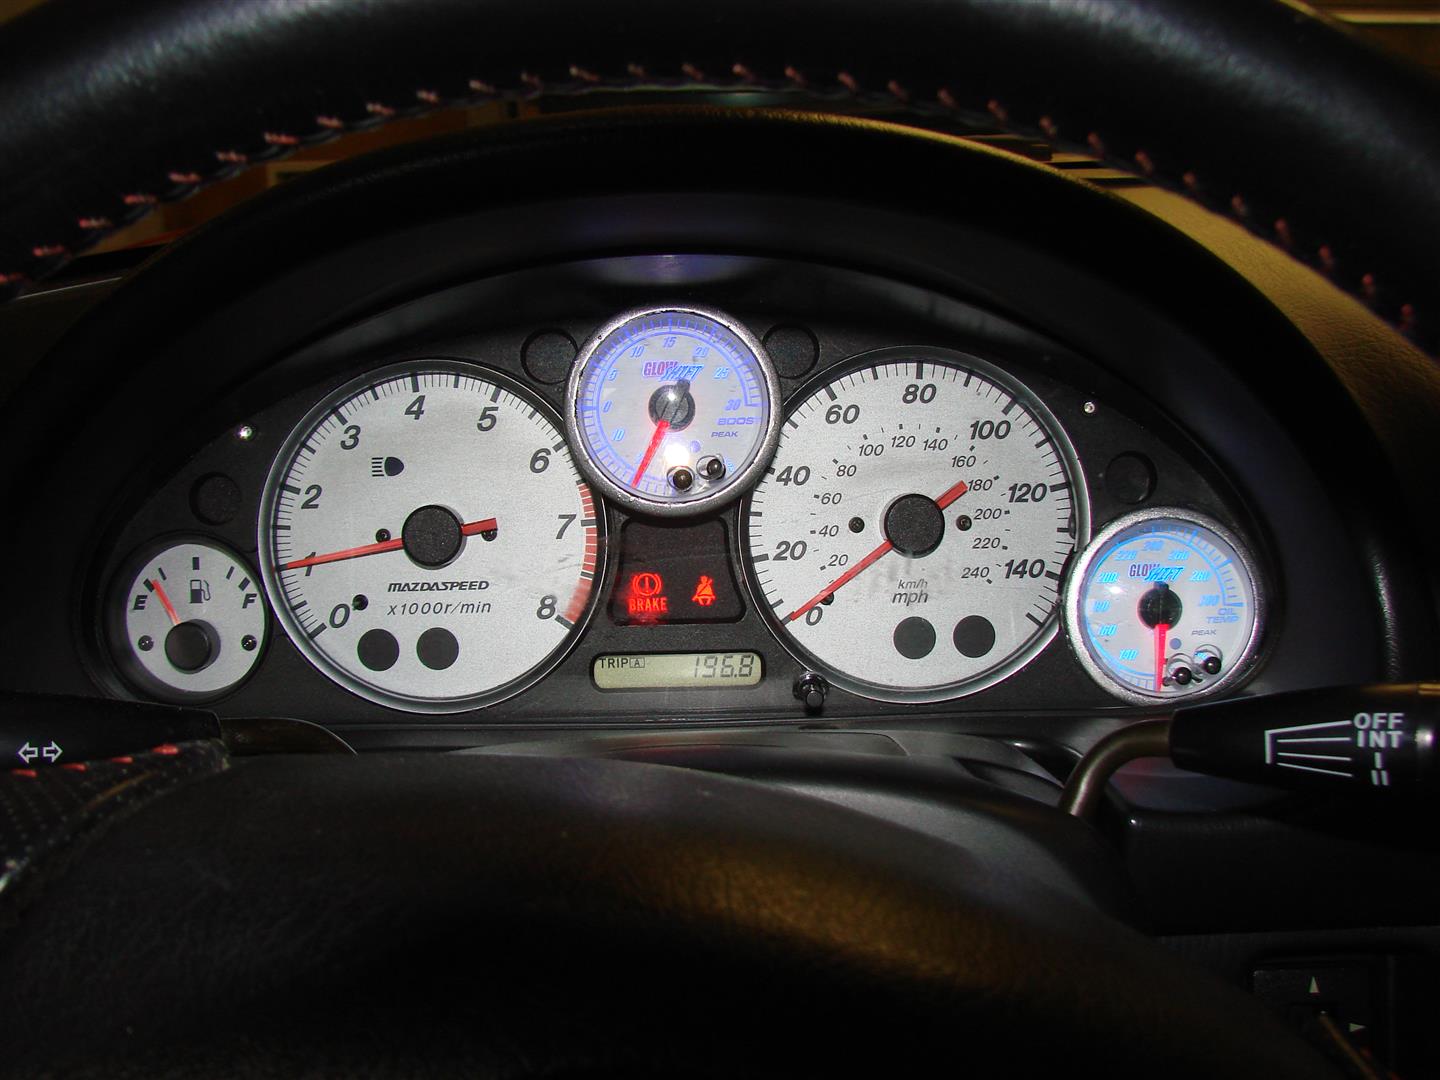

The fuel gauge is next on the list. The existing fuel gauge location will have a working oil pressure gauge. The fuel gauge itself will be replaced with a LEd bargraph shown above. While the bargraph works, I'm not quite ready to cut into the car to flush mount it yet. It needs a few more miles to ensure it'll continue working.
Unfortunately, the water temperature will for the forseeable future remain in the left side vent location....just not enough space inside the instrument cluster.
The new gauges are Glow Shift, and the installation required a LOT of cutting on the stock instrument cluster, mostly with a dremel tool.
While it's still a work in progress, I've replaced two gauges in the instrument cluster with working gauges, boost pressure, top center and oil temperature, lower right. Also you'll note two points of light to the left of the speedometer and to the right of the tach. Those are LEDs that light when the oil pressure is less than 7 PSI. They use the stock oil pressure gauge circuitry....which is all the stock gauge shows.
The fuel gauge is next on the list. The existing fuel gauge location will have a working oil pressure gauge. The fuel gauge itself will be replaced with a LEd bargraph shown above. While the bargraph works, I'm not quite ready to cut into the car to flush mount it yet. It needs a few more miles to ensure it'll continue working.
Unfortunately, the water temperature will for the forseeable future remain in the left side vent location....just not enough space inside the instrument cluster.

