
mx5 2nr's build thread


Thread Starter
MFz Lurker
Joined: Oct 2011
Posts: 43
From: San Antonio, Texas
Copy/pasted from my build thread from Club Roadster. I'm going to try my best to mirror my build thread there with this one. Link to said thread: CR build thread
So here is the story of my Miata project. A �lil background is in order� After a few years of not having a �fun car�, I grew a bit annoyed. I had sold my NB 2 or 3 years prior due to financial issues. Originally I was looking at a few various project cars I�ve kinda always wanted � Conquest/Starion, E30, �80�s Mini-Truck, FB (1st gen RX7), C3 Corvette, an old Datsun 240Z, or a Miata. The Miata bug had already infected me & I felt a relapse brewing�
Eventually (Feb 2k11) I came across this Miata in a Houston Craiglist that was square in my price range ($2k) & had a good friend who is also one of my old Miata buddies check it out for me on a Friday. He called me that night after looking at it & mentioned that it was really �ricey�. It had the full Fast & Furious treatment aside from Altezza tails & Troy-Lee graphics. It had an awful aluminum wing bolted into the trunk, black painted style bars, & the plastic window was held on with zip-ties. It smelled like ***, looked like ***, but it drove really really good. Overall he said that the drive train was good, & if I can get a few dollars knocked off it�d be a good deal. I talked to the owner over the phone & agreed on a $1800 price. The next day I grabbed my girlfriend & was on my way to Houston to pick up my new toy.
--Pic from the Craiglist Ad
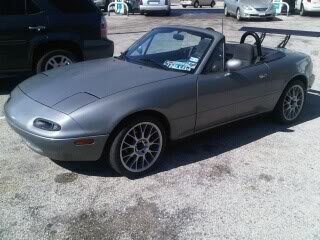
So after I picked up the car I decided that there�d be no way I�d make the trek back to San Antonio with that gawd-awful wing on, so I whipped out my tools & removed it � the first step to saving this car from the clutches of ricedom. One of the things that I had noticed & that my friend had pointed out was that somewhere in the life of this poor car the paint had been changed to some sort of grey�ish color. Kinda a bummer since it�s an original 1990 Silvertone, of which there was only like 3000 made (don�t quote me, IIRC I read it on M.net). One of the things that will need to be addressed in the future will definitely the paint � that�s later�
First thing�s first , I got it back to my garage in San Antonio to assess what I had bought. Aside from the horrible smell, it actually drove pretty good. The shifter had a little grind, but really, other than that it wasn�t bad. I went ahead and changed all the fluids � oil, tranny, turret, diff, etc.. and the spark plugs. It felt much much better.
Next after a few weeks I went ahead and deleted my top & attempted to find the culprit of the stank that had started to permeate my garage.
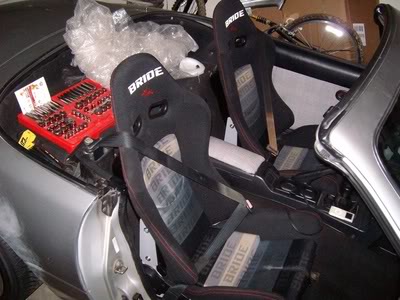
--interior ripped apart
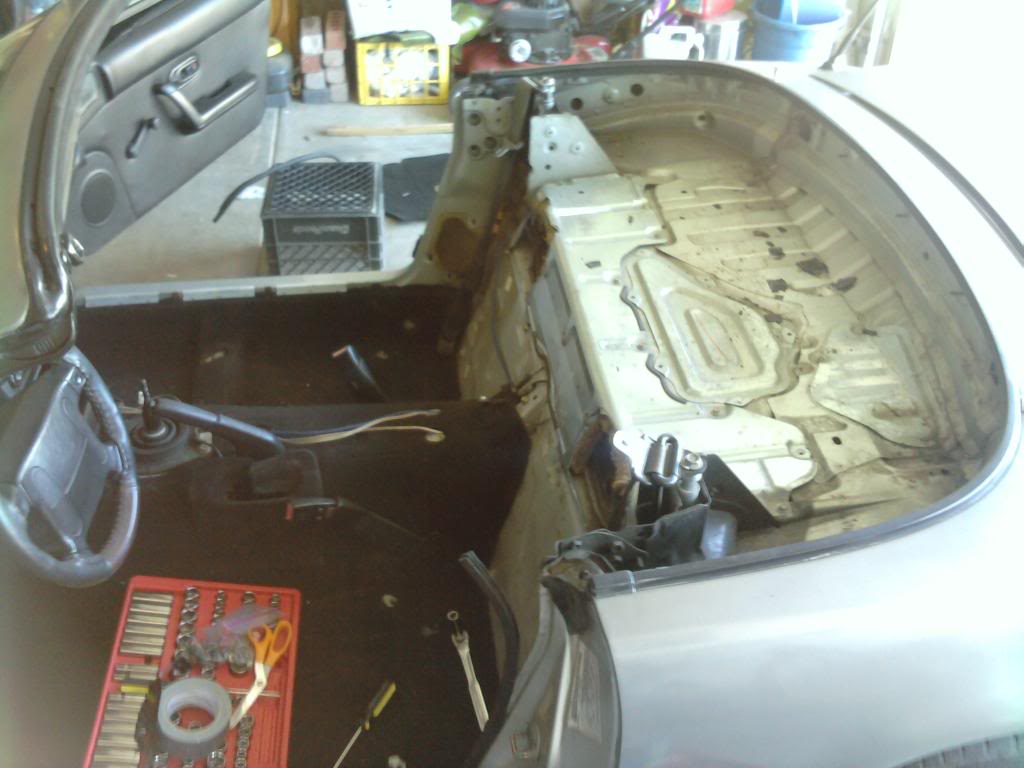
In the process of deleting the top and ripping out the interior, I got inspired & decided to do a headunit-less stereo since the stereo that was in it was some horrible �Pyle� stereo that had a Scarface dvd stuck inside.
--Yes that�s a 6x9 speaker sitting in the tunnel behind the driver�s seat.
I went ahead and installed a JL Audio e2150 amp & Polk db65 6.5� 2-way coax door speakers. I hooked it up direct to my old Ipod. It sounds good & recommend doing it if you�re looking to do a stereo without showing it off to potential thieves.
So I found the culprit of the horrid stench � the top had been rained on with it�s disastrous rear window repair, leaking water into the interior. The water had dried into the foam sound-deadening/heat foam stuff, turning it moldy. I ripped all of it out & steam cleaned every piece of carpet 3 times. I went ahead and steam cleaned the seats a few times to make sure the stench was gone for good. I cleaned every panel by hand before I reassembled them.
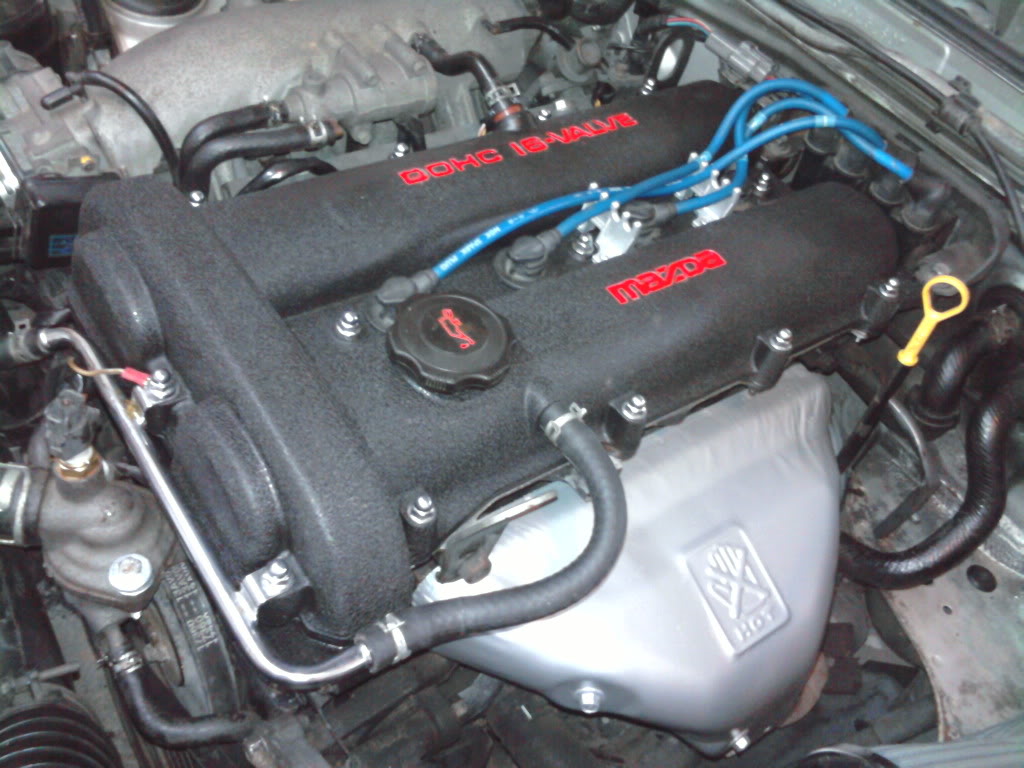
A month or two passed & I decided to go ahead and detail the engine since it had like 21 years of crap on it & looked atrocious. After a few passes of Simple Green it really didn�t change much, but it was noticibly cleaner, pictures don�t do it justice� I went to the local Pick N� Pull and found a few interior bits that were damaged in my car, a spiffy (ha!) mesh grille & a valve cover that I would later repaint when I change valve cover gaskets. I also went to town with engine paint, toothbrush and Simple Green.
I wanted to redo my interior panels �cause I always dug the plaid look on older VW�s, & I never got to redo panels on my old GTI in plaid so I found some fabric at a local Hancock & recovered them�
<pic of door panels>
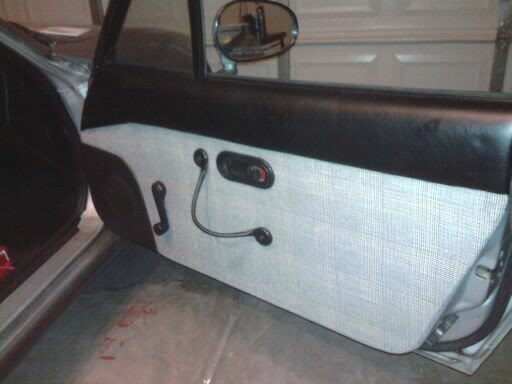
It was really easy (the panels), and makes a difference in the look of the cabin. I made my own door pulls based on some of the DIY�s on the forum. I used the leather handles off a purse I found at a thrift store. All in all I think I spent like $10 and an hour doing the panels.
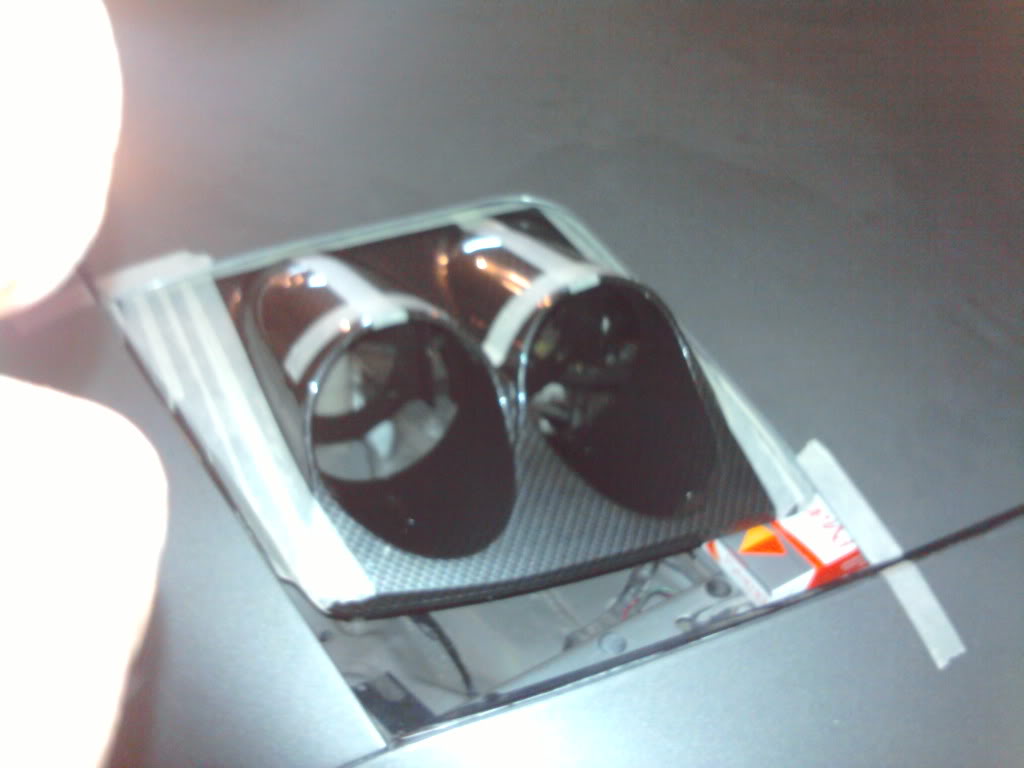
So a few months passed and I had been saving pennies for coil overs & wheels, I went ahead and ordered them, but as I was online ordering them, I got a little click happy & decided that I needed to replace the bug-eyes with something updated... So I did the sensible thing & decided that modifying a 240 exposed headlight to fit a Miata would make sense. Yeah. So being that my logic was flawless I went ahead and picked some up off ebay & with some metal flashing, a dremel, some bondo, some primer, a lot of sandpaper, and a drill I came up with this:
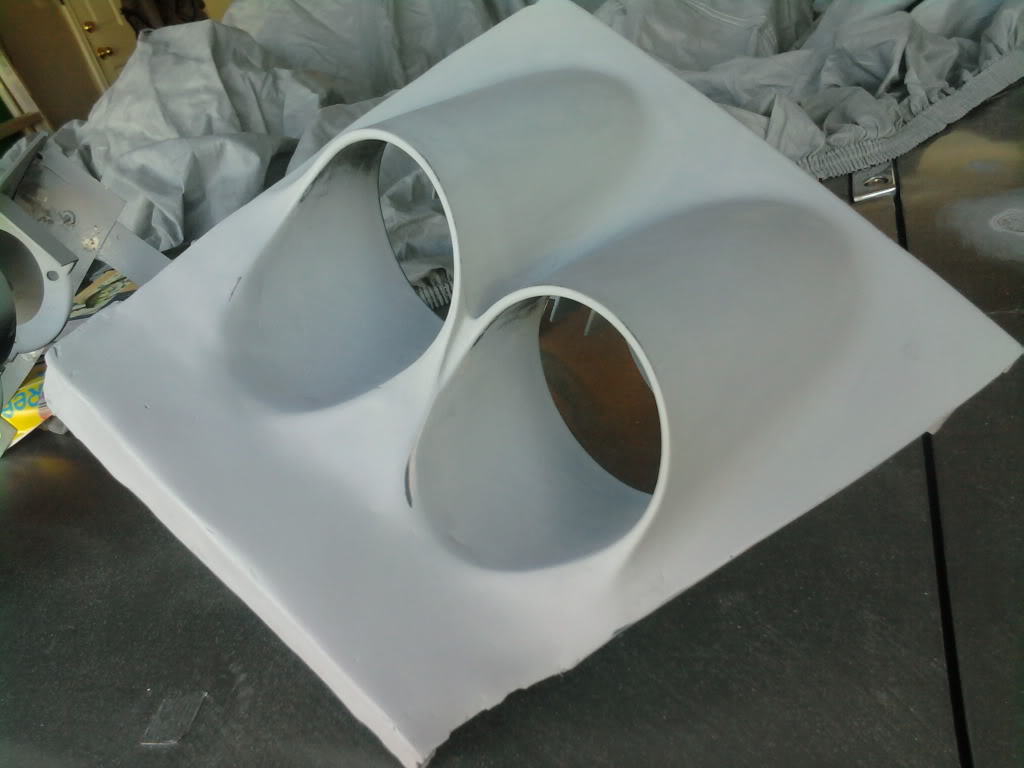
It started life as this:
*** Props go out to SPRSTA & 97_M-edition for helping me out & replying back to my pestering private messages on their 240 headlight conversions. ***
I'm going to go ahead & post this up for now. More to come soon - consider this part 1. As of typing this I've already installed coil overs, fitted the wheels, and am finishing up the stereo. And at the time of typing this, I've already ordered my "Canadian" Bride seats, & am on the hunt for a hardtop....
__________________
So here is the story of my Miata project. A �lil background is in order� After a few years of not having a �fun car�, I grew a bit annoyed. I had sold my NB 2 or 3 years prior due to financial issues. Originally I was looking at a few various project cars I�ve kinda always wanted � Conquest/Starion, E30, �80�s Mini-Truck, FB (1st gen RX7), C3 Corvette, an old Datsun 240Z, or a Miata. The Miata bug had already infected me & I felt a relapse brewing�
Eventually (Feb 2k11) I came across this Miata in a Houston Craiglist that was square in my price range ($2k) & had a good friend who is also one of my old Miata buddies check it out for me on a Friday. He called me that night after looking at it & mentioned that it was really �ricey�. It had the full Fast & Furious treatment aside from Altezza tails & Troy-Lee graphics. It had an awful aluminum wing bolted into the trunk, black painted style bars, & the plastic window was held on with zip-ties. It smelled like ***, looked like ***, but it drove really really good. Overall he said that the drive train was good, & if I can get a few dollars knocked off it�d be a good deal. I talked to the owner over the phone & agreed on a $1800 price. The next day I grabbed my girlfriend & was on my way to Houston to pick up my new toy.
--Pic from the Craiglist Ad
So after I picked up the car I decided that there�d be no way I�d make the trek back to San Antonio with that gawd-awful wing on, so I whipped out my tools & removed it � the first step to saving this car from the clutches of ricedom. One of the things that I had noticed & that my friend had pointed out was that somewhere in the life of this poor car the paint had been changed to some sort of grey�ish color. Kinda a bummer since it�s an original 1990 Silvertone, of which there was only like 3000 made (don�t quote me, IIRC I read it on M.net). One of the things that will need to be addressed in the future will definitely the paint � that�s later�
First thing�s first , I got it back to my garage in San Antonio to assess what I had bought. Aside from the horrible smell, it actually drove pretty good. The shifter had a little grind, but really, other than that it wasn�t bad. I went ahead and changed all the fluids � oil, tranny, turret, diff, etc.. and the spark plugs. It felt much much better.
Next after a few weeks I went ahead and deleted my top & attempted to find the culprit of the stank that had started to permeate my garage.
--interior ripped apart
In the process of deleting the top and ripping out the interior, I got inspired & decided to do a headunit-less stereo since the stereo that was in it was some horrible �Pyle� stereo that had a Scarface dvd stuck inside.
--Yes that�s a 6x9 speaker sitting in the tunnel behind the driver�s seat.
I went ahead and installed a JL Audio e2150 amp & Polk db65 6.5� 2-way coax door speakers. I hooked it up direct to my old Ipod. It sounds good & recommend doing it if you�re looking to do a stereo without showing it off to potential thieves.
So I found the culprit of the horrid stench � the top had been rained on with it�s disastrous rear window repair, leaking water into the interior. The water had dried into the foam sound-deadening/heat foam stuff, turning it moldy. I ripped all of it out & steam cleaned every piece of carpet 3 times. I went ahead and steam cleaned the seats a few times to make sure the stench was gone for good. I cleaned every panel by hand before I reassembled them.
A month or two passed & I decided to go ahead and detail the engine since it had like 21 years of crap on it & looked atrocious. After a few passes of Simple Green it really didn�t change much, but it was noticibly cleaner, pictures don�t do it justice� I went to the local Pick N� Pull and found a few interior bits that were damaged in my car, a spiffy (ha!) mesh grille & a valve cover that I would later repaint when I change valve cover gaskets. I also went to town with engine paint, toothbrush and Simple Green.
I wanted to redo my interior panels �cause I always dug the plaid look on older VW�s, & I never got to redo panels on my old GTI in plaid so I found some fabric at a local Hancock & recovered them�
<pic of door panels>
It was really easy (the panels), and makes a difference in the look of the cabin. I made my own door pulls based on some of the DIY�s on the forum. I used the leather handles off a purse I found at a thrift store. All in all I think I spent like $10 and an hour doing the panels.
So a few months passed and I had been saving pennies for coil overs & wheels, I went ahead and ordered them, but as I was online ordering them, I got a little click happy & decided that I needed to replace the bug-eyes with something updated... So I did the sensible thing & decided that modifying a 240 exposed headlight to fit a Miata would make sense. Yeah. So being that my logic was flawless I went ahead and picked some up off ebay & with some metal flashing, a dremel, some bondo, some primer, a lot of sandpaper, and a drill I came up with this:
It started life as this:
*** Props go out to SPRSTA & 97_M-edition for helping me out & replying back to my pestering private messages on their 240 headlight conversions. ***
I'm going to go ahead & post this up for now. More to come soon - consider this part 1. As of typing this I've already installed coil overs, fitted the wheels, and am finishing up the stereo. And at the time of typing this, I've already ordered my "Canadian" Bride seats, & am on the hunt for a hardtop....
__________________
Thread Starter
MFz Lurker
Joined: Oct 2011
Posts: 43
From: San Antonio, Texas
So ok I suppose this is part 2...
So as I was fabricating the headlights my coil-overs came in - Megan EZ Streets. I got them for $599 at LSD Motorsport, I was still waiting on my wheels - 15x9, 0 offset XXR 002's. Yes they're played, but screw it - I still like them. And for the price ($350/set), you can't beat 'em. I went ahead and ordered the tires; 195/45/15 Nexxus N3000 while I was fabricating the lights.
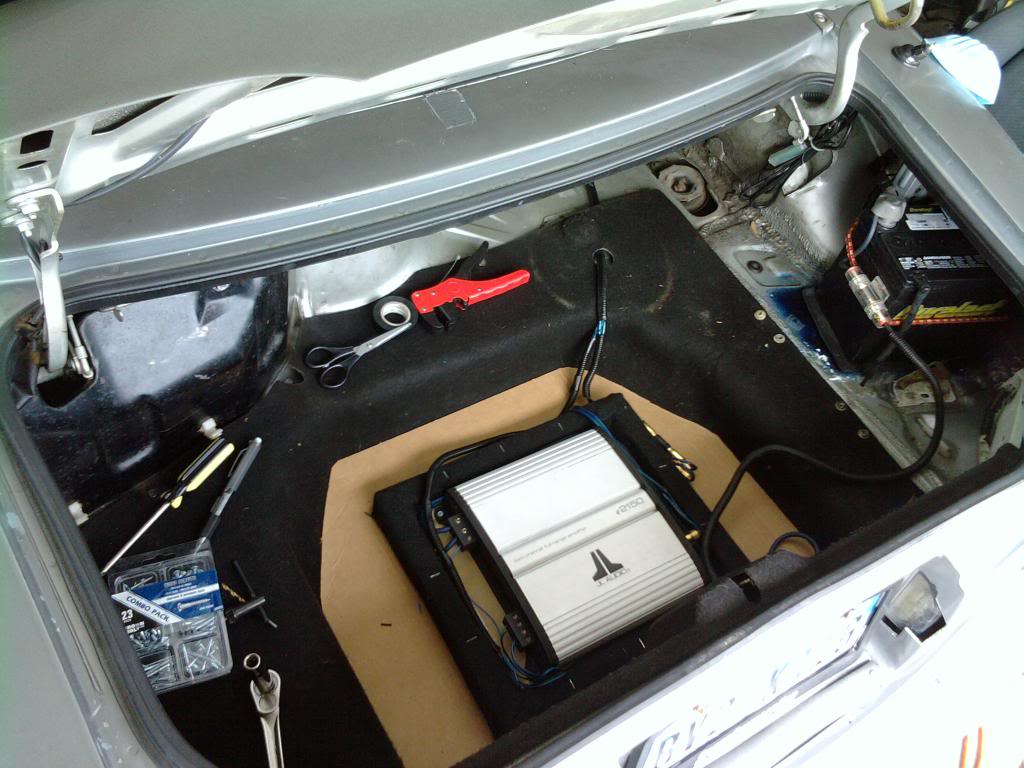
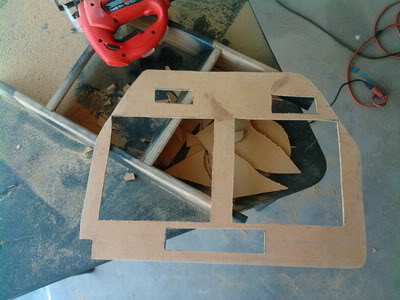
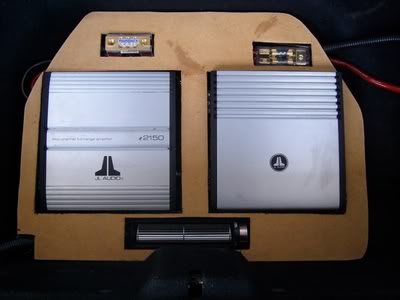
I also found a JL Audio A2150 & a JL Audio 8" sub on flea-bay going for next to nothing. I had the guy on ebay that makes Miata trunk enclosures make a 8" version of his box to fit the JL. I needed an actual battery tray and a better way to secure the battery so I got the factory battery mount kit, battery turn off post (so it's easier to disconnect the battery), and I got some blingy Stinger multiple output positive battery terminal.
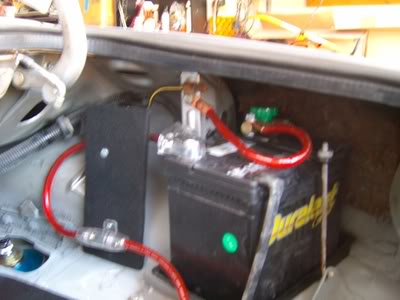
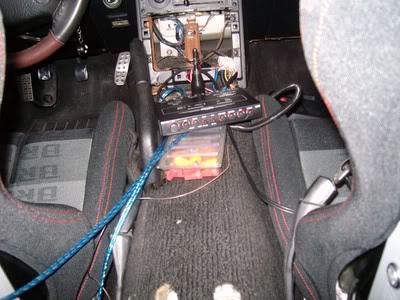
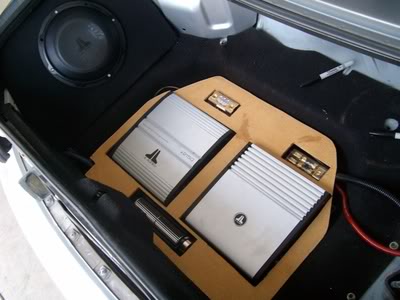
I went ahead and added the new pieces to the stereo, added a fan, used some old Phoenix Gold wires & distribution blocks, and came up with a trunk that looks like this:
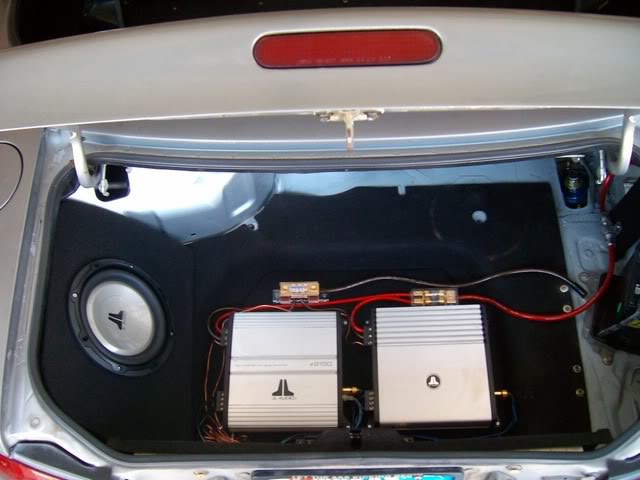
I'm still not finished yet, I decided to add an in dash equalizer/line driver to get better control over the music & to get an improved signal to the amps. I've got a piece of plexiglass & some trim pieces I still need to finish - but until those parts come in, this is where I'm leaving it.
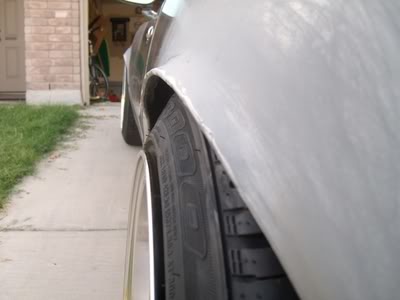
Right now I feel as if I really should give serious props to the guy who wrote the DIY on the suspension install. I'm sorry I completely forgot his name right now, but If I ever see him, Im getting him beer and a hooker. He deserves it... [EDIT: FooSchnickens, if you're reading this - I owe you!] After studying the DIY like a hawk, I decided to tackle the coil over install. While I was installing the suspension I picked up a fender roller & got a 'lil roll-happy. Honestly I wasn't planning on flaring out the rear as much as I did, but I'm happy with the look. This is the end result:
It was the single most dramatic change I've done to the car & I can't be any happier...
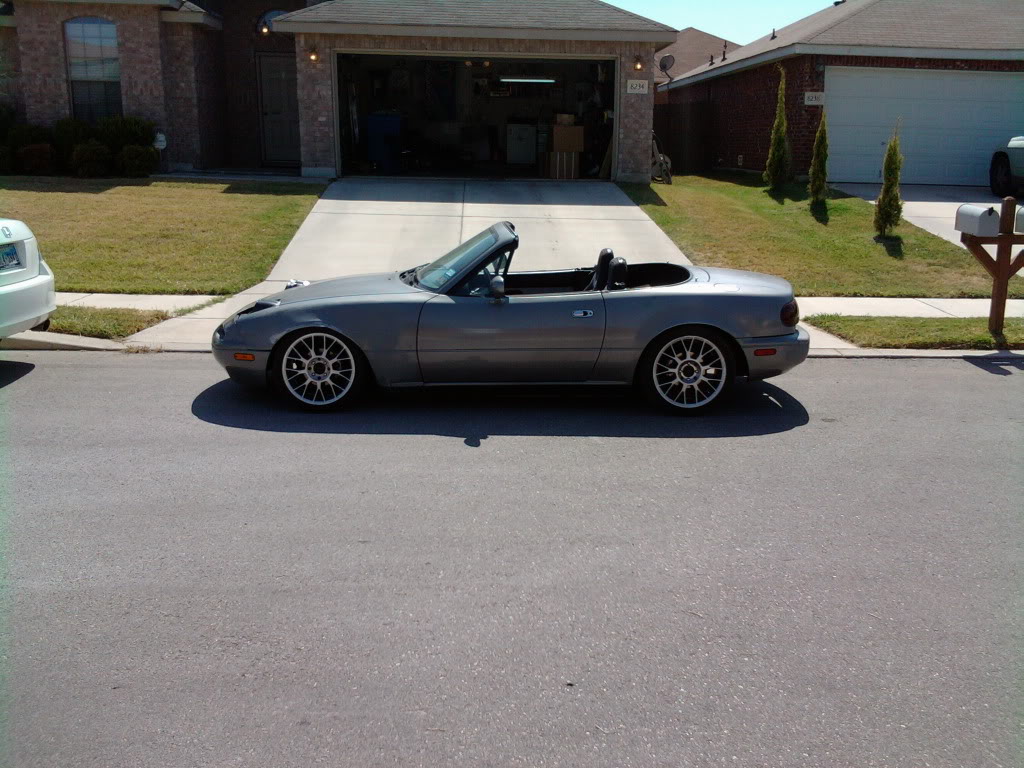
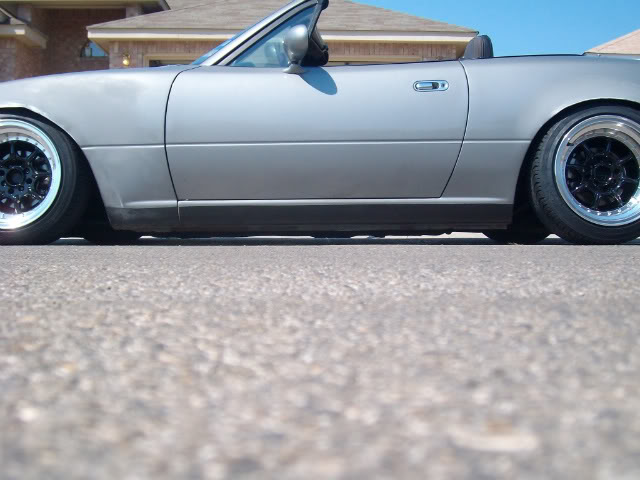
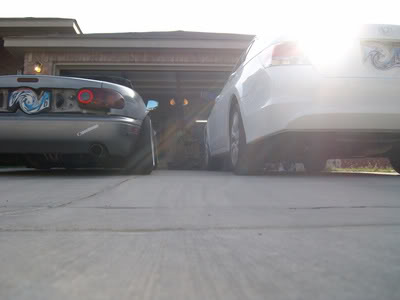
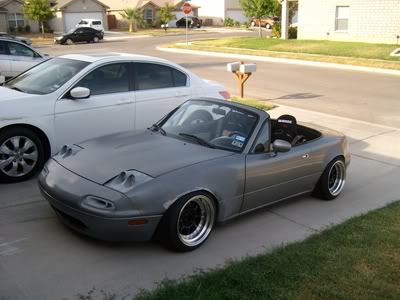
A few weeks later (this past Friday) my wheels finally came in! I got the tires mounted & threw them on the car. I re-adjusted the suspension to max drop in the rear, and I have about another .25" lower I can go in the fronts. I'm glad I rolled and pulled the fenders as much as I did - the only rubbing I have is on the front drivers side when I make right turns. There's a tab where the bumper meets the fender that I need to cut/grind off. Anyway, on to the pics...

As you can see, I still have a ton of work left, mainly bodywork, before it looks pretty. I need a rear finish panel & I need to decide which front lip I want to do before it gets to see a paint booth. I eventually want to pull the motor & drop in a 1.8 & turbo, but in time...
As I was typing this, my seats, & EQ just came in. So it's back to the garage for me... More to come...
So as I was fabricating the headlights my coil-overs came in - Megan EZ Streets. I got them for $599 at LSD Motorsport, I was still waiting on my wheels - 15x9, 0 offset XXR 002's. Yes they're played, but screw it - I still like them. And for the price ($350/set), you can't beat 'em. I went ahead and ordered the tires; 195/45/15 Nexxus N3000 while I was fabricating the lights.
I also found a JL Audio A2150 & a JL Audio 8" sub on flea-bay going for next to nothing. I had the guy on ebay that makes Miata trunk enclosures make a 8" version of his box to fit the JL. I needed an actual battery tray and a better way to secure the battery so I got the factory battery mount kit, battery turn off post (so it's easier to disconnect the battery), and I got some blingy Stinger multiple output positive battery terminal.
I went ahead and added the new pieces to the stereo, added a fan, used some old Phoenix Gold wires & distribution blocks, and came up with a trunk that looks like this:
I'm still not finished yet, I decided to add an in dash equalizer/line driver to get better control over the music & to get an improved signal to the amps. I've got a piece of plexiglass & some trim pieces I still need to finish - but until those parts come in, this is where I'm leaving it.
Right now I feel as if I really should give serious props to the guy who wrote the DIY on the suspension install. I'm sorry I completely forgot his name right now, but If I ever see him, Im getting him beer and a hooker. He deserves it... [EDIT: FooSchnickens, if you're reading this - I owe you!] After studying the DIY like a hawk, I decided to tackle the coil over install. While I was installing the suspension I picked up a fender roller & got a 'lil roll-happy. Honestly I wasn't planning on flaring out the rear as much as I did, but I'm happy with the look. This is the end result:
It was the single most dramatic change I've done to the car & I can't be any happier...
A few weeks later (this past Friday) my wheels finally came in! I got the tires mounted & threw them on the car. I re-adjusted the suspension to max drop in the rear, and I have about another .25" lower I can go in the fronts. I'm glad I rolled and pulled the fenders as much as I did - the only rubbing I have is on the front drivers side when I make right turns. There's a tab where the bumper meets the fender that I need to cut/grind off. Anyway, on to the pics...
As you can see, I still have a ton of work left, mainly bodywork, before it looks pretty. I need a rear finish panel & I need to decide which front lip I want to do before it gets to see a paint booth. I eventually want to pull the motor & drop in a 1.8 & turbo, but in time...
As I was typing this, my seats, & EQ just came in. So it's back to the garage for me... More to come...
Thread Starter
MFz Lurker
Joined: Oct 2011
Posts: 43
From: San Antonio, Texas
Got the (fake) Bride Gias seats in & used the factory rail/slider to bolt them in. I really can't gain any more weight - seriously. I can barely shoehorn myself into them. For reference I'm 6'2"; 34 inseam, 34-36 waist (pushing 36 right now, yes I'm a fatty)... Thanks go out to xDJ DUBx for giving me insight on how to get them in.
I haven't taken them out on the street yet, it's too freakin' hot right now & I'm about to install the last of the stereo stuff (EQ & new RCA cables & start on the amp rack trim).
Steering wheel, brakes, rear finish panel, front lip (need opinions - I was set on a Togue Run lip, but I'm thinking maybe R-Package?), RSX-type projector low beam HID's, and exhaust are on the menu....
Thread Starter
MFz Lurker
Joined: Oct 2011
Posts: 43
From: San Antonio, Texas
(CR member asked about headlights)
Here's an additional pic of the mock up of the brackets I fabbed for the headlights:
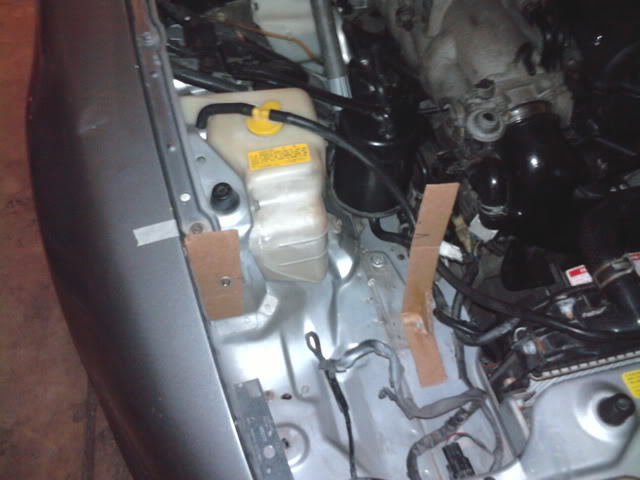
-- What I didn't take a pic of was where I mounted them on the front (near the bumper). I popped off the 3 plastic tabs on the radiator support and used 11/32" bolts/nuts/washers to keep the front part of the headlight down. To access the bolts I have to take off the TSI, you might be able to avoid doing that, but my "Arsenio Hall" hands are just too damn big.
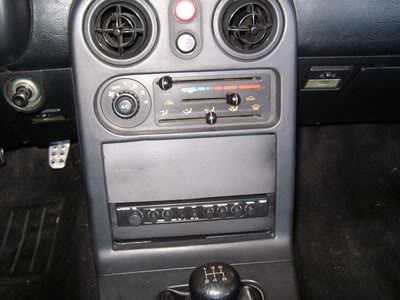
I finished the install on the EQ & made a trim/blanking plate out of leftover basswood from design projects. Great easy to use material, as long as you remember how flimsy it is. I cracked it on the top left hand side as I was screwing it in & split it as I was trimming it to fit the EQ Oh well, guess I gotta spring for the $12 panel from Rennmetal.com - serves me right for being a cheap-***...
(pic of testing the EQ)
(pic installed; the panel doesn't glare normally, I think it's the flash on the camera)
Random pics in the driveway after I cruised out to meet up with Stoly on Labor Day...
I was planning on finishing the trim on the amp rack this weekend, but I'm going to be out car shopping - not for me though. My girlfriend wrecked her '06 Mustang a week ago & it appears that it's most likely going to get totaled. She's ok, just a 'lil sore. She's more upset that she's going to lose her baby.
I ordered rotors & pads the other day, they should be here in about a week & I'm shopping brake lines right now. I'll be doing a brake job in the upcoming weeks - I just realized how ****-poor my brakes really are.
Here's an additional pic of the mock up of the brackets I fabbed for the headlights:
-- What I didn't take a pic of was where I mounted them on the front (near the bumper). I popped off the 3 plastic tabs on the radiator support and used 11/32" bolts/nuts/washers to keep the front part of the headlight down. To access the bolts I have to take off the TSI, you might be able to avoid doing that, but my "Arsenio Hall" hands are just too damn big.
I finished the install on the EQ & made a trim/blanking plate out of leftover basswood from design projects. Great easy to use material, as long as you remember how flimsy it is. I cracked it on the top left hand side as I was screwing it in & split it as I was trimming it to fit the EQ Oh well, guess I gotta spring for the $12 panel from Rennmetal.com - serves me right for being a cheap-***...
(pic of testing the EQ)
(pic installed; the panel doesn't glare normally, I think it's the flash on the camera)
Random pics in the driveway after I cruised out to meet up with Stoly on Labor Day...
I was planning on finishing the trim on the amp rack this weekend, but I'm going to be out car shopping - not for me though. My girlfriend wrecked her '06 Mustang a week ago & it appears that it's most likely going to get totaled. She's ok, just a 'lil sore. She's more upset that she's going to lose her baby.
I ordered rotors & pads the other day, they should be here in about a week & I'm shopping brake lines right now. I'll be doing a brake job in the upcoming weeks - I just realized how ****-poor my brakes really are.

Thread Starter
MFz Lurker
Joined: Oct 2011
Posts: 43
From: San Antonio, Texas
This Saturday I'm finally going to be doing my brakes. I picked up a low profile hydraulic jack from Harbor Freight - ----'s dope. No more driving up 2 levels of wood to get a jack under the car - only 1 thin level now...
I just got in from working on the "beauty board" trim piece for the amp rack. Looks ok, just need to wrap it in fabric (same as the door panels). I strained my shoulder cutting it up though, & I'm in pain... Glad I'm off for a lil' while, I'm gonna be hopped up on pain killers... Still gonna do these brakes on Saturday, ---- pain...
Edit for pics of progress...
Thread Starter
MFz Lurker
Joined: Oct 2011
Posts: 43
From: San Antonio, Texas
Got a window to work on the car today. Finished up wrapping the amp trim piece. I kinda rushed it & moved the fabric while it was drying so as you can see, the lines came out crooked... sigh... oh well, I'm rollin with it for now. It's something for me to redo at a later time.
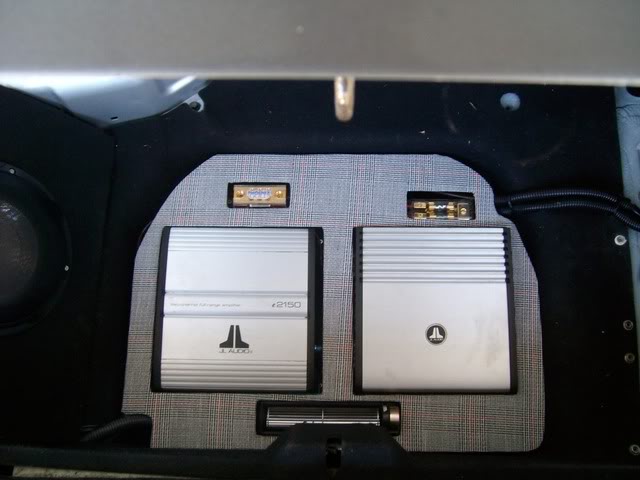
you can kinda see the slant on the fabric
^^^
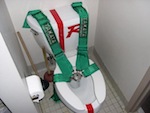
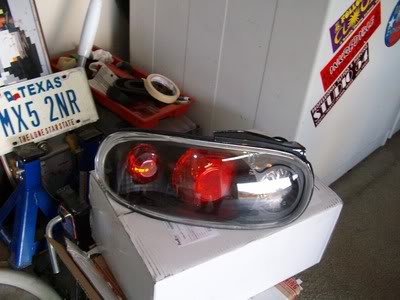
teaser pic of the next 'lil project that's been sitting in the garage for a few weeks. Yes custom altezza's!!! hahaha! Don't worry, they are going to be "massaged" a bit - I'm hoping they won't turn out ricey. If they do, this might be the only evidence of me ever purchasing something this wack... I'm trying to get them done & on the car by Stoly's F&F event on 10/01, we'll see if that happens... And if you were wondering - yes that's a real license plate (MX5 2NR). I had it on the silver NB I used to own (my avatar, pics in my album). And yes, I have plans to use it (another teaser)...
Remember kids, only you can prevent forest fires...
you can kinda see the slant on the fabric
^^^
teaser pic of the next 'lil project that's been sitting in the garage for a few weeks. Yes custom altezza's!!! hahaha! Don't worry, they are going to be "massaged" a bit - I'm hoping they won't turn out ricey. If they do, this might be the only evidence of me ever purchasing something this wack... I'm trying to get them done & on the car by Stoly's F&F event on 10/01, we'll see if that happens... And if you were wondering - yes that's a real license plate (MX5 2NR). I had it on the silver NB I used to own (my avatar, pics in my album). And yes, I have plans to use it (another teaser)...
Remember kids, only you can prevent forest fires...
Thread Starter
MFz Lurker
Joined: Oct 2011
Posts: 43
From: San Antonio, Texas
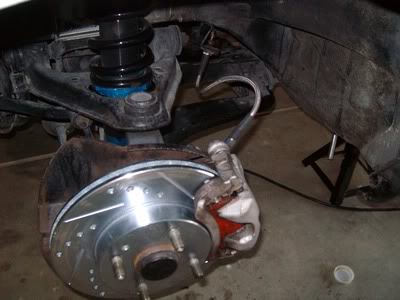
So with the help of Stoly (big props brah) I got to working on my brakes this weekend.

It was all lookin' good, got everything installed (pads/rotors/SS lines).
Then the next morning I got my girlfriend to lend a foot to help me bleed the system. The bleeder valve on the right rear caliper was stuck so I exerted my manhood to show him who's boss - bad move...
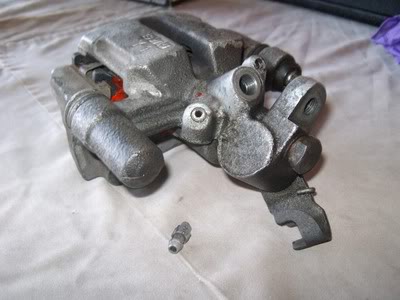
I snapped the bleeder valve screw right at the caliper & I spent the next few hours trying to get it out - it's a no-go...
Now I'm searching for a rear caliper. I found that the local Pick N Pull has a ton of Protege's & from what I can gather it's the same caliper. I should be heading out there to grab one sometime this week...
It was all lookin' good, got everything installed (pads/rotors/SS lines).
Then the next morning I got my girlfriend to lend a foot to help me bleed the system. The bleeder valve on the right rear caliper was stuck so I exerted my manhood to show him who's boss - bad move...
I snapped the bleeder valve screw right at the caliper & I spent the next few hours trying to get it out - it's a no-go...
Now I'm searching for a rear caliper. I found that the local Pick N Pull has a ton of Protege's & from what I can gather it's the same caliper. I should be heading out there to grab one sometime this week...
Thread Starter
MFz Lurker
Joined: Oct 2011
Posts: 43
From: San Antonio, Texas
Well, I installed the PnP Protege caliper. I had put up a post in the brakes/suspension section, it has more info, pics & discussion if you want to read through it - here's the link: http://clubroadster.net/vb_forum/sho...15#post1014515. Anyway, here's a pic of the Protege caliper installed on a NA:
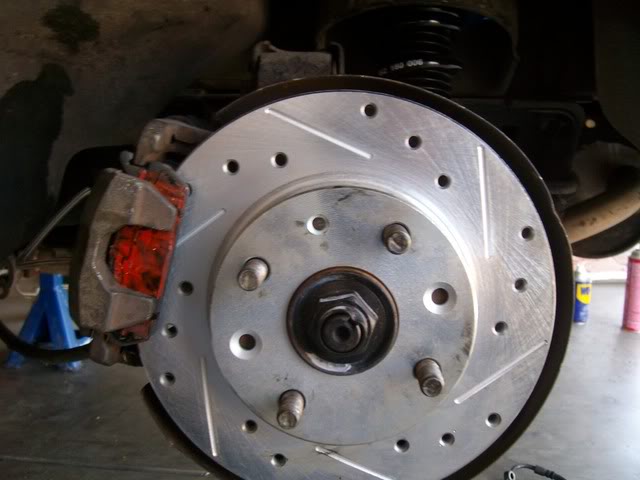
It kinda fits, but the bracket is a lil' large, making the pad grab about half as much as it should. As of this writing the car is still on jackstands & obviously haven't driven it yet. I can see it working, but not as well as a stock NA caliper would. I'm using it as a temporary fix until I find a NA caliper on the cheap. I wouldn't recommend it to guys who DD their car or track it (obviously). I drive less than 50 miles a month on this car- if that & most of it is at maybe 2/10ths...
It kinda fits, but the bracket is a lil' large, making the pad grab about half as much as it should. As of this writing the car is still on jackstands & obviously haven't driven it yet. I can see it working, but not as well as a stock NA caliper would. I'm using it as a temporary fix until I find a NA caliper on the cheap. I wouldn't recommend it to guys who DD their car or track it (obviously). I drive less than 50 miles a month on this car- if that & most of it is at maybe 2/10ths...
Thread Starter
MFz Lurker
Joined: Oct 2011
Posts: 43
From: San Antonio, Texas
I left out discussion on the caliper/bracket from the original post. I ended up using a Miata bracket on the Protege caliper - works like a charm....
Well, after the Cowboys debacle on Sunday I got frustrated with life & decided to finish up the trunk. I went ahead and cut up some spacers out of 2"x2" & 1"x1" wood pieces (the 1"x1" are covered in black speaker carpet). I always thought things look better under glass.
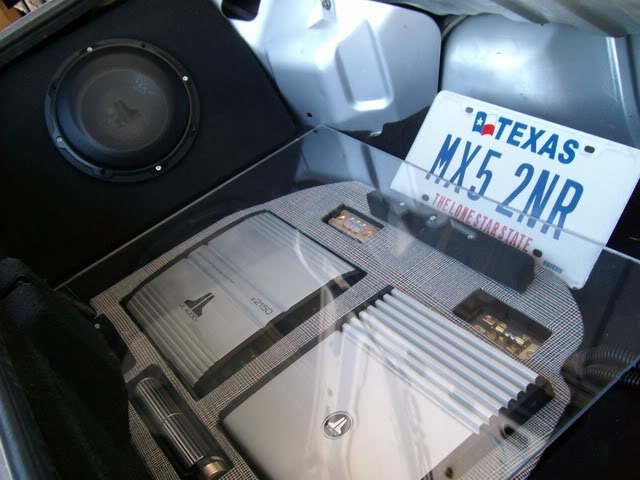
It's like I'm straight outta' a car stereo shop in '88 now. I am thinking about cutting the edges of the plexiglass to match up better with the curves of the sunken area, ya' know, so it doesn't look so boxed out. I wasn't sure if I could cut it with the jigsaw I am using, so I didn't take the chance. I'm hoping someone can chime in... I'm not too happy with the look of the black-carpeted spacers, I'm not too sure what to do. I need the extra space to clear the amps & to provide some ventilation. Should I re-cover them in the matching plaid fabric?
Well, after the Cowboys debacle on Sunday I got frustrated with life & decided to finish up the trunk. I went ahead and cut up some spacers out of 2"x2" & 1"x1" wood pieces (the 1"x1" are covered in black speaker carpet). I always thought things look better under glass.
It's like I'm straight outta' a car stereo shop in '88 now. I am thinking about cutting the edges of the plexiglass to match up better with the curves of the sunken area, ya' know, so it doesn't look so boxed out. I wasn't sure if I could cut it with the jigsaw I am using, so I didn't take the chance. I'm hoping someone can chime in... I'm not too happy with the look of the black-carpeted spacers, I'm not too sure what to do. I need the extra space to clear the amps & to provide some ventilation. Should I re-cover them in the matching plaid fabric?