
mx5 2nr's build thread


Thread Starter
MFz Lurker
Joined: Oct 2011
Posts: 43
From: San Antonio, Texas
I haven't updated the build thread in a while, and it's for good reason - there hasn't been much to update. I've been extremely busy with "life" & I haven't had much time to devote to the car.
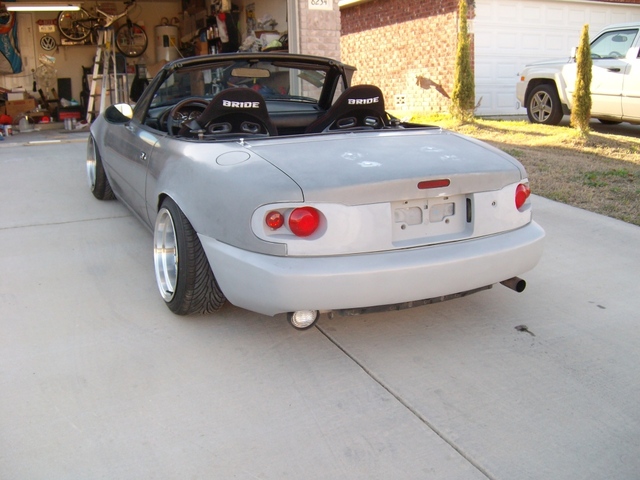
I have been able to drive it a bit more since it's been amazing weather out here. Here's a pic from a "meet" in San Antonio where I met up with Banzai & Shadow_Mx5... It was earlier on, the parking lot was pretty full when I left about an hour or 2 after this pic was taken. Sorry about the crap phone pic...

I haven't really progressed too far on the whole tail-light thing. Hopefully in a couple of weeks I'll have some time to work on them & have something to show. I'm having to slow down progression. I was originally planning on getting the car into a paint booth in Jan/Feb, but now it's looking like it'll be sometime in late-summer - if that. But when it goes in, it looks like a R-Type lip will be added, CR has spoken & I was leaning that way anyway...
Enjoy & be safe...
I have been able to drive it a bit more since it's been amazing weather out here. Here's a pic from a "meet" in San Antonio where I met up with Banzai & Shadow_Mx5... It was earlier on, the parking lot was pretty full when I left about an hour or 2 after this pic was taken. Sorry about the crap phone pic...
I haven't really progressed too far on the whole tail-light thing. Hopefully in a couple of weeks I'll have some time to work on them & have something to show. I'm having to slow down progression. I was originally planning on getting the car into a paint booth in Jan/Feb, but now it's looking like it'll be sometime in late-summer - if that. But when it goes in, it looks like a R-Type lip will be added, CR has spoken & I was leaning that way anyway...
Enjoy & be safe...
Thread Starter
MFz Lurker
Joined: Oct 2011
Posts: 43
From: San Antonio, Texas
Well, I've gotten a lil time to work on the car during the holidays & have progressed work on these:

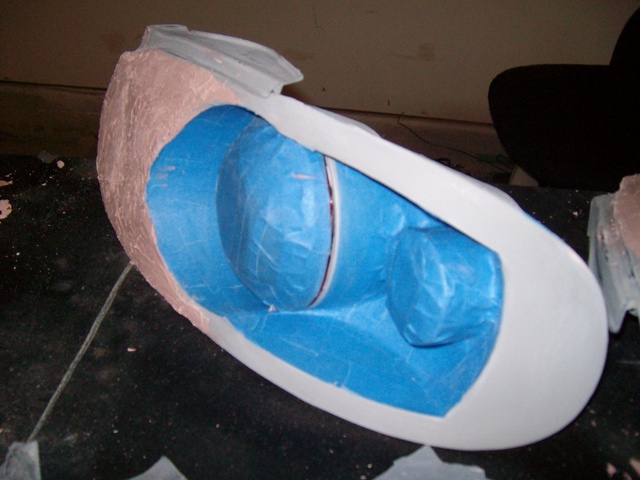
I removed the plastic cover with a heat gun and a screwdriver. Then I spent hours with Goo Gone, a flathead screwdriver, and a few jack & cokes. After cleaning out all the adhesive gunk I could I started taping everything off.
I then proceeded to apply body filler. I am suck at this, but steadily improving...
I sanded off the excess filler, and attempted to smoothen everything out. I sprayed a couple of coats of primer...

It's kinda where I'm at today. I need to fill in the little imperfections, sand it smooth, and respray the light. I haven't touched the other light yet, this is taking a lot longer than expected, but I'm learning as I go - that's where the fun is, right? Hopefully today I'll get one light finished - that's the plan... I'll update this with a pic if I can get it done.
Anyway guys I kinda want your opinions/tips/suggestions. I'm kinda still on the fence with these tails, if anything it's a challenge for me & a learning experience. I feel like I've gotten much better at working with body filler since doing the headlights (the first time I've ever touched the stuff). The ultimate goal is to get at least the rear end of the car (trunk, taillights, finish panel, bumper) straight & primer'ed out by the end of the month...
I removed the plastic cover with a heat gun and a screwdriver. Then I spent hours with Goo Gone, a flathead screwdriver, and a few jack & cokes. After cleaning out all the adhesive gunk I could I started taping everything off.
I then proceeded to apply body filler. I am suck at this, but steadily improving...
I sanded off the excess filler, and attempted to smoothen everything out. I sprayed a couple of coats of primer...
It's kinda where I'm at today. I need to fill in the little imperfections, sand it smooth, and respray the light. I haven't touched the other light yet, this is taking a lot longer than expected, but I'm learning as I go - that's where the fun is, right? Hopefully today I'll get one light finished - that's the plan... I'll update this with a pic if I can get it done.
Anyway guys I kinda want your opinions/tips/suggestions. I'm kinda still on the fence with these tails, if anything it's a challenge for me & a learning experience. I feel like I've gotten much better at working with body filler since doing the headlights (the first time I've ever touched the stuff). The ultimate goal is to get at least the rear end of the car (trunk, taillights, finish panel, bumper) straight & primer'ed out by the end of the month...
Thread Starter
MFz Lurker
Joined: Oct 2011
Posts: 43
From: San Antonio, Texas
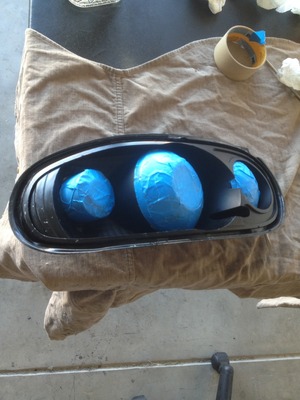
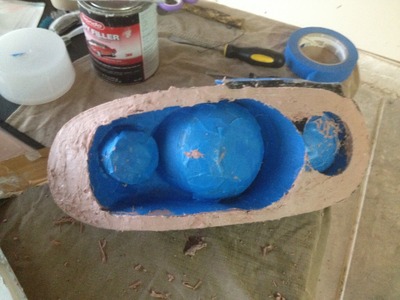
Been working on the tails..
It took a lot of this:

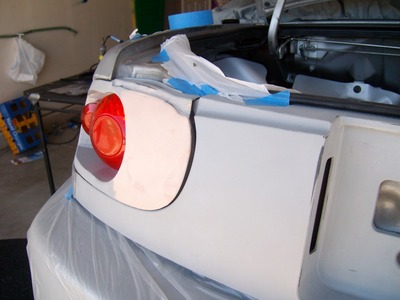
checking out what it'd look like...
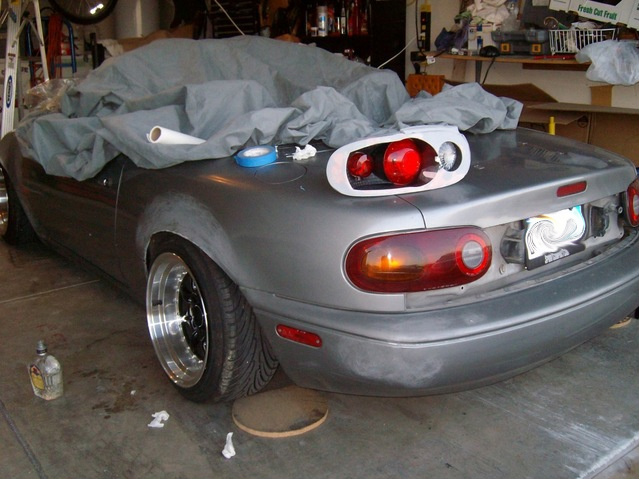
aannddd.....
Done!
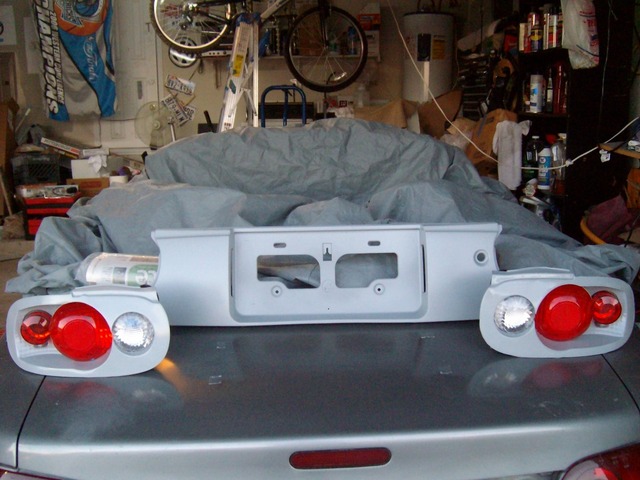
All together to check for paint variances..
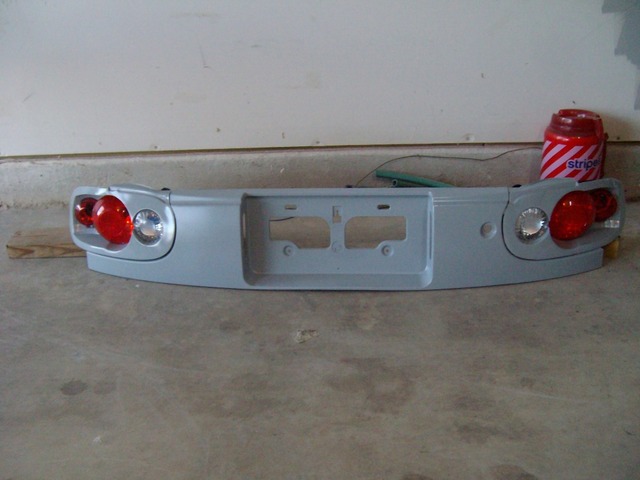
I kinda rushed the other taillight & had some drips on the clear coat. I tried to "fix" them, but I think I made it worse. Oh well, it's all relatively temporary... I'm still not 100% sure if I'm gonna like it. I'm saving final judgement for when it's all on the car.
I also painted the rear finish panel I bought a while back. I ran out of clear coat, so it still needs 1 more coat to get the same gloss as the tails. Next week I'll start on the rear bumper - trim off a 'lil on the bottom, fill in a phantom 1" hole, sand and primer; & also fill in holes in the trunk lid from PO's aluminum wing, sand & primer.
New goal - by mid February get the entire car primer'd out. Progress pics coming...
__________________
It took a lot of this:
checking out what it'd look like...
aannddd.....
Done!
All together to check for paint variances..
I kinda rushed the other taillight & had some drips on the clear coat. I tried to "fix" them, but I think I made it worse. Oh well, it's all relatively temporary... I'm still not 100% sure if I'm gonna like it. I'm saving final judgement for when it's all on the car.
I also painted the rear finish panel I bought a while back. I ran out of clear coat, so it still needs 1 more coat to get the same gloss as the tails. Next week I'll start on the rear bumper - trim off a 'lil on the bottom, fill in a phantom 1" hole, sand and primer; & also fill in holes in the trunk lid from PO's aluminum wing, sand & primer.
New goal - by mid February get the entire car primer'd out. Progress pics coming...
__________________
Thread Starter
MFz Lurker
Joined: Oct 2011
Posts: 43
From: San Antonio, Texas
Originally in build thread, omitted here - questions/comments about molding lights, & discussion about possible options...
Really really good suggestions guys, I really appreciate it - a LOT...
I'm taking a lunch break right now, & also waiting for my Dremel tool to recharge (one of these days I gotta get a corded Dremel). I went ahead and cut my bumper, and I fit a spot for the reverse light that I picked up from Harbor Freight (for a mere $12!).
I'd like to trim up the rear bumper support, but I've got to deal with rusted bolts like these:
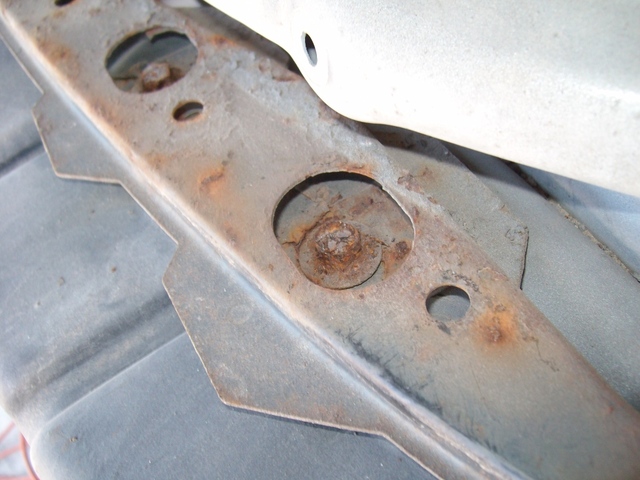
I can't stress enough how much I don't want to deal with this at the moment, it's like a whole can of worms that I'd rather not open right now. I know it's not a "choice" look, but for the moment I'm gonna leave it be. I'll clean it up later...
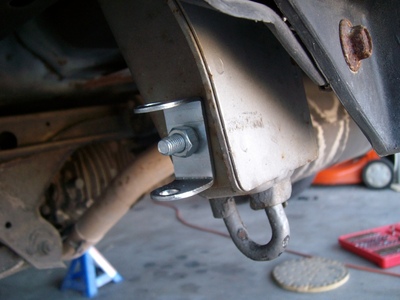
I didn't want to begin molding in the reverse lights on the modified altezza's until I found a decent location to mount the new reverse light, for obvious reasons. I located a bolt that I could use that places the light about where I wanted it - opposite the exhaust pipe. I thought about installing it in the tailpipe location & running a center exit exhaust, but i decided to keep the exhaust in the stock location. Sometime in the future I'm planning on installing a trailer receiver to lug around track wheels/tires & a toolbox...
Anyway, here's a pic of where I mounted the bracket for the reverse light.
Before I came back in, I did a "mockup" of how it all should look. I duct taped the areas together where the pieces are to be filled in.

I need to figure out how to wire up the reverse light - there's a red wire coming out of the Harbor Freight light. I haven't looked at the Mazda wires, but I'm assuming it can't be difficult...
--- right?
Really really good suggestions guys, I really appreciate it - a LOT...
I'm taking a lunch break right now, & also waiting for my Dremel tool to recharge (one of these days I gotta get a corded Dremel). I went ahead and cut my bumper, and I fit a spot for the reverse light that I picked up from Harbor Freight (for a mere $12!).
I'd like to trim up the rear bumper support, but I've got to deal with rusted bolts like these:
I can't stress enough how much I don't want to deal with this at the moment, it's like a whole can of worms that I'd rather not open right now. I know it's not a "choice" look, but for the moment I'm gonna leave it be. I'll clean it up later...
I didn't want to begin molding in the reverse lights on the modified altezza's until I found a decent location to mount the new reverse light, for obvious reasons. I located a bolt that I could use that places the light about where I wanted it - opposite the exhaust pipe. I thought about installing it in the tailpipe location & running a center exit exhaust, but i decided to keep the exhaust in the stock location. Sometime in the future I'm planning on installing a trailer receiver to lug around track wheels/tires & a toolbox...
Anyway, here's a pic of where I mounted the bracket for the reverse light.
Before I came back in, I did a "mockup" of how it all should look. I duct taped the areas together where the pieces are to be filled in.
I need to figure out how to wire up the reverse light - there's a red wire coming out of the Harbor Freight light. I haven't looked at the Mazda wires, but I'm assuming it can't be difficult...
--- right?
Thread Starter
MFz Lurker
Joined: Oct 2011
Posts: 43
From: San Antonio, Texas
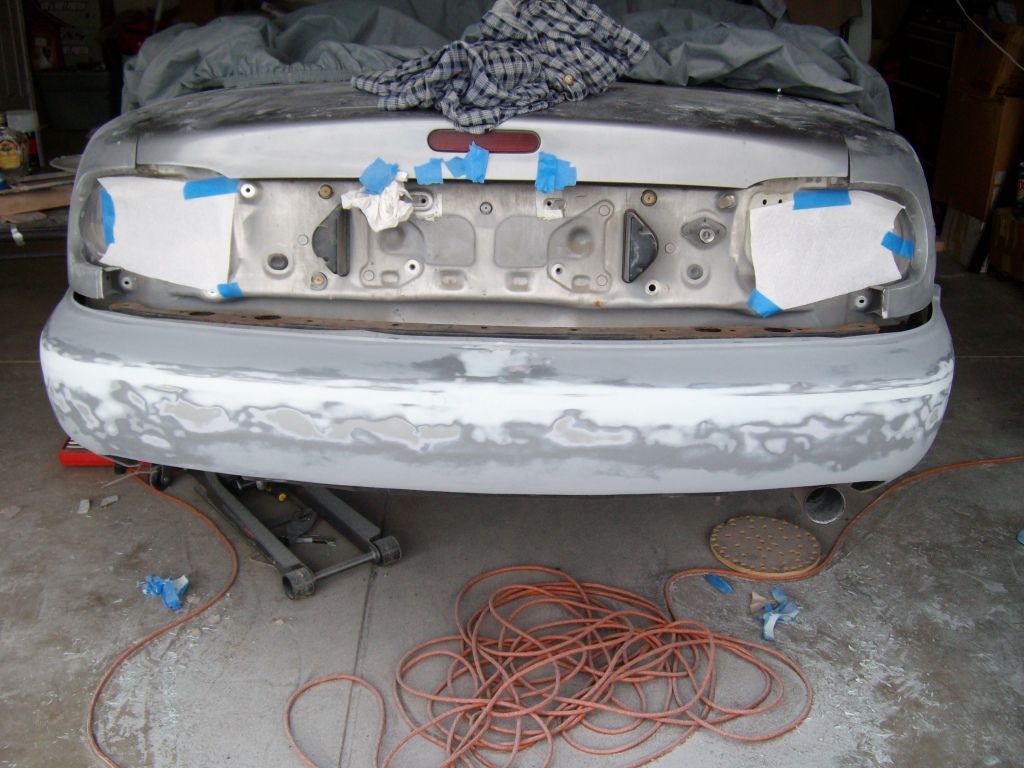
Been workin' on the *** end some more, progress pics...
I fixed all the little bumps and bruises on the bumper & layed down a layer of primer...
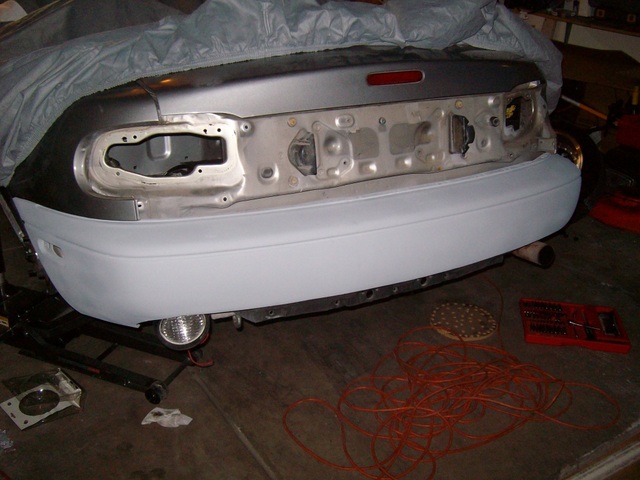
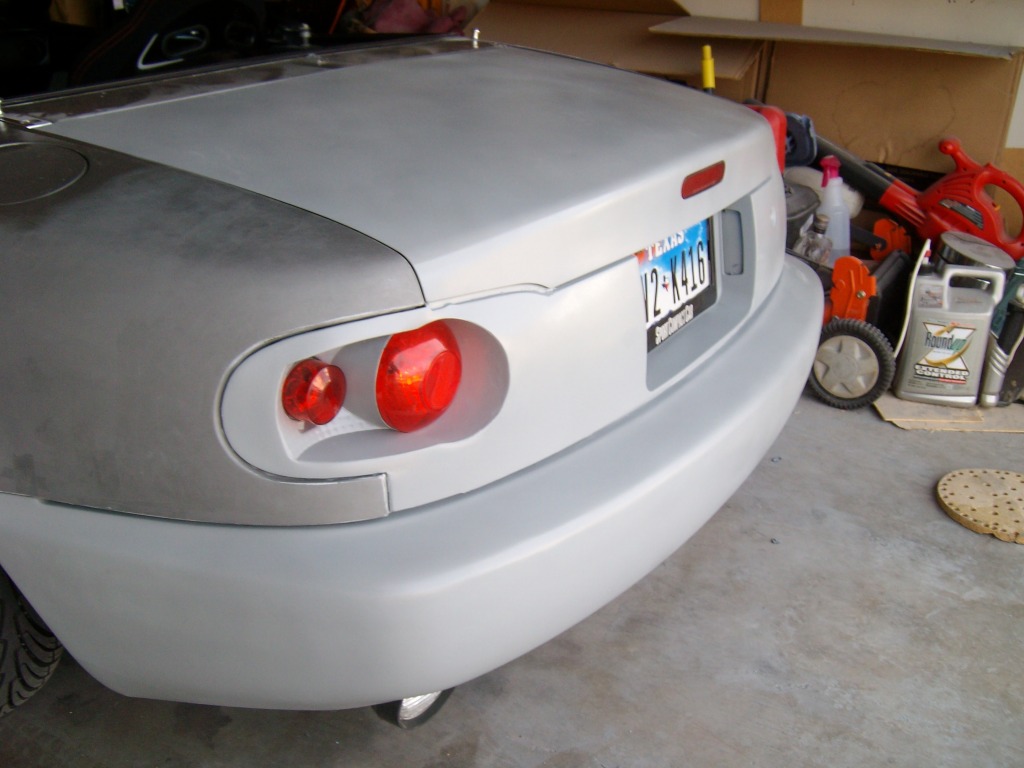
I filled in the reverse lights, this is before I sanded them down...

While I was sanding the passenger side down, I noticed a small gap between the red reflector & the taillight (the area not taped up). I haven't done it yet, but am thinking about carefully sealing it up with caulk & sanding it smooth. Good idea or should I do something else?
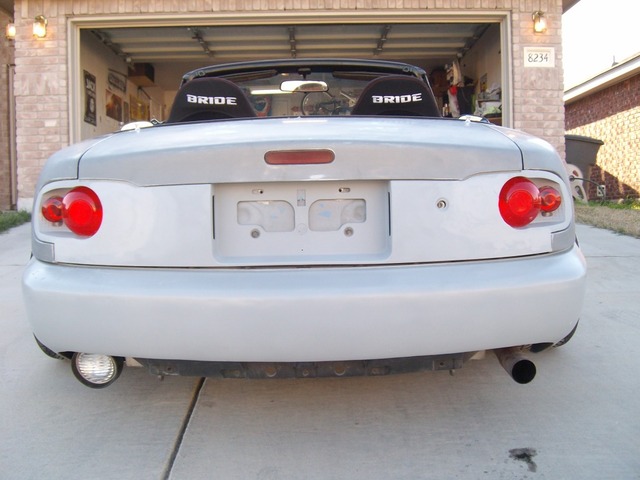
Here's a few pics of the taillights sanded down & everything mocked up again...
I've already started wiring up the new reverse light, I'm about halfway through, should have the wire done over this weekend. Gotta spend time with the g/f & her parents so I probably won't get to finishing up the rear end until Monday or so... The goal is to get the tails & finish panel molded together, painted, and installed before next weekend...
I fixed all the little bumps and bruises on the bumper & layed down a layer of primer...
I filled in the reverse lights, this is before I sanded them down...
While I was sanding the passenger side down, I noticed a small gap between the red reflector & the taillight (the area not taped up). I haven't done it yet, but am thinking about carefully sealing it up with caulk & sanding it smooth. Good idea or should I do something else?
Here's a few pics of the taillights sanded down & everything mocked up again...
I've already started wiring up the new reverse light, I'm about halfway through, should have the wire done over this weekend. Gotta spend time with the g/f & her parents so I probably won't get to finishing up the rear end until Monday or so... The goal is to get the tails & finish panel molded together, painted, and installed before next weekend...
Thread Starter
MFz Lurker
Joined: Oct 2011
Posts: 43
From: San Antonio, Texas
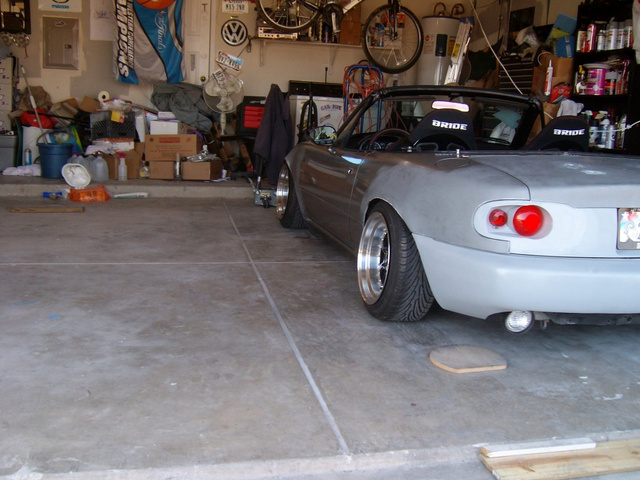
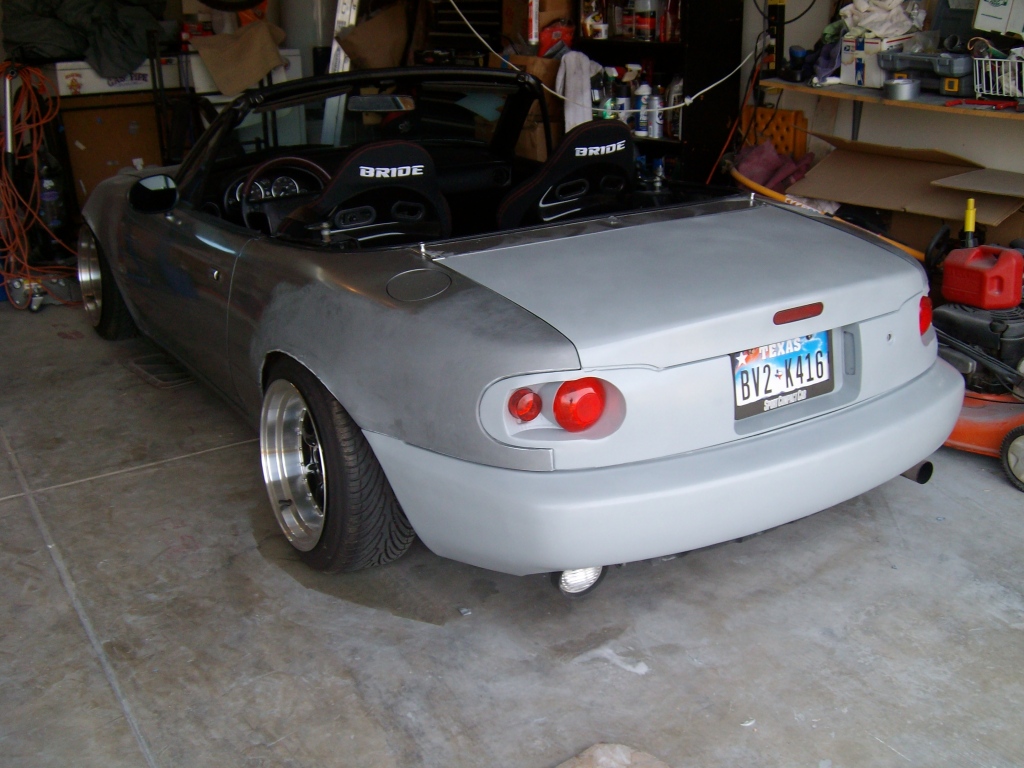
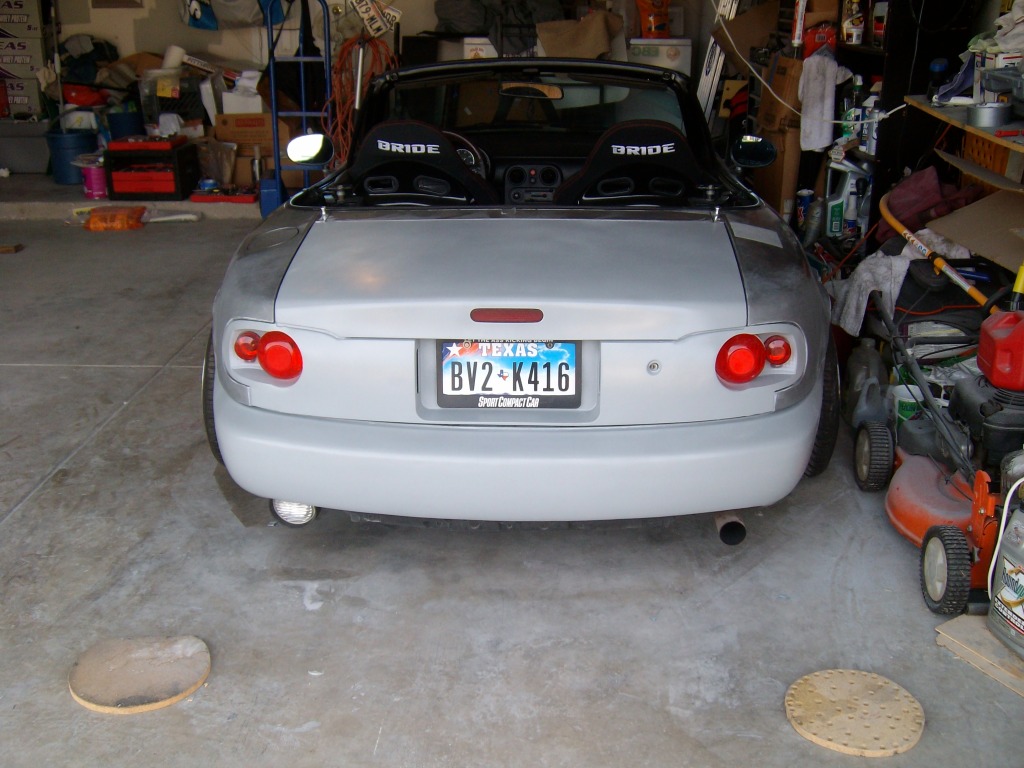
So back to the car. I've been working on the car all last week to get it to a point to where I can have a "driveable project" again & I veered off the path a lil' bit. I have kinda always liked the clean smooth look (no body lines), so I got to workin'.... (BTW props to 1vicissitude on the Rage Body Filler tip, thanks mang!)
So anyway, I filled in the belt line on the rear bumper...
... and the rear bumper lights...
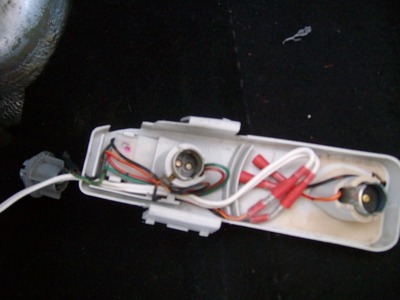
I wired the reverse light by tapping into the wires on the back of the driver's side tail light - I set it up so it could be reversed back to stock easily (bullet connectors).
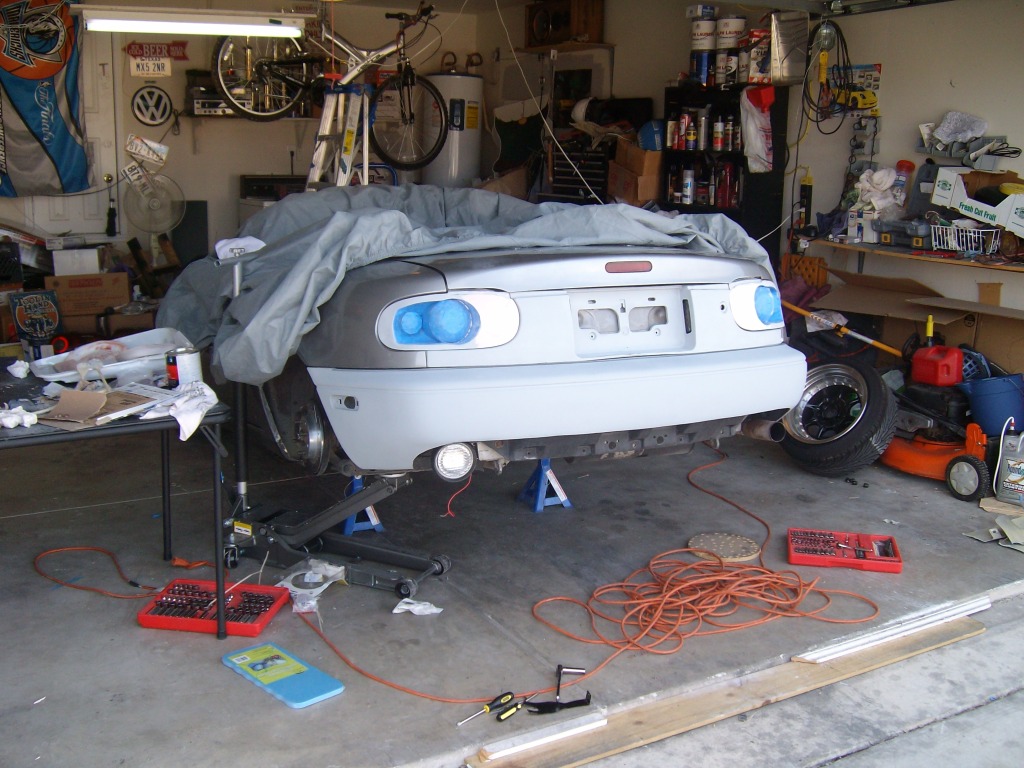
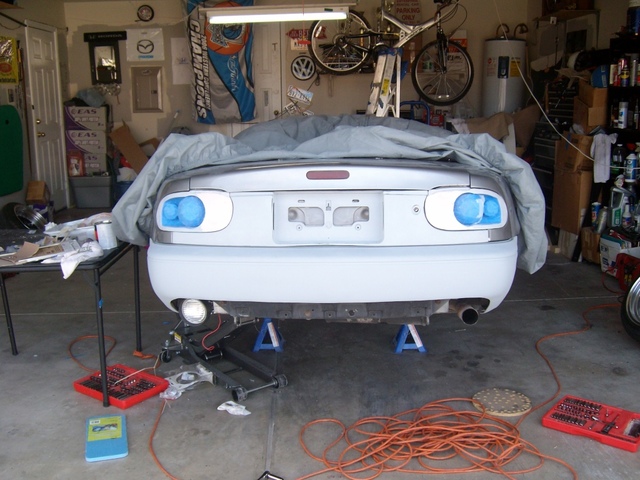
I went ahead and mounted up the tail lights & finish panel. Just a word of warning - I'm using an R-Speed finish panel (stock). The panel does not bolt up and line up perfectly like a Mazda factory rear finish panel, I don't know if it's just the one I have, or if all rear finish panels are like that. I had to modify the key hole & I had to shave down the edges of the finish panel where it meets the rear 3/4 panel (rear fenders). Also a pictured below the lines are all outta wack - good thing I'm molding-in the tails....
After a bit of fill & sand I went ahead and sprayed a quick layer of primer. I still need to smoothen it out a bit and finish it out proper. All in all I think I spent about $225-$250 on the finish panel, tail lights, body fill, primer, clear coat, sandpaper, filler applicators, extra hardener, and random hardware. Pic of where it stands at this point....
More body work to come....
So anyway, I filled in the belt line on the rear bumper...
... and the rear bumper lights...
I wired the reverse light by tapping into the wires on the back of the driver's side tail light - I set it up so it could be reversed back to stock easily (bullet connectors).
I went ahead and mounted up the tail lights & finish panel. Just a word of warning - I'm using an R-Speed finish panel (stock). The panel does not bolt up and line up perfectly like a Mazda factory rear finish panel, I don't know if it's just the one I have, or if all rear finish panels are like that. I had to modify the key hole & I had to shave down the edges of the finish panel where it meets the rear 3/4 panel (rear fenders). Also a pictured below the lines are all outta wack - good thing I'm molding-in the tails....
After a bit of fill & sand I went ahead and sprayed a quick layer of primer. I still need to smoothen it out a bit and finish it out proper. All in all I think I spent about $225-$250 on the finish panel, tail lights, body fill, primer, clear coat, sandpaper, filler applicators, extra hardener, and random hardware. Pic of where it stands at this point....
More body work to come....
Thread Starter
MFz Lurker
Joined: Oct 2011
Posts: 43
From: San Antonio, Texas
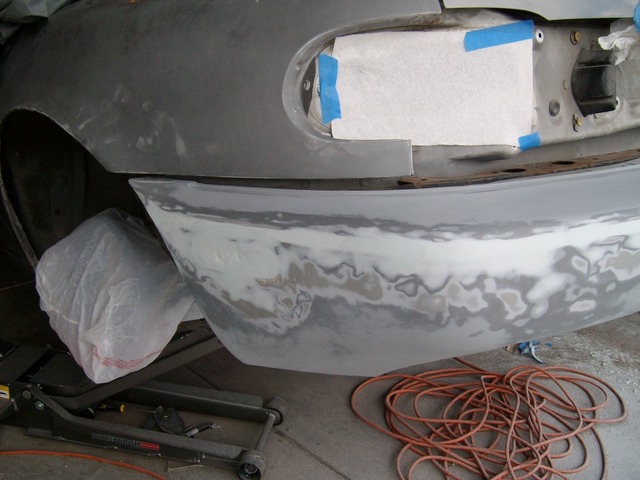
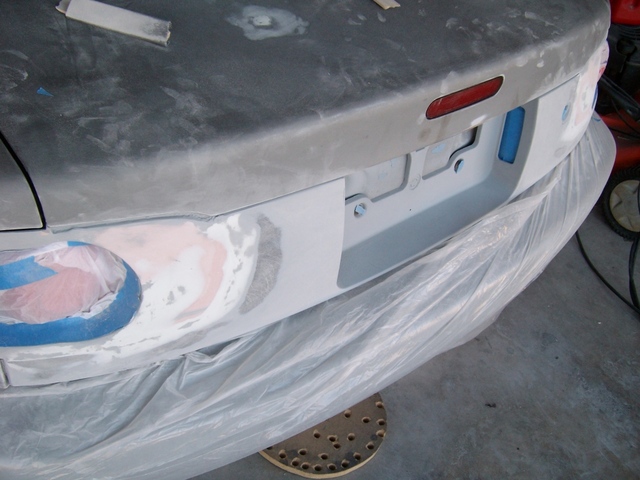
I got about an hour today to get back to work on the rear. I sanded out the areas to expose the low spots.
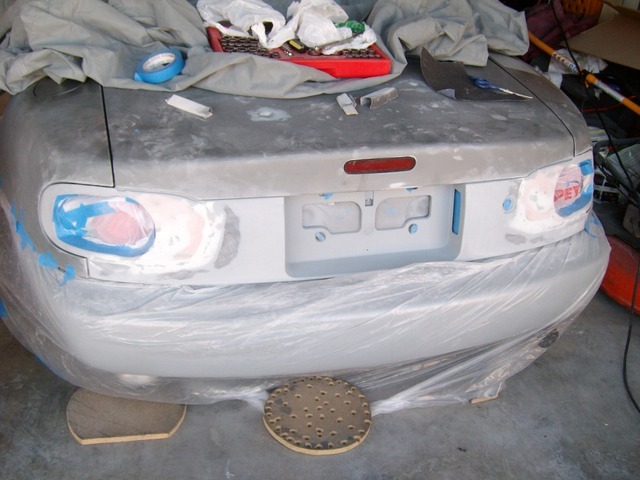
Another shot...
I'm really trying to get the rear totally smooth & painted & also get the trunk smooth/painted within the next 2 weeks. I'm gettin' kinda busy with other things, which is hindering progress.
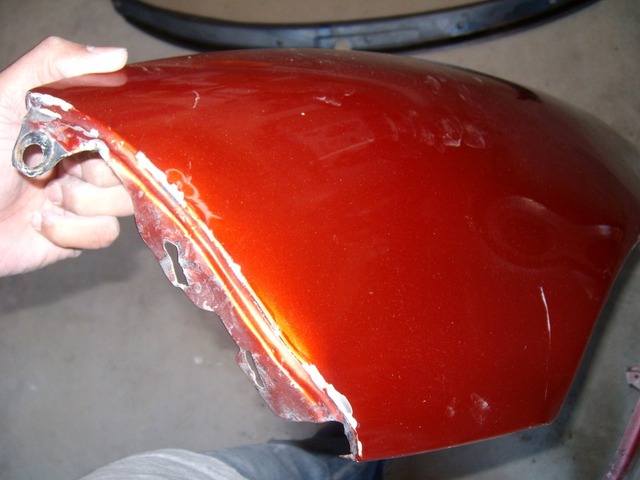
I picked up a fender from an NA & a cowl/front window trim panel off an NB this past week. THe fender has a slight dent where it meets the bumper, but I think it's workable. The cowl looks like it's the same for an NB & NA, mine was broken at the passenger side.
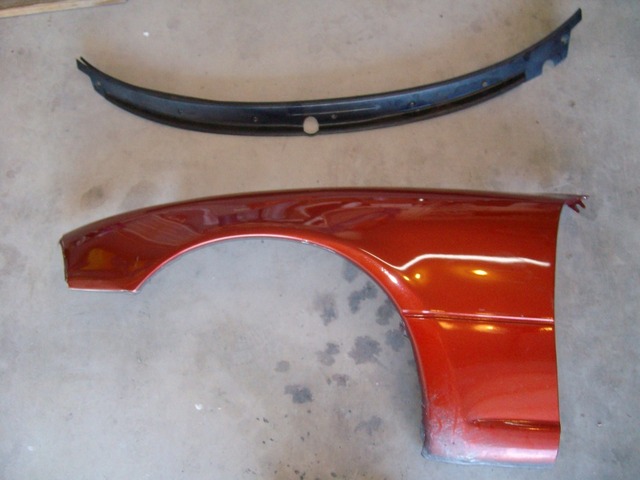
pics of the dent, it's hard to see in pics... Sorry about the camera strap floating in the frame on the second pic...
I've got my eye open for a new steering wheel, I've grown sick of the diaper of a steering wheel that came from the factory. Any recommendations?
Another shot...
I'm really trying to get the rear totally smooth & painted & also get the trunk smooth/painted within the next 2 weeks. I'm gettin' kinda busy with other things, which is hindering progress.
I picked up a fender from an NA & a cowl/front window trim panel off an NB this past week. THe fender has a slight dent where it meets the bumper, but I think it's workable. The cowl looks like it's the same for an NB & NA, mine was broken at the passenger side.
pics of the dent, it's hard to see in pics... Sorry about the camera strap floating in the frame on the second pic...
I've got my eye open for a new steering wheel, I've grown sick of the diaper of a steering wheel that came from the factory. Any recommendations?
Thread Starter
MFz Lurker
Joined: Oct 2011
Posts: 43
From: San Antonio, Texas
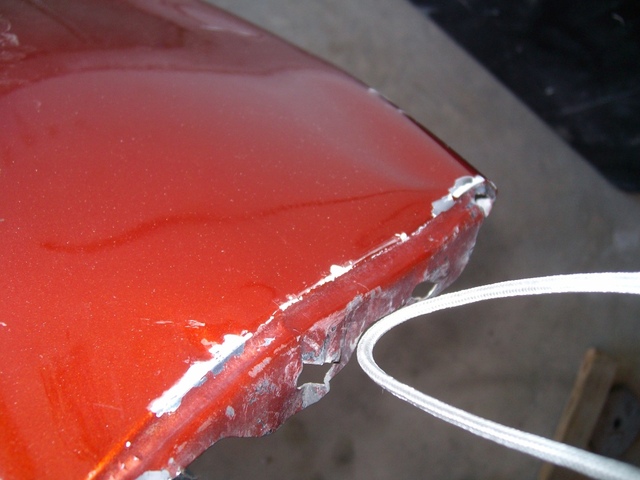
Well, Monday night before I went to sleep I noticed that the local PnP had 2 Miata's on the lot. So Tuesday morning I dropped everything to scavenge what I could off them before they turn into carcasses. I picked up a straight trunk lid for $35 & 3 window/door trim pieces for $15. Why 3? One of them had the tabs ripped off, but it was in good condition otherwise. Either way the 3 I picked up are in far better condition than what's on my car now. I'm having a ---- of a time sanding off the clearcoat on the back of the trunk - the stuff does not want off. I'm using 80 & 100 grits & doing it by hand with slow results. The paint on the top of the trunk was already faded & the clear was gone so sanding was a joke on that.
Pics of my booty... not what you think, pervs...
I smoothened out the tails/rear panel & sprayed a layer of primer, waiting for it to dry....
I'm no graffiti artist, but my spray can skill jumped like 10 points since I started this project.
Pics of my booty... not what you think, pervs...
I smoothened out the tails/rear panel & sprayed a layer of primer, waiting for it to dry....
I'm no graffiti artist, but my spray can skill jumped like 10 points since I started this project.
Thread Starter
MFz Lurker
Joined: Oct 2011
Posts: 43
From: San Antonio, Texas
Quote:
Originally Posted by mx5 2nr
I'm no graffiti artist, but my spray can skill jumped like 10 points since I started this project.
Totally spoke too soon....
After spraying the tails I had an alligator looking pattern emerging from part of the tails & finish panel. After some more sanding (sigh) and a few coats of primer & clear coat I can now say I am 100% freakin' done with these tails/finish panel.
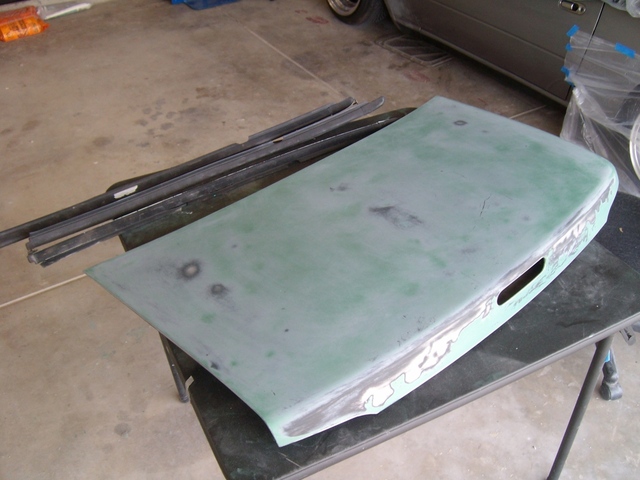
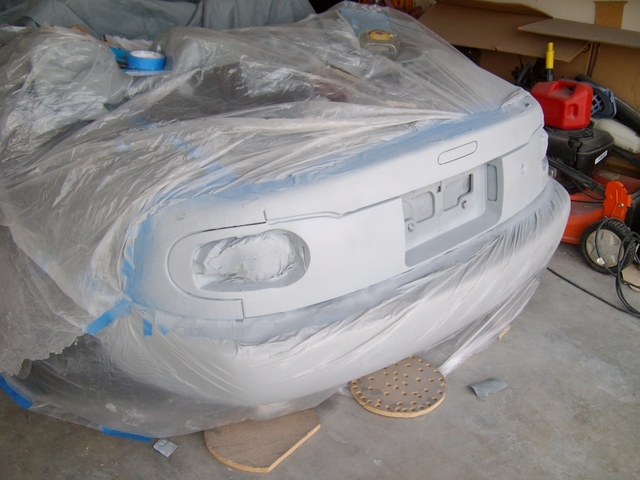
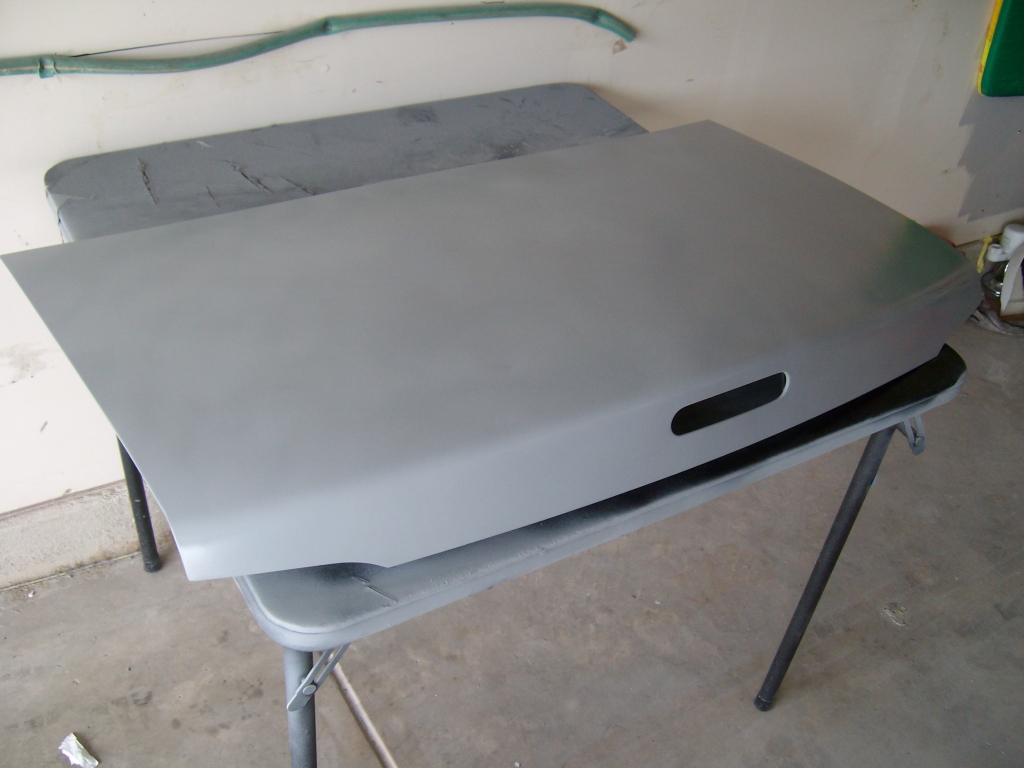
In between waiting for the coats to dry I finished prepping the PnP trunk & spraying it. Turns out my new trunk isn't as straight as I once thought. Unfortunately there's about 6 or 7 small hail dents that I didn't see until I sprayed the first coat of primer. Oh well, even with the dents it's in better condition then the one that came with the car. Either I learn how to do PDR, or I work it in the deal when I get the car painted professionally. I'm not sure if they shows in pictures.
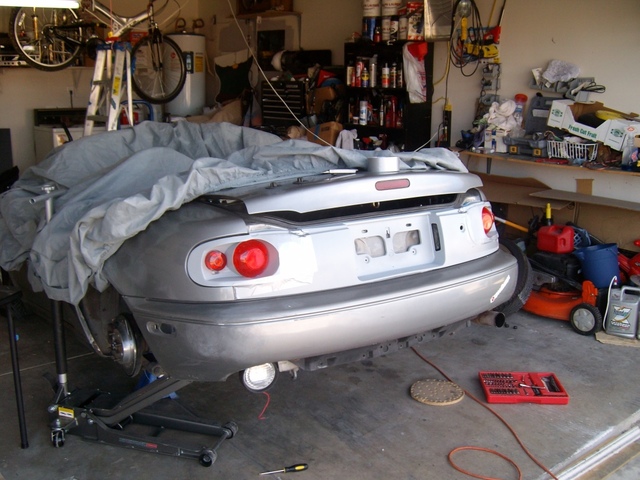
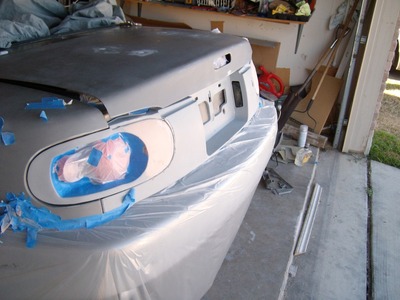
I'm soo used to seeing the car all taped up & under drop cloth, it's weird to see it like this...
I feel like all I've been doing is updating this with the same pics over and over. I can't tell you the elation I felt when I pulled the tape & plastic off for (hopefully) the last time on those tails. I really can't believe that they're done. This was a hell'uva monster project for me, I totally pushed the limits of what I thought I could do. If anyone out there wants to do the same conversion, hit me up if you want assistance.
Finishing off the bodywork seems like a piece of cake now...
Originally Posted by mx5 2nr
I'm no graffiti artist, but my spray can skill jumped like 10 points since I started this project.
Totally spoke too soon....
After spraying the tails I had an alligator looking pattern emerging from part of the tails & finish panel. After some more sanding (sigh) and a few coats of primer & clear coat I can now say I am 100% freakin' done with these tails/finish panel.
In between waiting for the coats to dry I finished prepping the PnP trunk & spraying it. Turns out my new trunk isn't as straight as I once thought. Unfortunately there's about 6 or 7 small hail dents that I didn't see until I sprayed the first coat of primer. Oh well, even with the dents it's in better condition then the one that came with the car. Either I learn how to do PDR, or I work it in the deal when I get the car painted professionally. I'm not sure if they shows in pictures.
I'm soo used to seeing the car all taped up & under drop cloth, it's weird to see it like this...
I feel like all I've been doing is updating this with the same pics over and over. I can't tell you the elation I felt when I pulled the tape & plastic off for (hopefully) the last time on those tails. I really can't believe that they're done. This was a hell'uva monster project for me, I totally pushed the limits of what I thought I could do. If anyone out there wants to do the same conversion, hit me up if you want assistance.
Finishing off the bodywork seems like a piece of cake now...