
Suspension How-To: Control Arm bushings

Thread Starter
BAMFr

Joined: Jul 2011
Posts: 1,787
From: NC
Installing my new coilovers + CA bushings. I will cover the bushings as the coilover install is really quite simple. But I will post a few steps for the coilovers real quick AS IT APPLIES TO THIS (There is probably faster ways to do just coilovers):
Front Coilovers
1) disconnect the sway bar endlinks from the control arms
2) Up top, remove the two bolts holding the tophats to the chassis (support under the control arms before this, not required but suggested)
3) remove the lower shock bolt
4) remove the upper control arm to chassis bolt (the long bolt)
5) push down on lower control arm, and pull the coilover out
Tools:
Assorted sockets (14mm, 17mm, 21mm)
Big Screwdriver for leverage
3-jaw puller or hydraulic press
possibly a deadblow/rubber mallet
C-clamp for putting bushing sleeves in
NOTE: Do not tighten anything down unless you are using the bolts to get the sleeves or bushings into place. Anything that I reconnect to help with leverage or for breaking other bolts loose, is simple pushed in and has a nut threaded on to keep it from falling. SO once again, do not tighten anything down until the end.
---------Upper Control Arm----------
The fronts are a real pain in the *** because the ball joints allow the CA to move around a lot. Not much you can do, but I will give suggestions as to what I did to help with that.
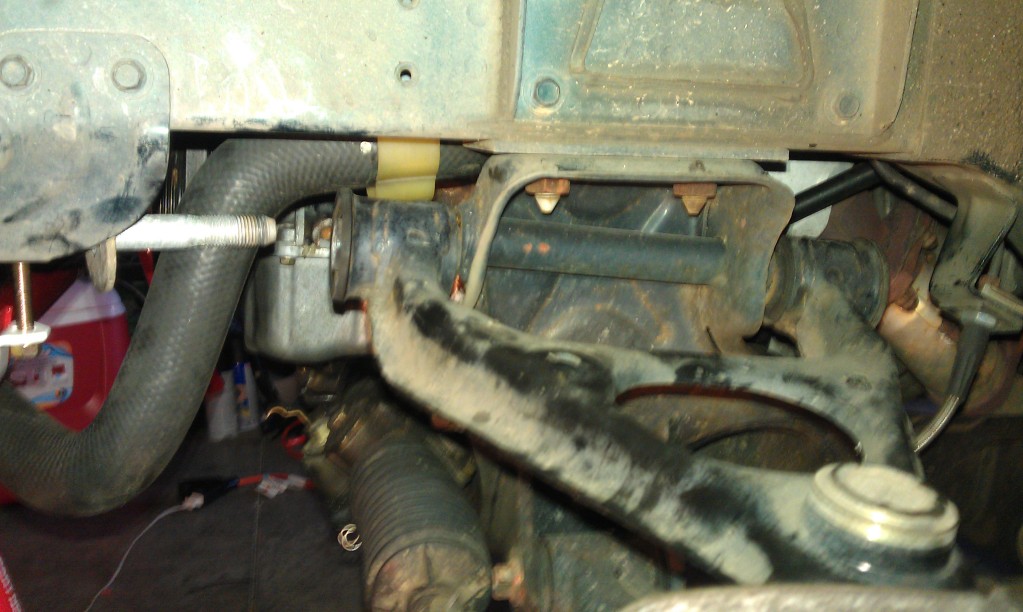
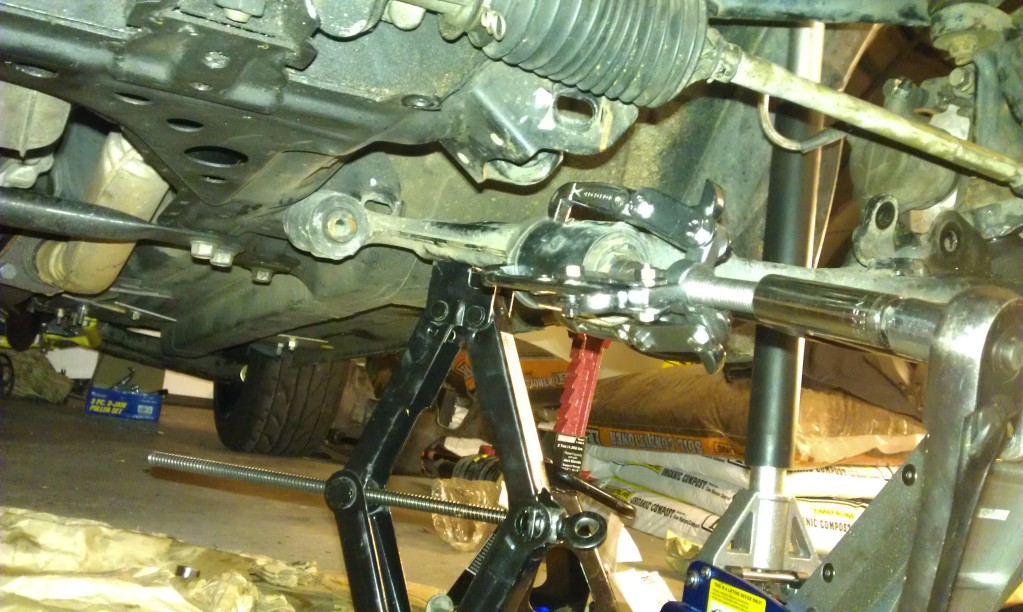
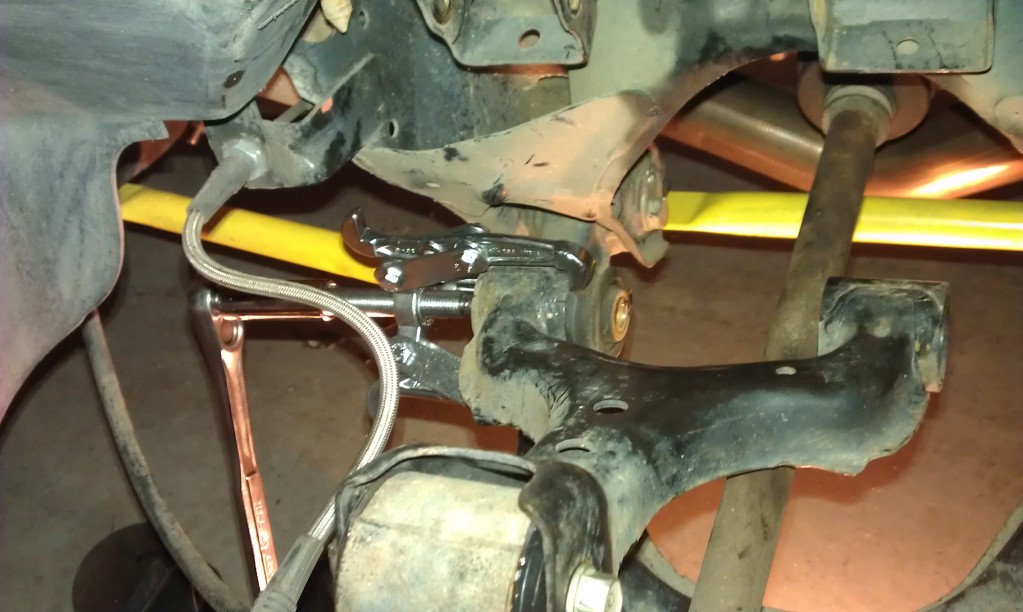
Go ahead and get the two upper bushings done, while the long bolt is out. I rotated it around like this:
MAKE SURE to support under this as the whole assembly will want to fall over and do bad things to your brake lines. Done. Put the long bolt back in and lets move to the lowers.
---------Lower Control Arm----------
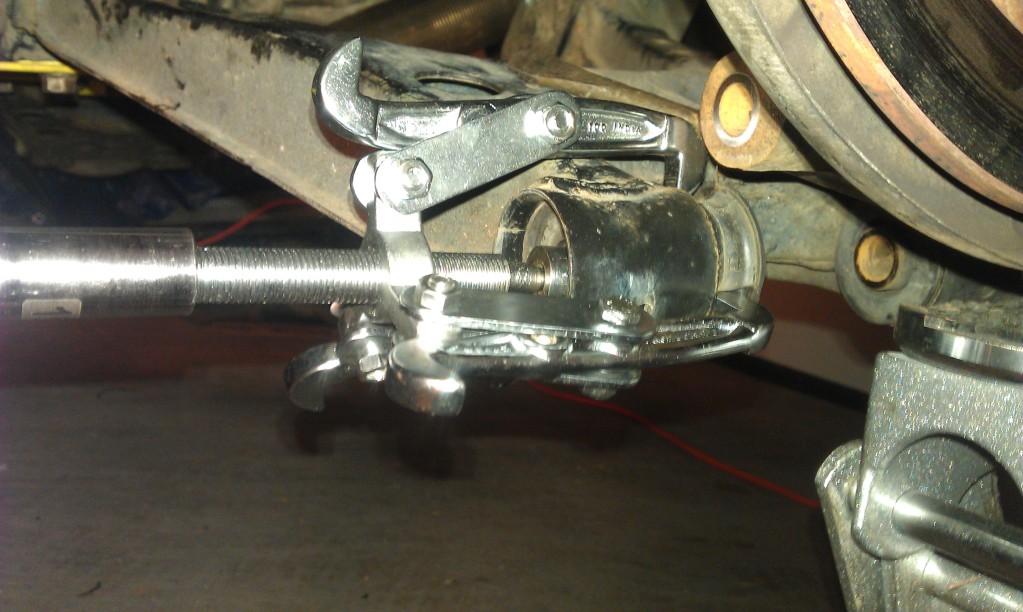
Mark and remove the two eccentrics (make sure you have the long bolt back in), then remove them to free up the lowers.
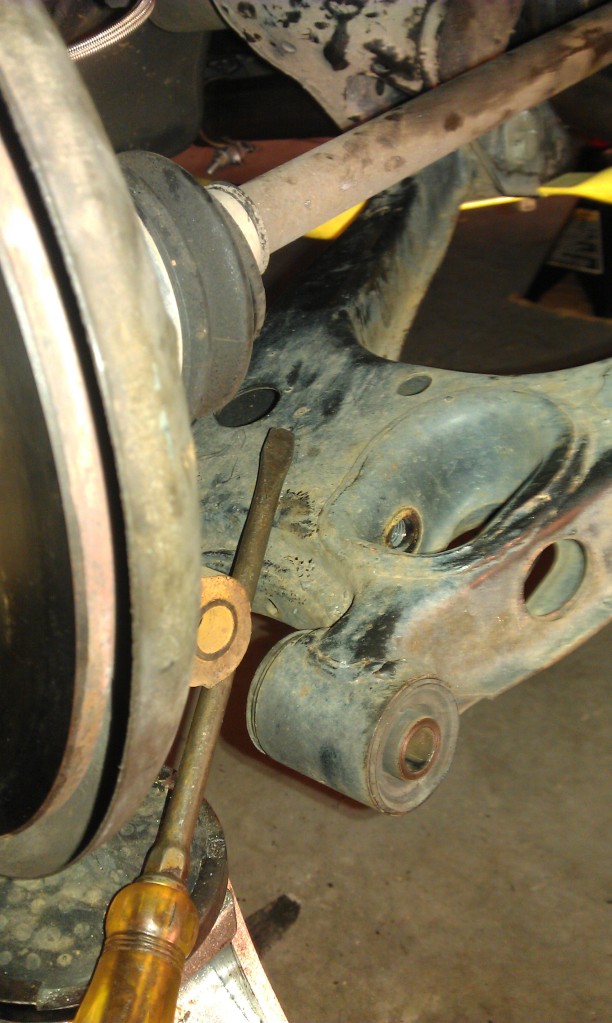
for the one closest to the front, I jacked up one side and jammed it against the lower mount (Not hard or anything, just enough to have something push back against the jaw). Like this here so:
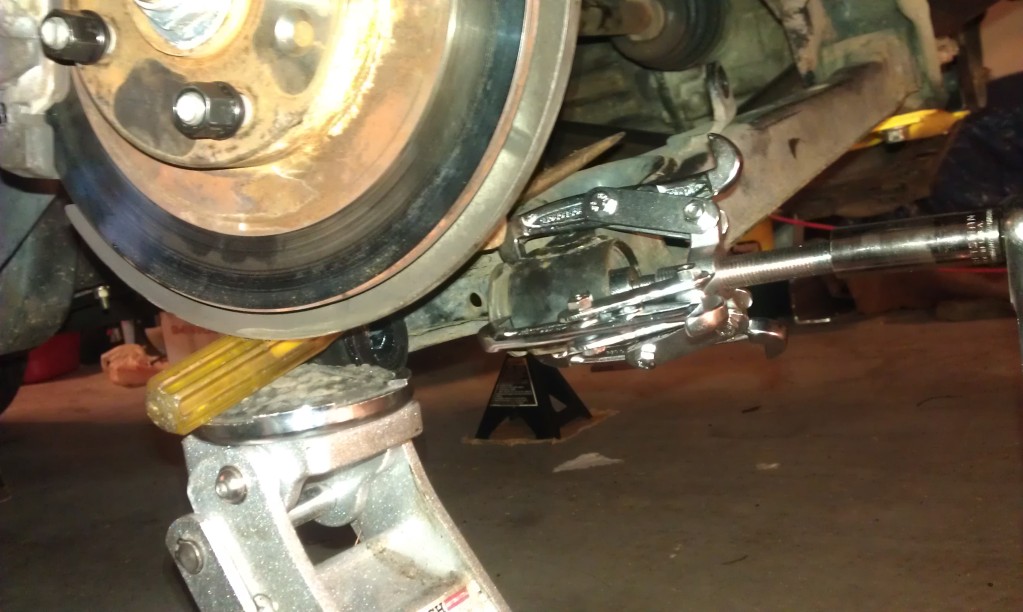
The other one is a bit more tricky, as the whole arm has a tendency to fall if you don't support under that one. So, I pushed the other end up into its mount and put a long screwdriver in to stop it from falling:

Now you are done, move to the otherside!
Front Coilovers
1) disconnect the sway bar endlinks from the control arms
2) Up top, remove the two bolts holding the tophats to the chassis (support under the control arms before this, not required but suggested)
3) remove the lower shock bolt
4) remove the upper control arm to chassis bolt (the long bolt)
5) push down on lower control arm, and pull the coilover out
Tools:
Assorted sockets (14mm, 17mm, 21mm)
Big Screwdriver for leverage
3-jaw puller or hydraulic press
possibly a deadblow/rubber mallet
C-clamp for putting bushing sleeves in
NOTE: Do not tighten anything down unless you are using the bolts to get the sleeves or bushings into place. Anything that I reconnect to help with leverage or for breaking other bolts loose, is simple pushed in and has a nut threaded on to keep it from falling. SO once again, do not tighten anything down until the end.
---------Upper Control Arm----------
The fronts are a real pain in the *** because the ball joints allow the CA to move around a lot. Not much you can do, but I will give suggestions as to what I did to help with that.
Go ahead and get the two upper bushings done, while the long bolt is out. I rotated it around like this:
MAKE SURE to support under this as the whole assembly will want to fall over and do bad things to your brake lines. Done. Put the long bolt back in and lets move to the lowers.
---------Lower Control Arm----------
Mark and remove the two eccentrics (make sure you have the long bolt back in), then remove them to free up the lowers.
for the one closest to the front, I jacked up one side and jammed it against the lower mount (Not hard or anything, just enough to have something push back against the jaw). Like this here so:
The other one is a bit more tricky, as the whole arm has a tendency to fall if you don't support under that one. So, I pushed the other end up into its mount and put a long screwdriver in to stop it from falling:
Now you are done, move to the otherside!
Last edited by Track; Nov 11, 2011 at 10:22 AM.
Thread Starter
BAMFr
Joined: Jul 2011
Posts: 1,787
From: NC
Rear Control Arms
Rear Coilovers
1) disconnect the sway bar endlinks from the control arms
2) Up top, remove the two bolts holding the tophats to the chassis
3) remove the lower coilover bolt
4) remove the upper control arm bolt
5) push down on assembly, pull coilover out.
Tools:
Assorted Sockets (14mm and 17mm in the regular and deep style, 21mm)
Rubber mallet/deadblow
Big screwdriver for leverage
3-jaw puller or hydraulic press or whatever gets the old bushings out
C-clamp for putting bushing sleeves in (Not required, but VERY helpful).
NOTE: Do not tighten anything down unless you are using the bolts to get the sleeves or bushings into place. Anything that I reconnect to help with leverage or for breaking other bolts loose, is simple pushed in and has a nut threaded on to keep it from falling. SO once again, do not tighten anything down until the end.
---------Upper Control Arm----------
-You already have the knuckle off at this point, so go ahead and get that bushing out.
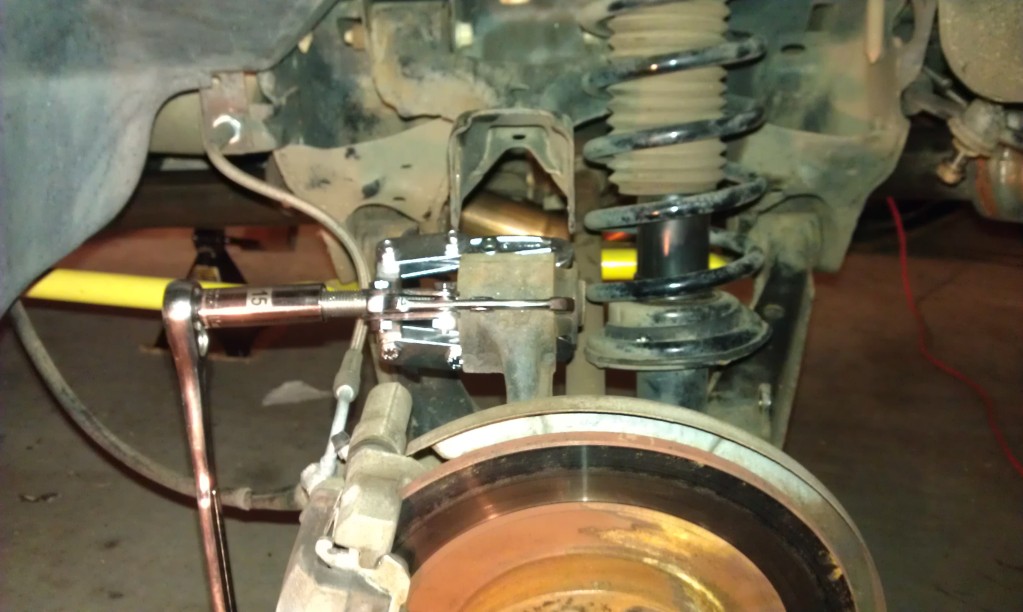
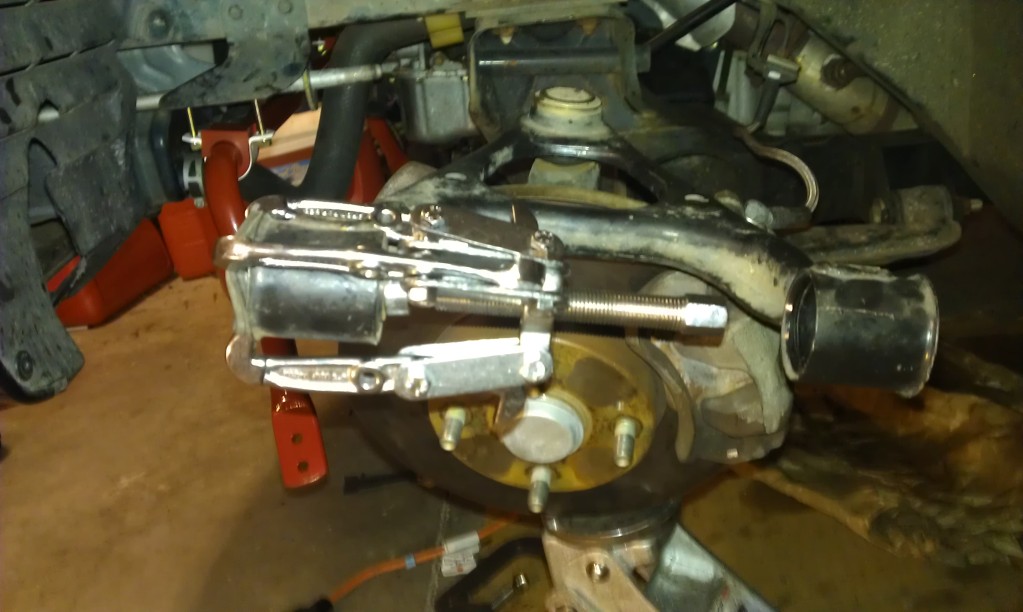
-To break the two bolts at the chassis is a bit tricky. If you connect the knuckle back on, it puts weight on the bolts and you have to thread them out every mm, but using a socket wrench it will get stuck like this:
So best here is to use two wrenches to break it loose. If thats not an option, connect the knuckle to keep the CA under control, break them loose, then disconnect the knuckle to get the bolts out. Reconnect the knuckle to the CA again so you can have something to jaw on. Lets recap
1) reattach knuckle with the bolt (skip to step 4 if you have two 14mm wrenches)
2) break chassis bolts loose (using either reattached knuckle for a counter)
3) remove the knuckle bolt
4) remove the chassis bolts
5) reattach the knuckle
6) jaw the two bushings out
-Now, you have the bushings and sleeves in the Rear Upper Control Arm. If you attach the knuckle first, you will have a HELL of a time getting the two chassis bolts to line up. So as implied, with upper CA completely unattached, start by putting in the two chassis bolts, but don't tighten them obviously.
---------Lower Control Arm----------
-I started at the knuckle for the lowers. this is the "long bolt". Its usually the pain in the *** bolt and some people say they are bent. I didn't have much problem getting it out, but then again...I guess mine isn't bent.
-Once you remove this long bolt, its going to release the knuckle so make sure you support it (remember you have already loosened the upper CA, so its not good for much other than keep it within a radius). It won't really fall or anything as there is still some friction between the knuckle and the Control Arm.
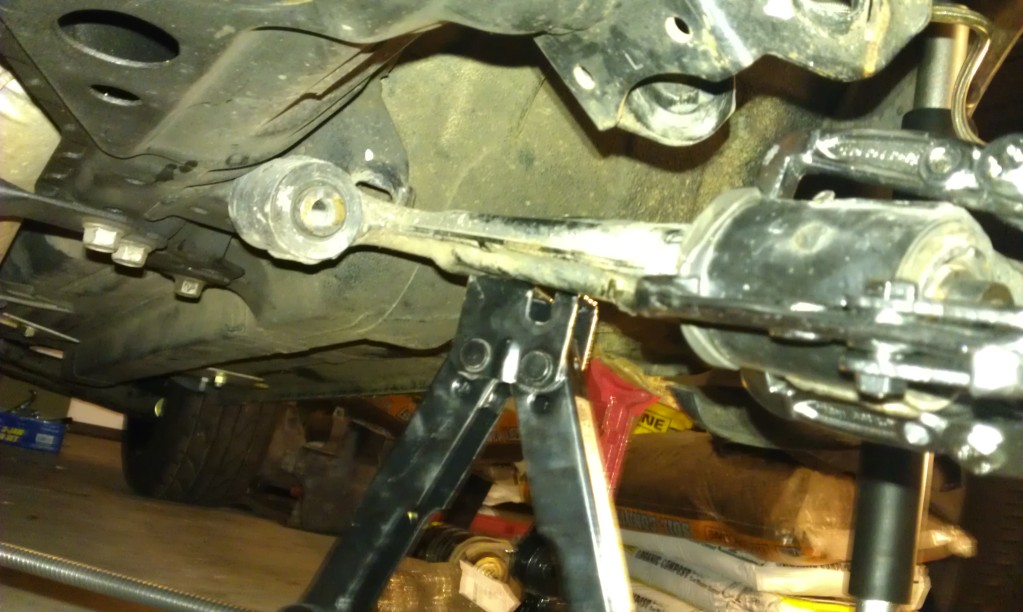
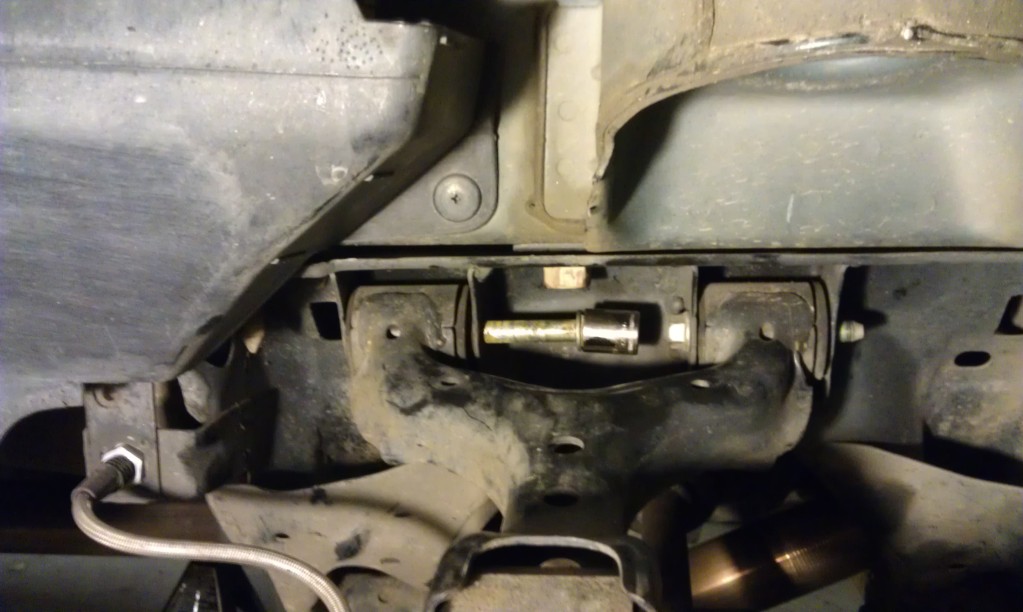
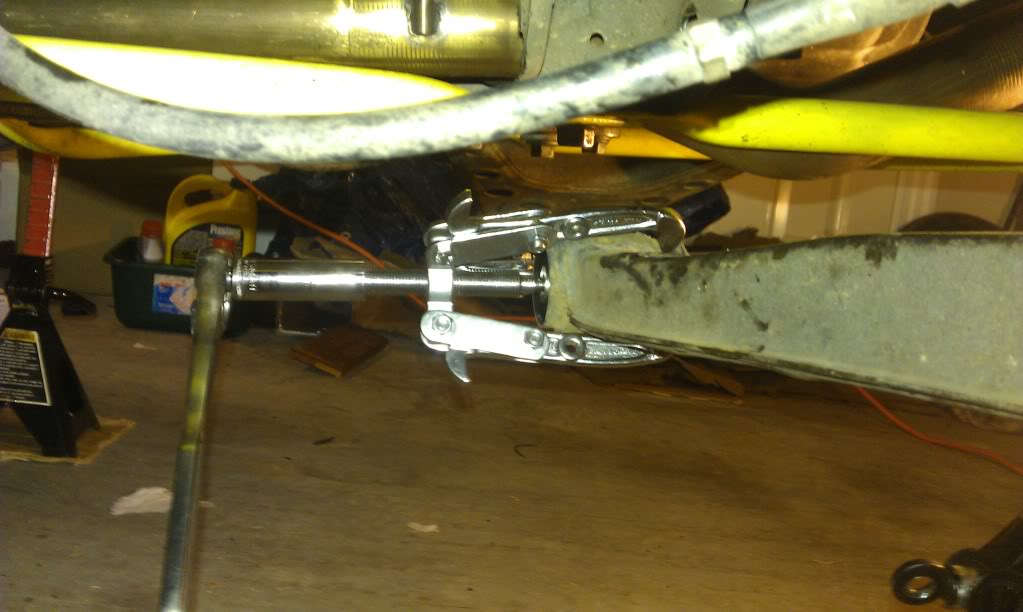
-The big problem with this one is that the lower you push the lower CA, the more the knuckle will drop. Pain in the *** at first, but its easy to fix...remember that screwdriver I was talking about earlier? you will be happy to see the solution is as easy as a leverage bar/screwdriver and your good old floor jack. See picture:
Voila, now you have access to these *******:
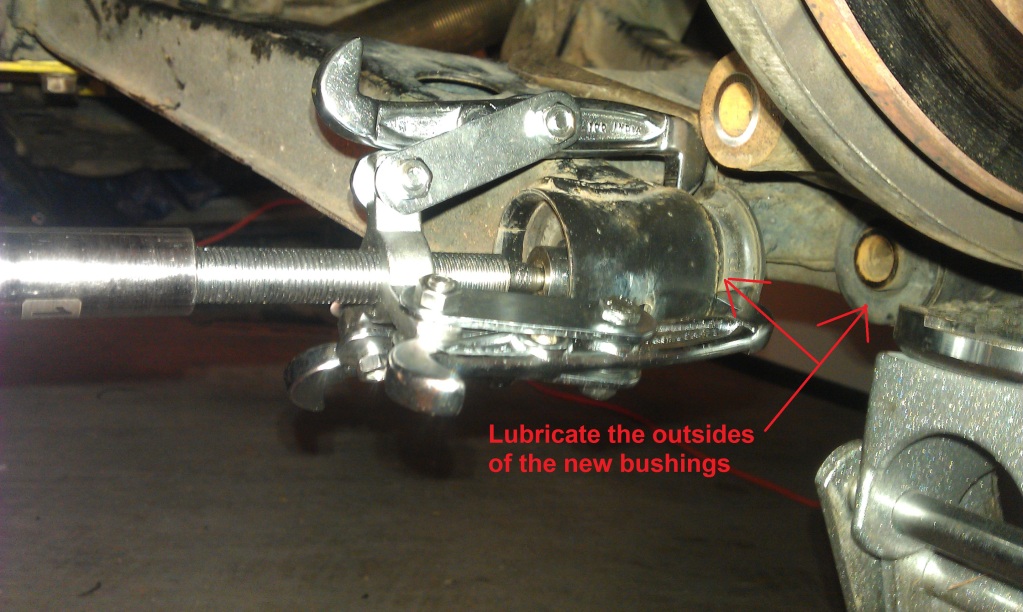
Easy eh? well the hard part here is getting the damn knuckle back in the CA. First, its going to pinch on the new bushing, since the bushing hasn't been compressed much, it has a tendency to flare out too far and the knuckle won't fit. Easiest way is to get one side on, then use the screwdriver again to leverage the knuckle into the other side. Second... MAKE SURE YOU LUBRICATE THE OUTSIDE of these bushings. The only time you have to put lubricant on the bushings IS NOW. otherwise you will not (unless superman helps) be able to align the knuckle with the bolt holes through the CA. My typing is confusing, I am sure. so let me diagram:
-Done? lets move on to the chassis side of the lowers then! this is really...easy. Just make sure you get a second support for this, as they have a tendency to keep sliding down since you are loose (plus my ES bushings don't preload as the sleeve is seperate from the poly, unlike sleeve impregnated into the rubber with the stockers).
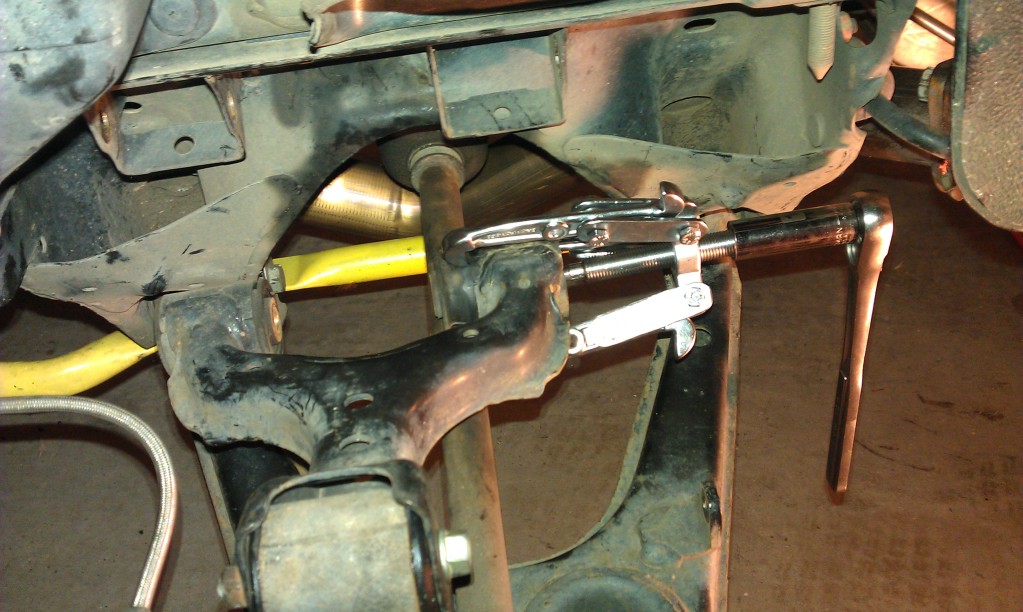
Lookies:

-support the other side, support at the front knuckle, attach jaw, pull, rinse repeat (shouldn't have to mention this, but MARK your Eccentrics).
Rear Coilovers
1) disconnect the sway bar endlinks from the control arms
2) Up top, remove the two bolts holding the tophats to the chassis
3) remove the lower coilover bolt
4) remove the upper control arm bolt
5) push down on assembly, pull coilover out.
Tools:
Assorted Sockets (14mm and 17mm in the regular and deep style, 21mm)
Rubber mallet/deadblow
Big screwdriver for leverage
3-jaw puller or hydraulic press or whatever gets the old bushings out
C-clamp for putting bushing sleeves in (Not required, but VERY helpful).
NOTE: Do not tighten anything down unless you are using the bolts to get the sleeves or bushings into place. Anything that I reconnect to help with leverage or for breaking other bolts loose, is simple pushed in and has a nut threaded on to keep it from falling. SO once again, do not tighten anything down until the end.
---------Upper Control Arm----------
-You already have the knuckle off at this point, so go ahead and get that bushing out.
-To break the two bolts at the chassis is a bit tricky. If you connect the knuckle back on, it puts weight on the bolts and you have to thread them out every mm, but using a socket wrench it will get stuck like this:
So best here is to use two wrenches to break it loose. If thats not an option, connect the knuckle to keep the CA under control, break them loose, then disconnect the knuckle to get the bolts out. Reconnect the knuckle to the CA again so you can have something to jaw on. Lets recap
1) reattach knuckle with the bolt (skip to step 4 if you have two 14mm wrenches)
2) break chassis bolts loose (using either reattached knuckle for a counter)
3) remove the knuckle bolt
4) remove the chassis bolts
5) reattach the knuckle
6) jaw the two bushings out
-Now, you have the bushings and sleeves in the Rear Upper Control Arm. If you attach the knuckle first, you will have a HELL of a time getting the two chassis bolts to line up. So as implied, with upper CA completely unattached, start by putting in the two chassis bolts, but don't tighten them obviously.
---------Lower Control Arm----------
-I started at the knuckle for the lowers. this is the "long bolt". Its usually the pain in the *** bolt and some people say they are bent. I didn't have much problem getting it out, but then again...I guess mine isn't bent.
-Once you remove this long bolt, its going to release the knuckle so make sure you support it (remember you have already loosened the upper CA, so its not good for much other than keep it within a radius). It won't really fall or anything as there is still some friction between the knuckle and the Control Arm.
-The big problem with this one is that the lower you push the lower CA, the more the knuckle will drop. Pain in the *** at first, but its easy to fix...remember that screwdriver I was talking about earlier? you will be happy to see the solution is as easy as a leverage bar/screwdriver and your good old floor jack. See picture:
Voila, now you have access to these *******:
Easy eh? well the hard part here is getting the damn knuckle back in the CA. First, its going to pinch on the new bushing, since the bushing hasn't been compressed much, it has a tendency to flare out too far and the knuckle won't fit. Easiest way is to get one side on, then use the screwdriver again to leverage the knuckle into the other side. Second... MAKE SURE YOU LUBRICATE THE OUTSIDE of these bushings. The only time you have to put lubricant on the bushings IS NOW. otherwise you will not (unless superman helps) be able to align the knuckle with the bolt holes through the CA. My typing is confusing, I am sure. so let me diagram:
-Done? lets move on to the chassis side of the lowers then! this is really...easy. Just make sure you get a second support for this, as they have a tendency to keep sliding down since you are loose (plus my ES bushings don't preload as the sleeve is seperate from the poly, unlike sleeve impregnated into the rubber with the stockers).
Lookies:
-support the other side, support at the front knuckle, attach jaw, pull, rinse repeat (shouldn't have to mention this, but MARK your Eccentrics).
Last edited by Track; Nov 3, 2011 at 10:54 PM.

Thread
Thread Starter
Forum
Replies
Last Post
TrackNate
Miata Parts for Sale & Wanted
0
Dec 1, 2012 02:00 PM